
You notice a wet spot on the ceiling. Or even worse – water dripping all over the floor! If you notice that it’s after someone uses the shower, your problem might be that your tile shower is leaking.
As bathroom remodeling contractors, we hear these questions regularly:
“I’m seeing a wet spot on the ceiling beneath my shower. I think my shower tile is leaking! What should I do to stop the water?“
Or…
“Can you come out and check the grout in my shower? I think there must be a hole in the grout somewhere, the tiles are leaking.“
Leaky showers can be a homeowner’s nightmare- not only can they create a mess, there’s the potential for mold and structural damage. As such, you should address them as soon as possible. Most homeowners know that it’s a problem to be remedied, but don’t always know what steps to take.
Let’s take a look at what to do next:
What to do when your shower is leaking
Estimated reading time: 10 minutes
1. Shower Diagnosis: Let’s Find the Leak!
First things first: let’s isolate exactly where and when you are getting a leak. Take note where the leak is visible. Is it on the ceiling? Is it on a wall? Can you trace which part of the shower is leaking by visual alone? IE, is the shower pan leaking (the tiled floor of the shower), or perhaps the wall with the shower controls? If we can diagnose which part of the shower is leaking, that will give us an indication of whether we are looking for a plumbing leak or a tile failure. Does the shower leak all the time, or only when in use? When in use, is there a long or a short delay before we see evidence of water below? All these answers can give us clues to zero in on the problem.
We can also do some testing by carefully controlling where the water flows. Here’s how we will find out where your shower is leaking from:
Leaking Tile Shower Diagnosis Steps: Start with the Plumbing
- Using the shower head, fill a large bucket, being careful not to spill any water. Do you see any dripping below the shower? If so, there’s likely a problem in the plumbing between the shower valve and the shower head. A plumber should be able to fix this problem.
- Assuming that wasn’t the problem, pour the bucket of water very carefully directly into the center of the drain. Try not to spill any water on the surrounding tile (a towel surrounding the drain may help). If this results in a leak below, then there’s likely a problem with the drain line. Again, with this, you’ll call a plumber.
- In some drains, the weep holes will get clogged, causing the base of the shower pan to become saturated with water. If you’re able to unclog them, it will allow the built-up water to escape. That may reduce the amount of water leaking out of the shower. While this can temporarily fix the problem, it also can indicate some other problems with the construction of your shower.
Leaking Tile Shower Diagnosis Steps: Shower Pan Leak Check
- If nothing else has caused a leak, let’s concentrate on the tile. The first thing we can do is check the connection between the waterproofing and the drain. Plug the drain, whether using a test plug from the hardware store, or an improvised solution. Fill water around the plug, but not so deep that the water approaches the shower curb (we want to isolate our problem to the drain only). Wait for a few minutes, and observe your leak.
- Using the hand-held sprayer or your bucket, put some water close to the curb, perhaps concentrating on one corner for a minute or two, then the other corner. Observe your leak between the two corners. Is one more obviously the issue?
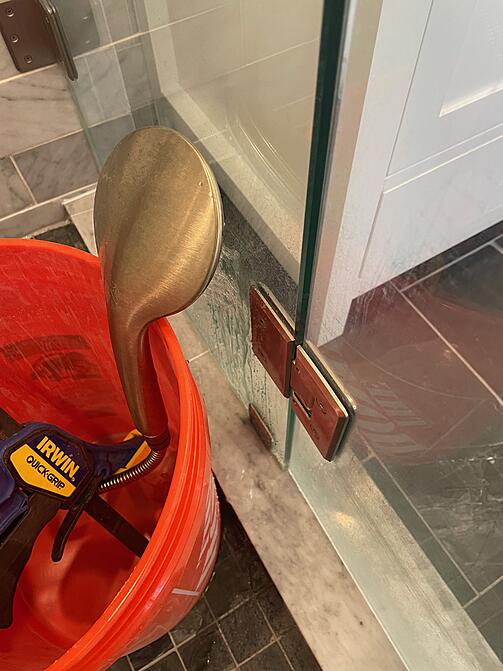
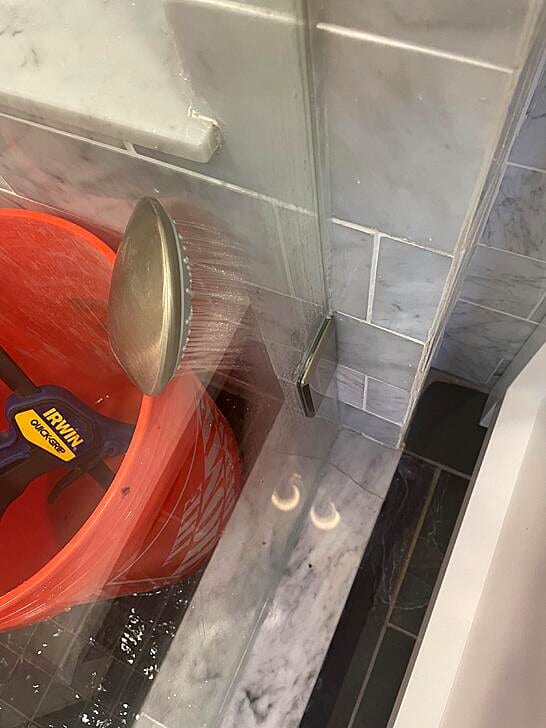
- Does your shower have a glass door installed? Concentrate a stream of water on any place where screws are visible, especially if they are in a track. Again, take note of when/where the leak comes from.
- If you have an acrylic or cast-iron shower base that seems to be leaking, there are a couple other possibilities. Acrylic pans can sometimes develop very small cracks that will let water through. We have also found pans installed so far out of level that the water on top of the curb will find its way past the flange behind the tile and down over the side. You can diagnose this by paying attention to the path any water on the curb takes. Does any run along the curb instead of going over the side towards the drain? Verify by putting absorbent paper towels along the corner where the tile meets the curb. Direct some water on the curb in the middle, away from the paper towels. Does any water find it’s way along the curb to soak the towels?
2. Fix the Plumbing Where Necessary
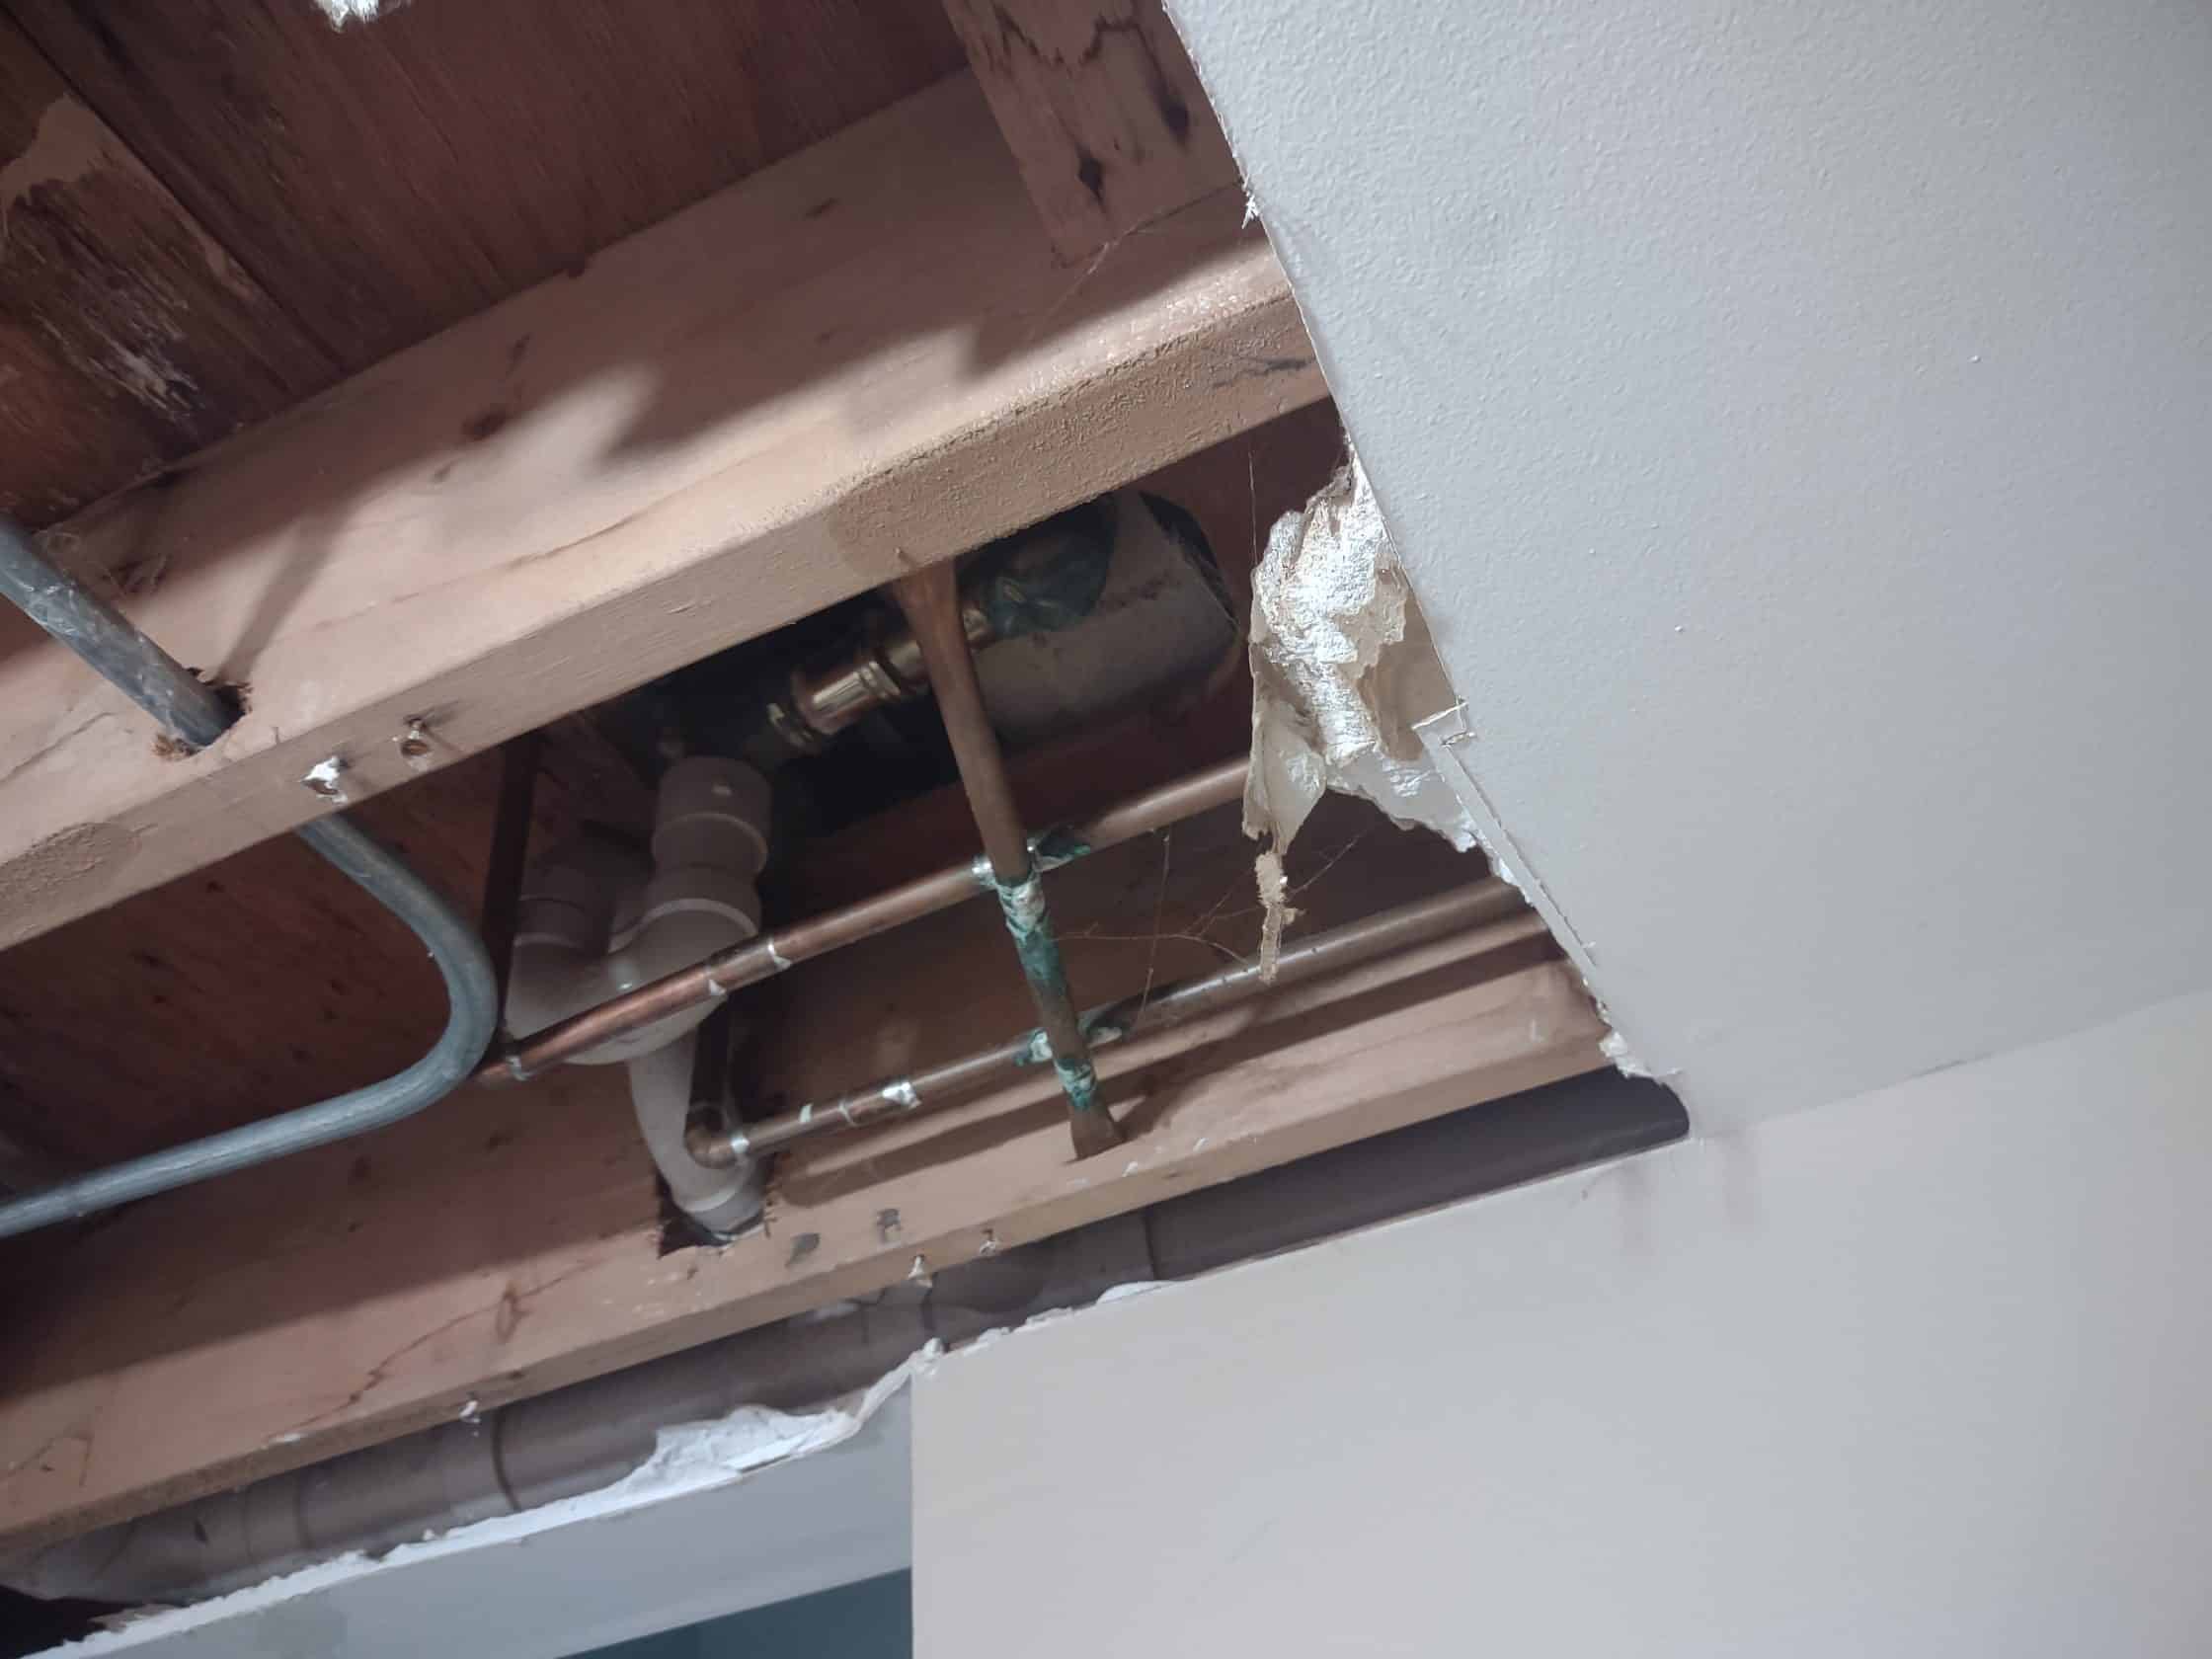
Typically, because a plumbing repair is a best-case scenario repair, the first step is to call a plumber. They can open a hole in the ceiling beneath or wall behind the shower to fix any issues related to the plumbing, whether the drain line or the supply lines feeding the shower. Assuming that was the issue, the rest is comparatively straightforward – once the plumber has finished the repair, you’ll need someone to repair the drywall, prime, texture, and paint.
3. Assess the Tile Installation Problem
If it turns out that your plumbing is not the issue, it’s time for the next step. If you’re noticing problems on the walls around your shower, or around the curb, or your plumber says the plumbing is fine, call your tile contractor to inspect the shower pan and tile. They may remove a tile or two, open surrounding walls, and use a moisture meter to further diagnose why your shower is leaking.
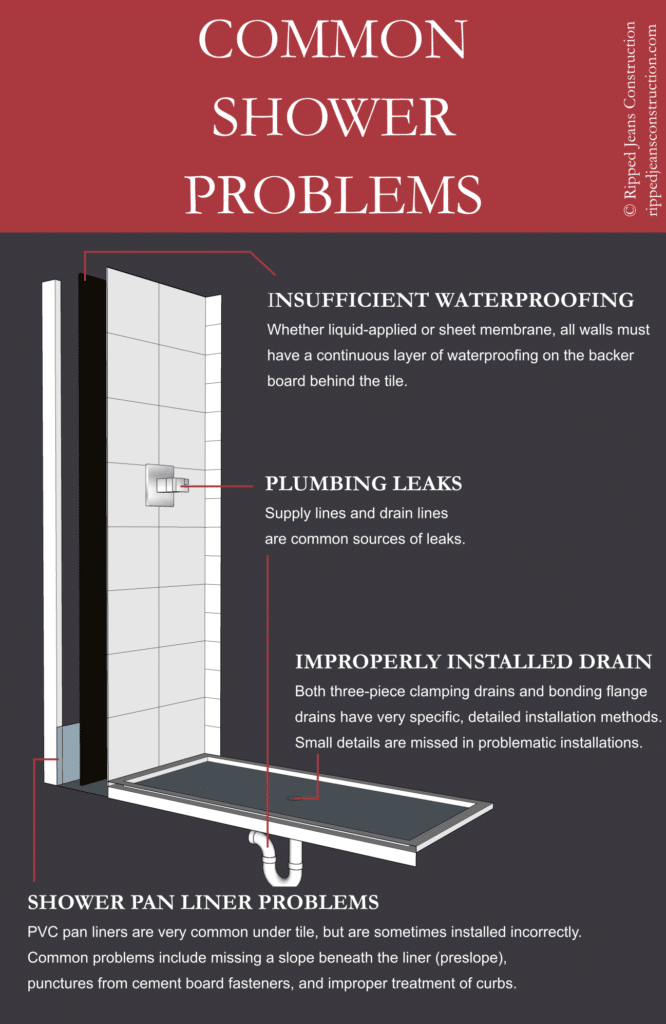
Here’s the bad news though: there’s no such thing as “tiles leaking.” Any leak behind the tile is an indication of system failure. The tiles’ role is aesthetic and to provide a hard-wearing surface – the materials behind are what provide a waterproof shower.
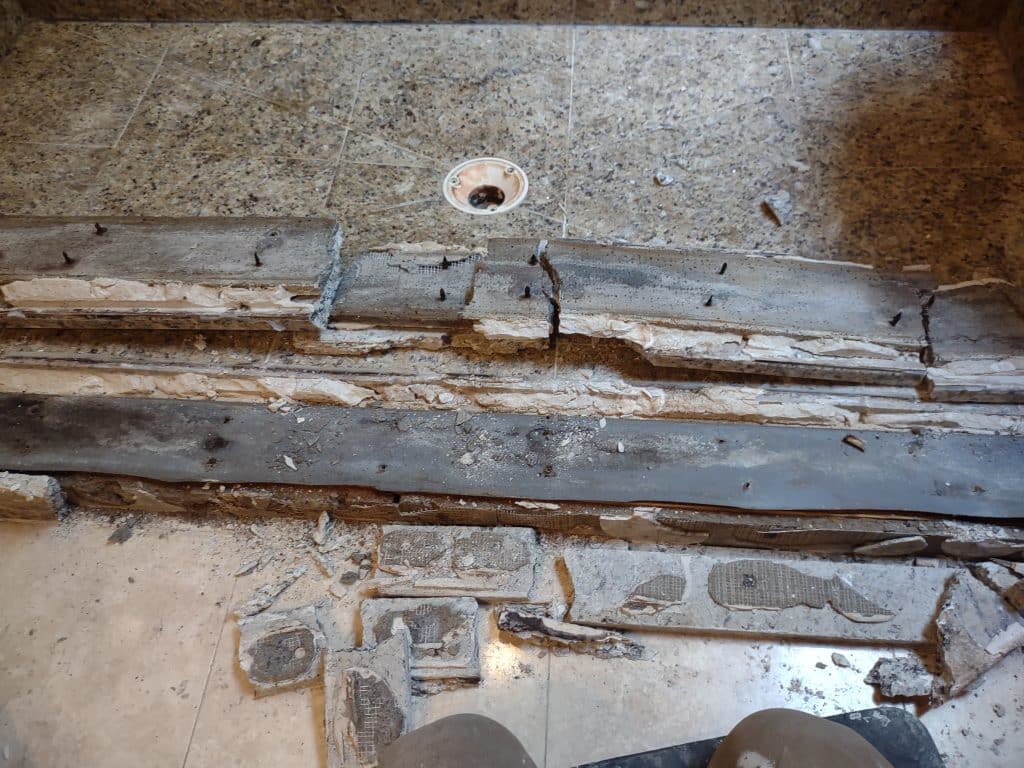
There are many ways to build a waterproof shower – and even more ways not to. The standard methods are outlined in ANSI publications and the TCNA handbook for tile installers. A good tile contractor will have an understanding of all the methods, and will be able to find where a waterproofing failure deviated from the proper installation (see the image above).
Unfortunately, the fast pace of change in the tile industry and poor adaptation into building codes has resulted in many underqualified installers building leaking showers. Before hiring a tile contractor, check about methods and materials used, as well as warranties they offer for your installation. Then spend some time reading and understanding the basics of how the shower system works.
4. Repairing your Tile Shower Leak
Let’s start by saying: regrouting, recaulking, or adding sealer is not an effective repair for a shower leak. There are companies that advertise such services to fix shower leaks, but they should be thought of as aesthetic improvements only. At best, they may offer a temporary solution. If you do buy some time using such a method, know that the failure will reoccur at some point down the road.
There is no topical solution for a structural problem.
To be permanently effective, a shower repair needs to remove the entirety of the affected area, ensuring a continuous waterproof layer, and rebuild. At a minimum, this means rebuilding the bottom half of the shower, including the pan. This will address the leak without the expense of having to redo the entire shower. Once the waterproofing in the pan has been rebuilt, it’s a good idea to flood test the pan. This involves filling the pan with water and waiting for a specified amount of time (usually 24hrs), then checking to make sure the water level hasn’t changed. Once the flood test has passed, then it’s time to set the tile.
Many tile contractors are uncomfortable with providing a warranty for a repair of this sort, so keep in mind you as the homeowner will absorb the risk in a situation like that. Additionally, it is sometimes difficult to find an exact match for the existing tile, and some aesthetic compromises may have to be made.
The absolute best repair, unfortunately, is a total replacement. Furthermore, if you have a steam shower that leaks, you will also need a total rebuild. Steam showers have more stringent waterproofing requirements and significant potential for damage to your home when something goes wrong. Because they are specialized builds, a repair is not worth the risk of continued leaking at some other place in the assembly. While a total rebuild more expensive, this ensures a complete repair of the leak, as well as a neat and seamless tile job in the shower itself. Most tile contractors will also happily warranty a complete shower build, providing the homeowner some peace of mind against this happening again.
Common Questions about Leaking Showers
Unfortunately, if your problem is a tile failure (you’ve ruled out plumbing), there are only band-aid fixes. The only permanent solution is to remove the failed shower, whether in part or entirely, and replace.
Unfortunately this won’t work. Sealer is meant to be a defense against stains. It temporarily causes water to bead, but it doesn’t prevent water from moving through it. Caulk may help against water getting into the corners, but remember: grout and most tiles aren’t waterproof. The water will eventually find its way down through the assembly anyway.
Epoxy grout will let less water through than standard cement grout, but it still will let some water through. Even 0.1% of the water you use in a shower adds up to gallons into your floors and walls over time. It’s better to fix it correctly.
If you can’t address the issue currently, try to limit your usage of the shower. In fact, if you have another shower or tub, use that instead. Using a leaking shower over time will cause rot and mold, which are hazardous for your health.
Many homeowners find that their insurance will cover the total or partial cost of a shower rebuild when it leaks. It’s worth getting a shower repair/rebuild quote and presenting it to your insurance adjuster to see what they can do for you.
If you’re not sure about what’s wrong, your first call should be to a plumber. If they don’t find any problems, call a tile professional.
Yes, certainly. Grout isn’t a waterproof material, and lets water through. A properly-built shower takes that into account by giving water a path to the drain beneath the tile. If you don’t have a leak, however, you can choose to fix little cracks or openings as an aesthetic choice.
It’s definitely a good idea! It’s a good way to make sure you don’t have any leaks before the significant labor of setting the tile commences.
More Resources
[2022]: The National Tile Contractors Association has published a brochure to guide homeowners through the steps to take when your shower leaks.