
Often, bathroom remodeling projects are a way to refresh a space, or make more functional for the owners. Other times, unfortunately, projects come about as a result of damage or ongoing issues. This is one of the unfortunate times a leaky shower turned into a total shower replacement.
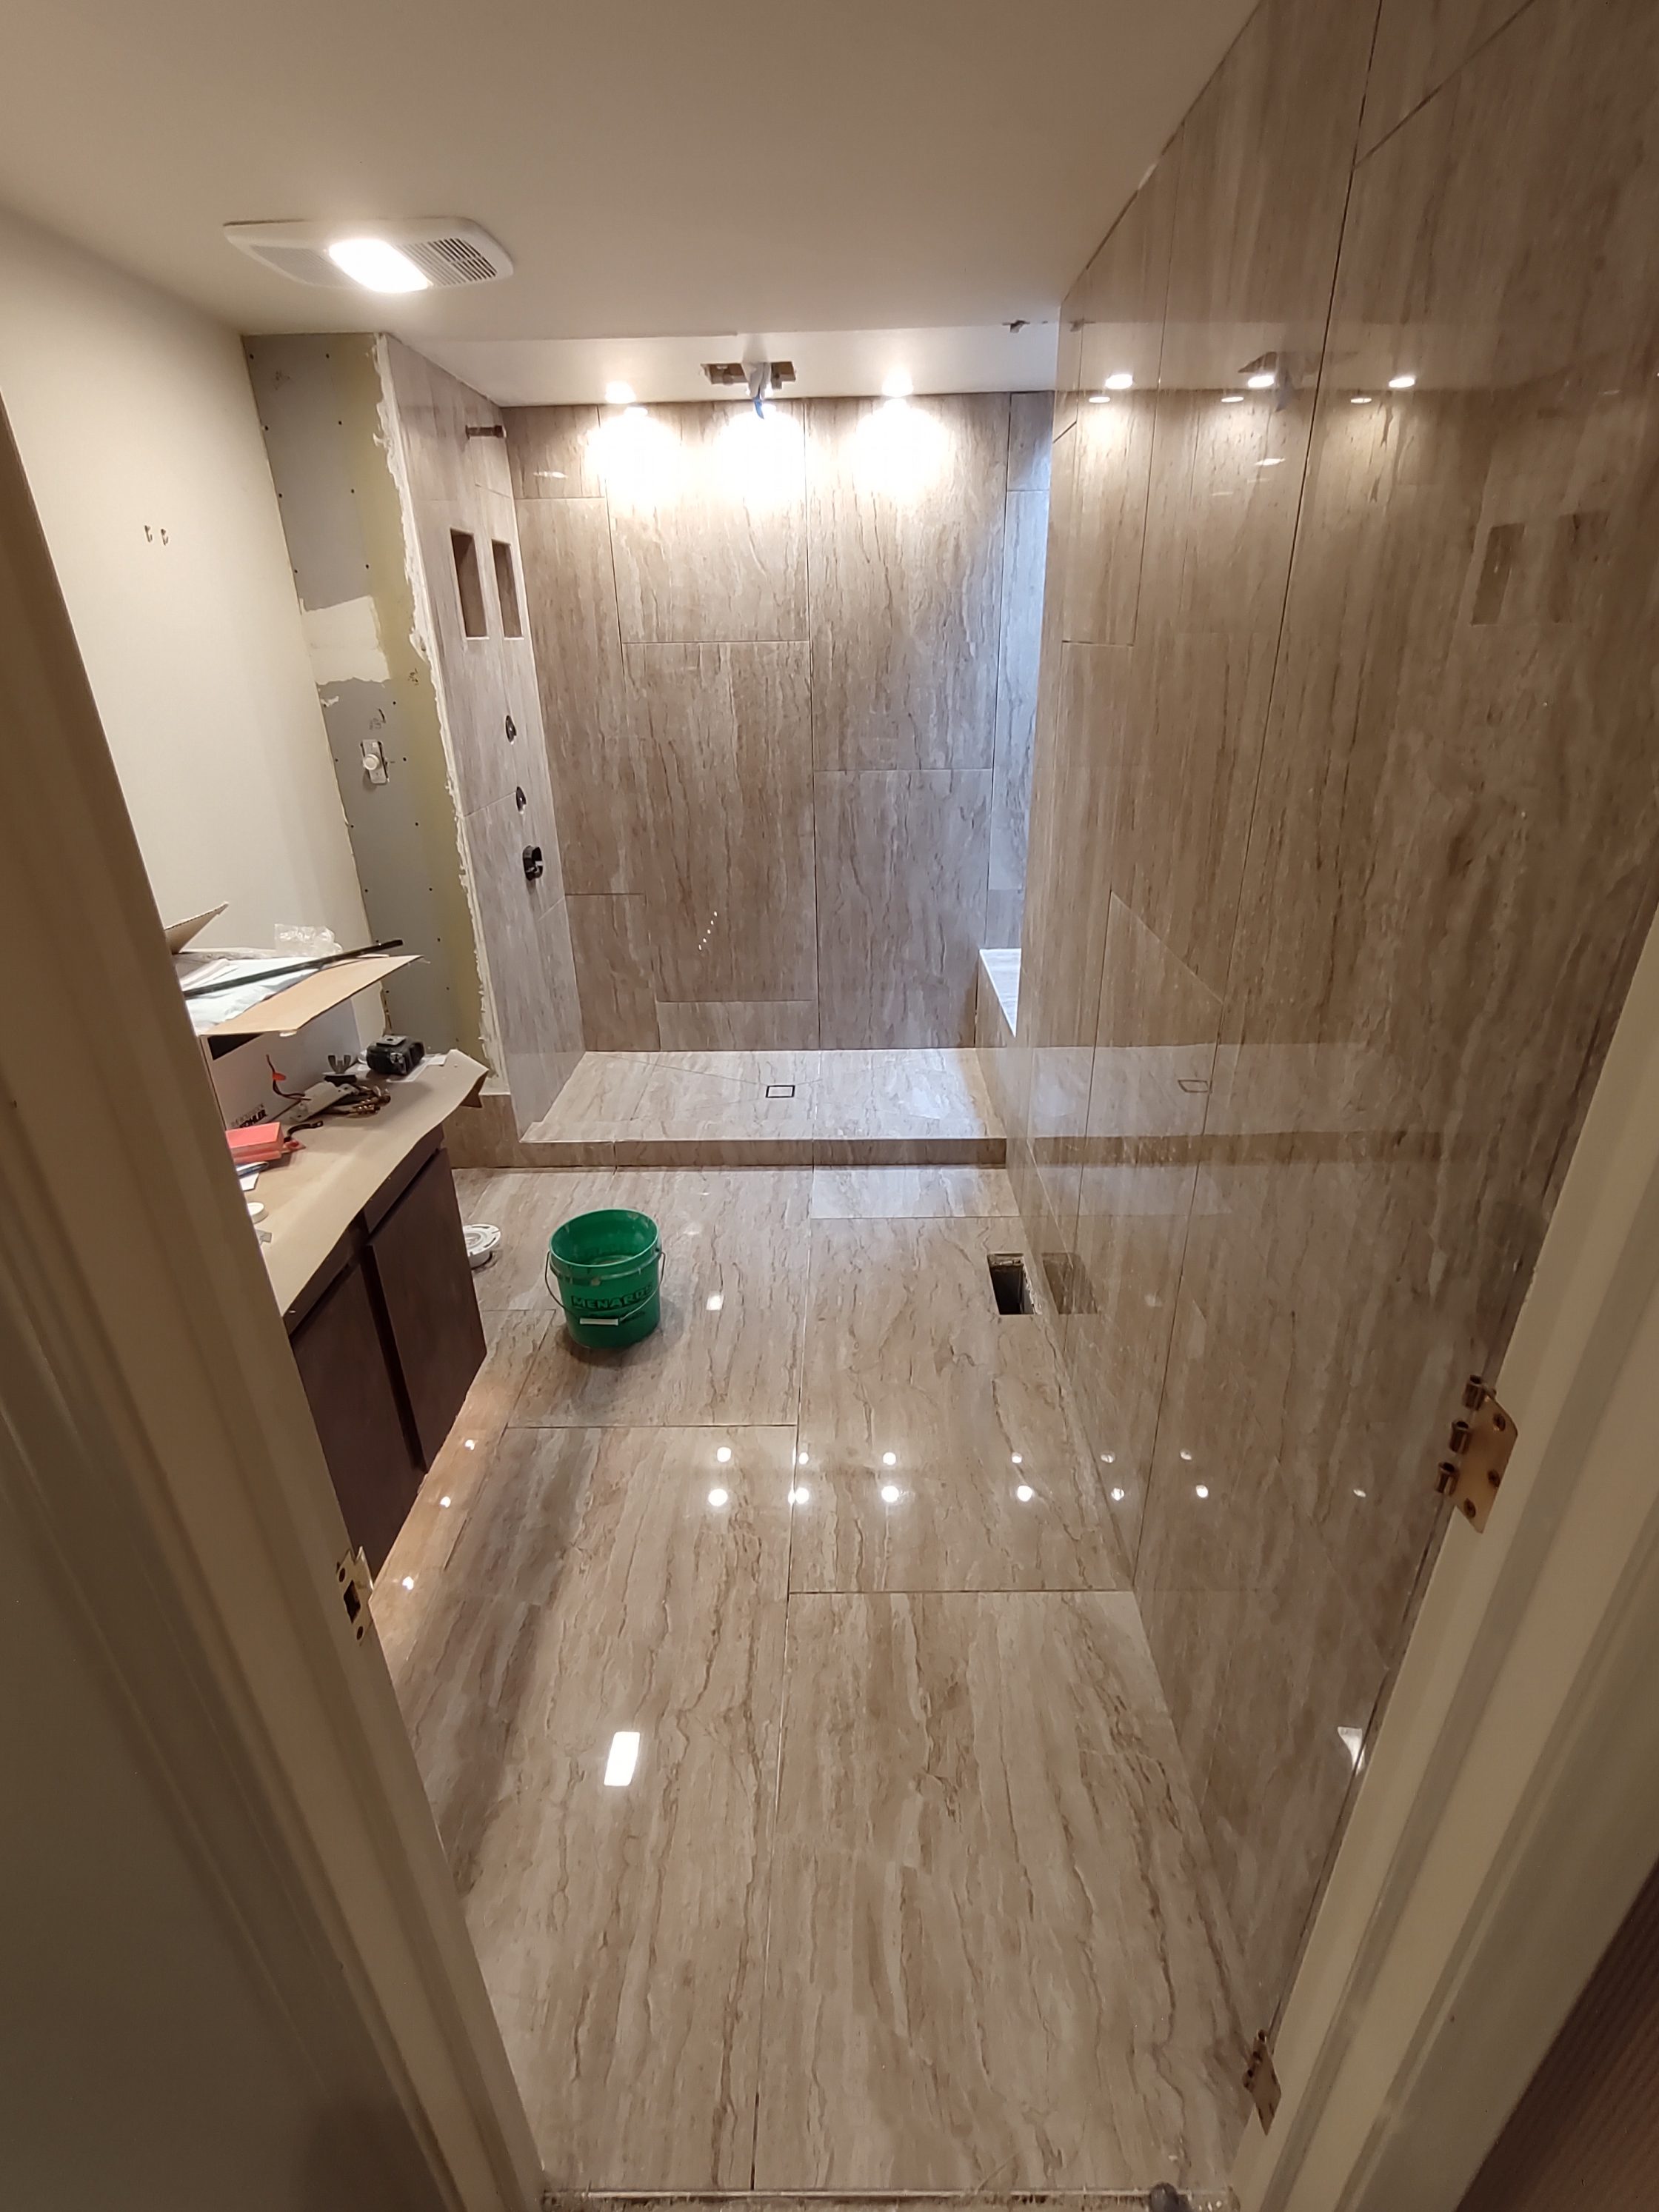
This Geneva customer reached out for a consult, mentioning their shower had been leaking to the room below for some months. After doing some research into why a shower can leak, they started by unplugging the weep holes in their drain. After this and a few other attempts at stopping the leak, they had stopped using this shower altogether. Matching the existing granite tile wasn’t available, so rather than repairing the shower, we opted for a total replacement, along with the bathroom floor. The customer chose stone-look porcelain in a super large format (24″x48″), to create a seamless look across the bathroom.
Project Segments
Estimated reading time: 13 minutes
Leaky Shower: Demolition
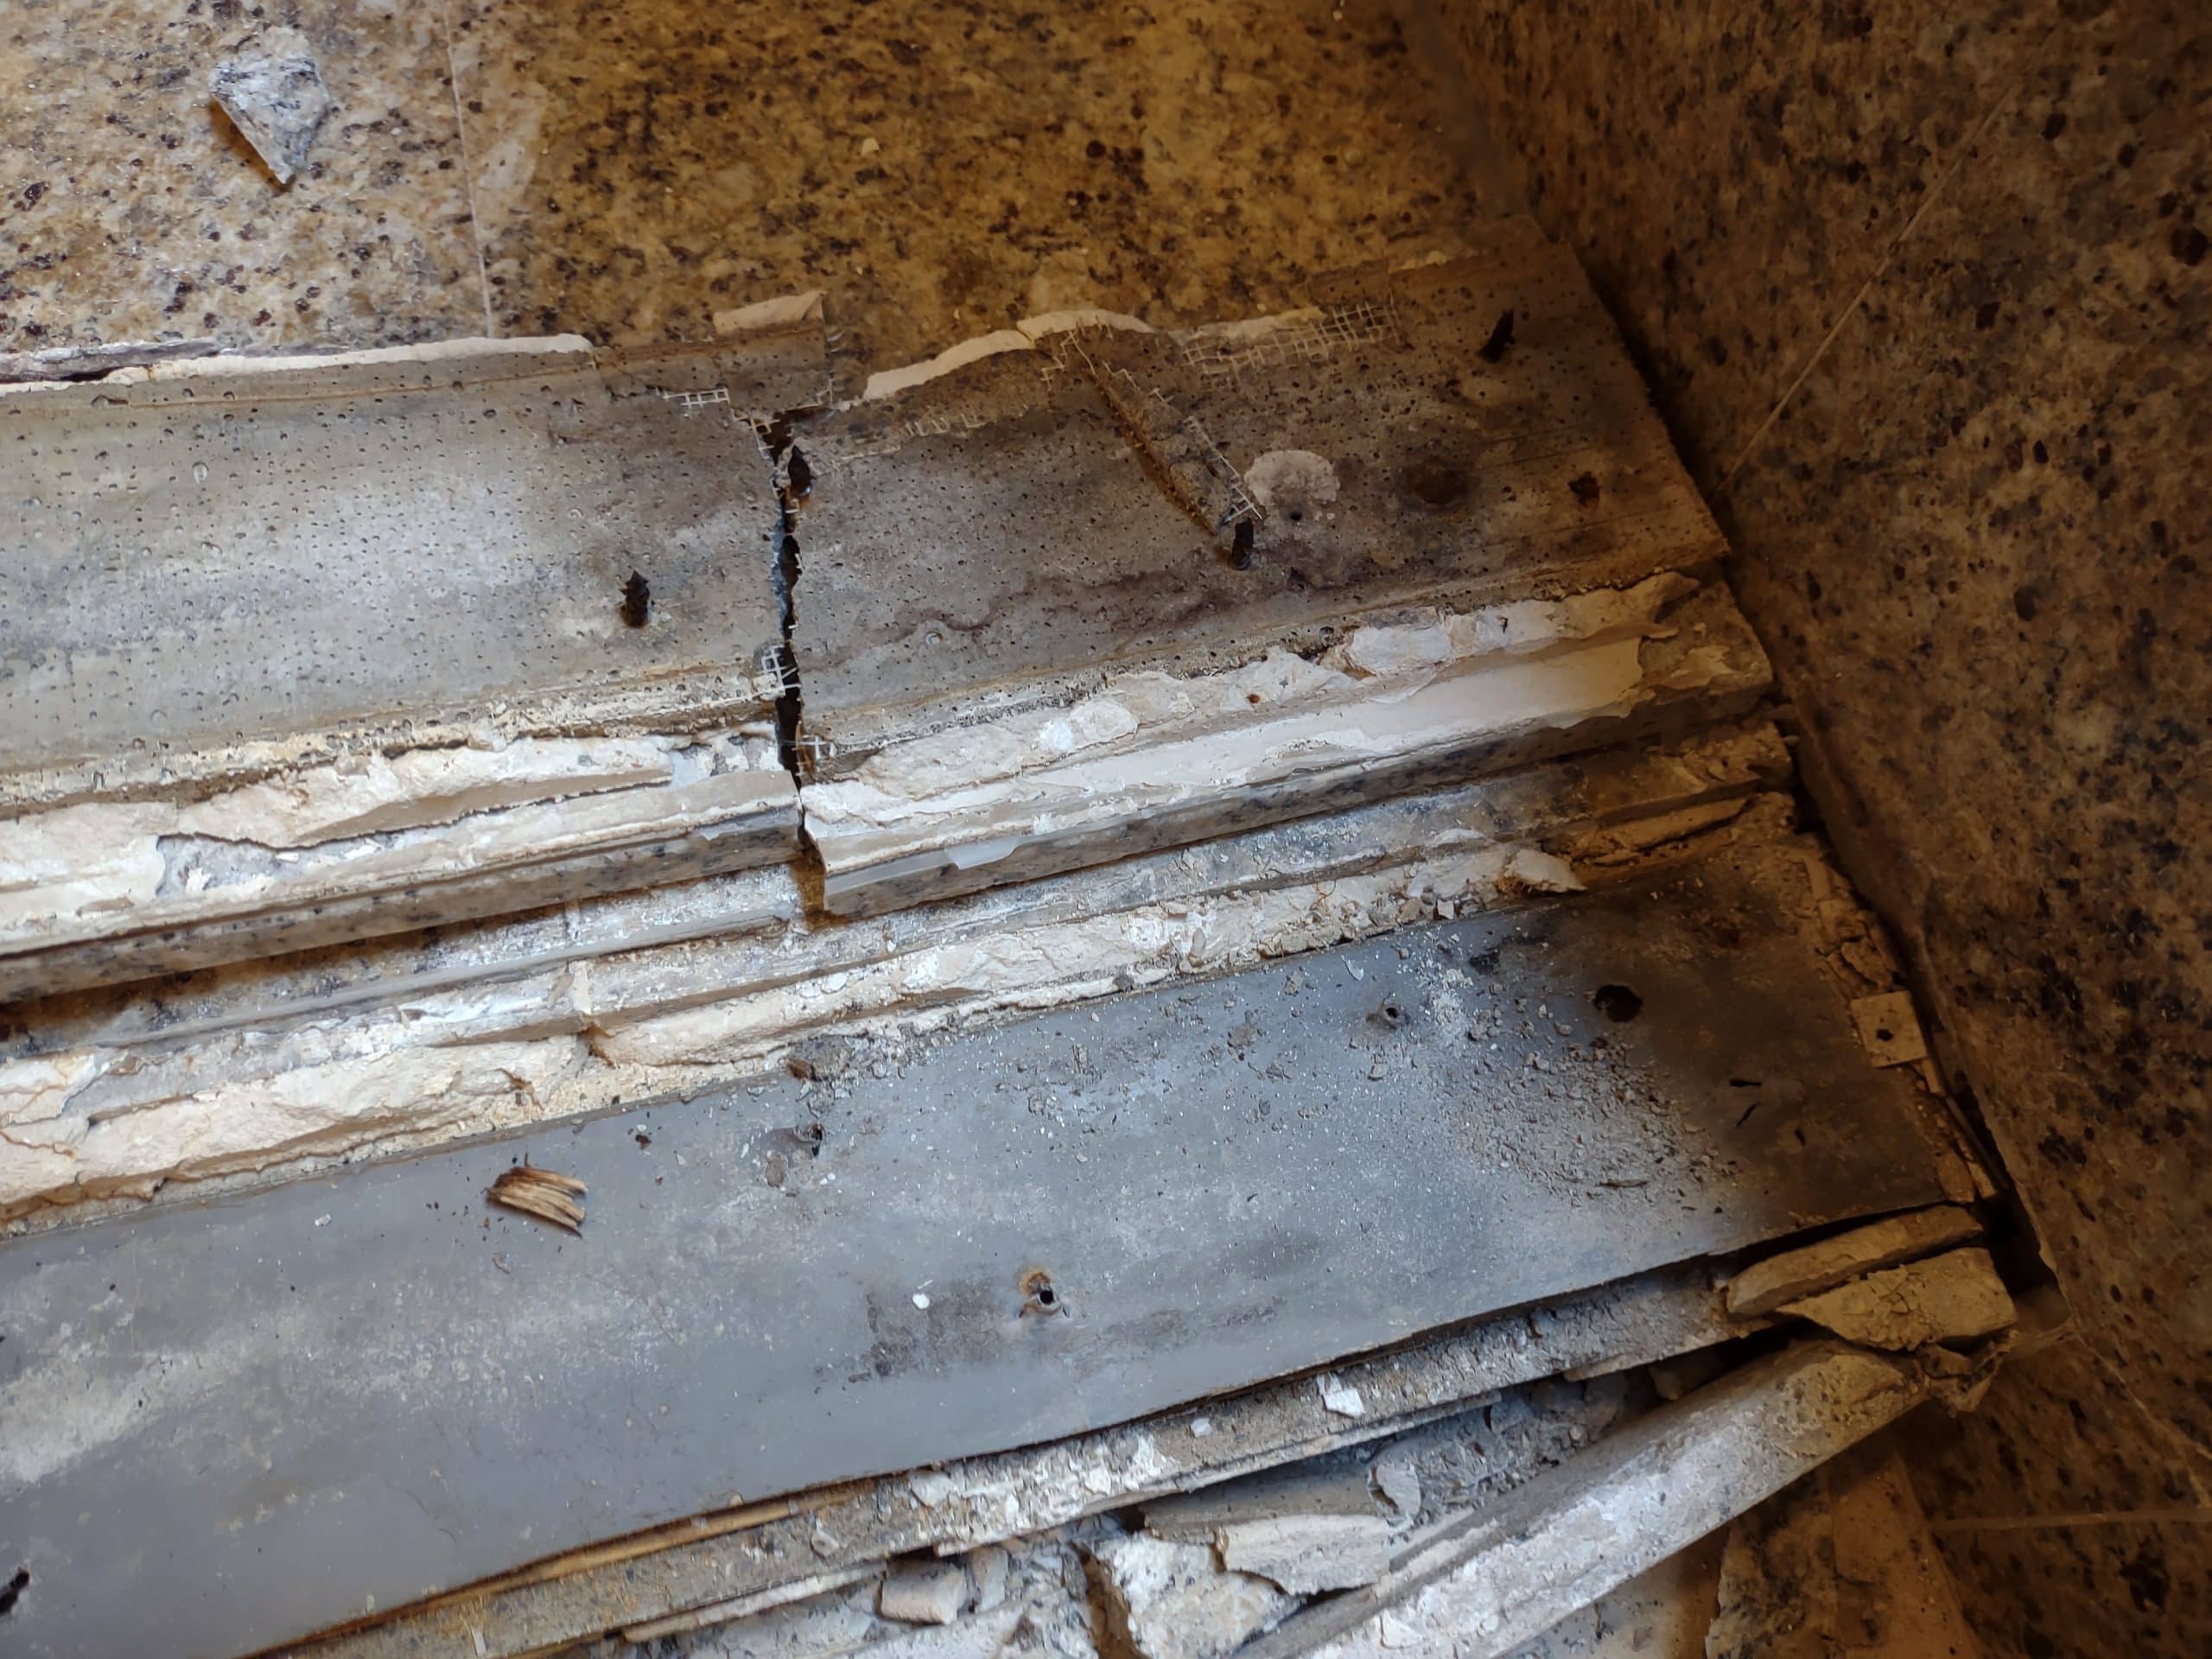

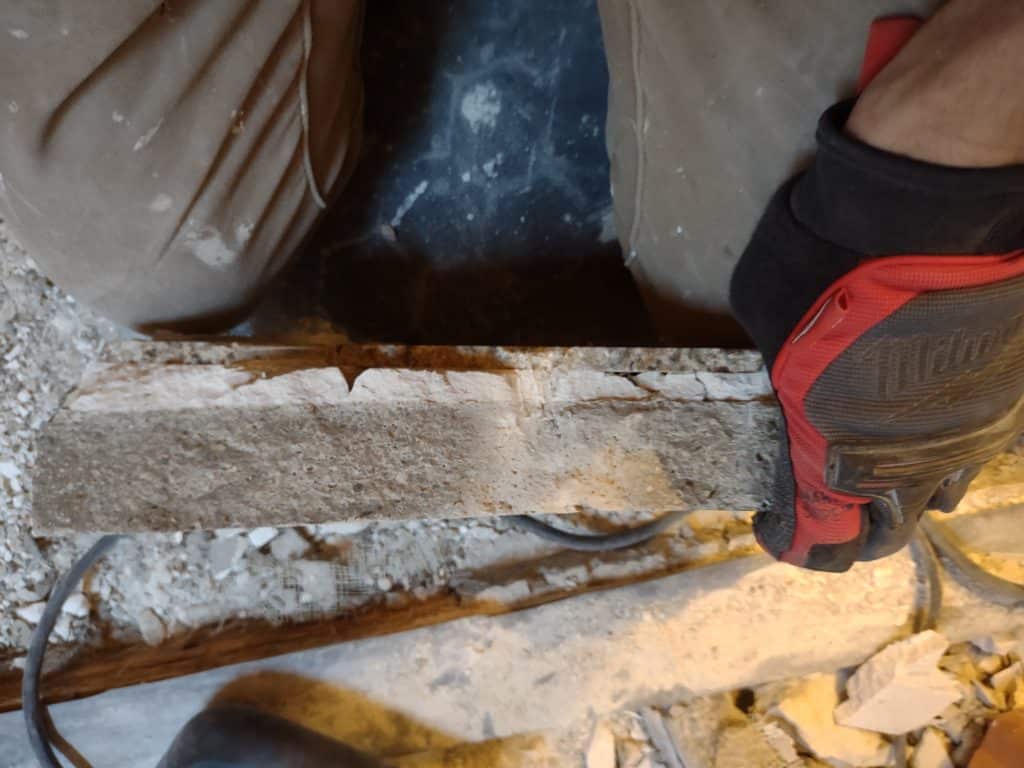
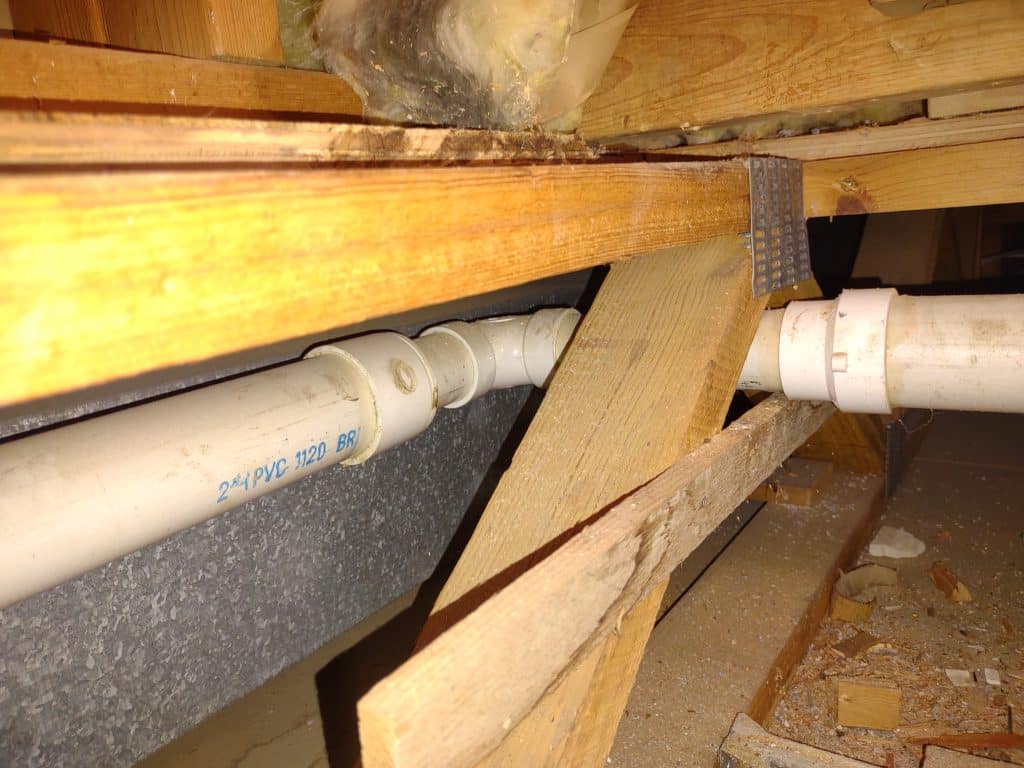
When water leaks, it will escape it’s container via any pathway available, then will run to the lowest point on the subfloor before dripping to the floor below. In this shower pan, there were multiple available pathways because of some common mistakes made in the installation of the PVC pan liner. In the first photo, we see that the corners of the pan liner were trimmed, rather than being folded up the adjacent wall. The liner was also trimmed along the width of the curb, rather than being wrapped around the backside. Cement board was installed on top of the liner with drywall screws. Not only do the screws put holes in the liner for water to escape, but they also corrode when in contact with cement (and in this case, water).
Leak Diagnosis
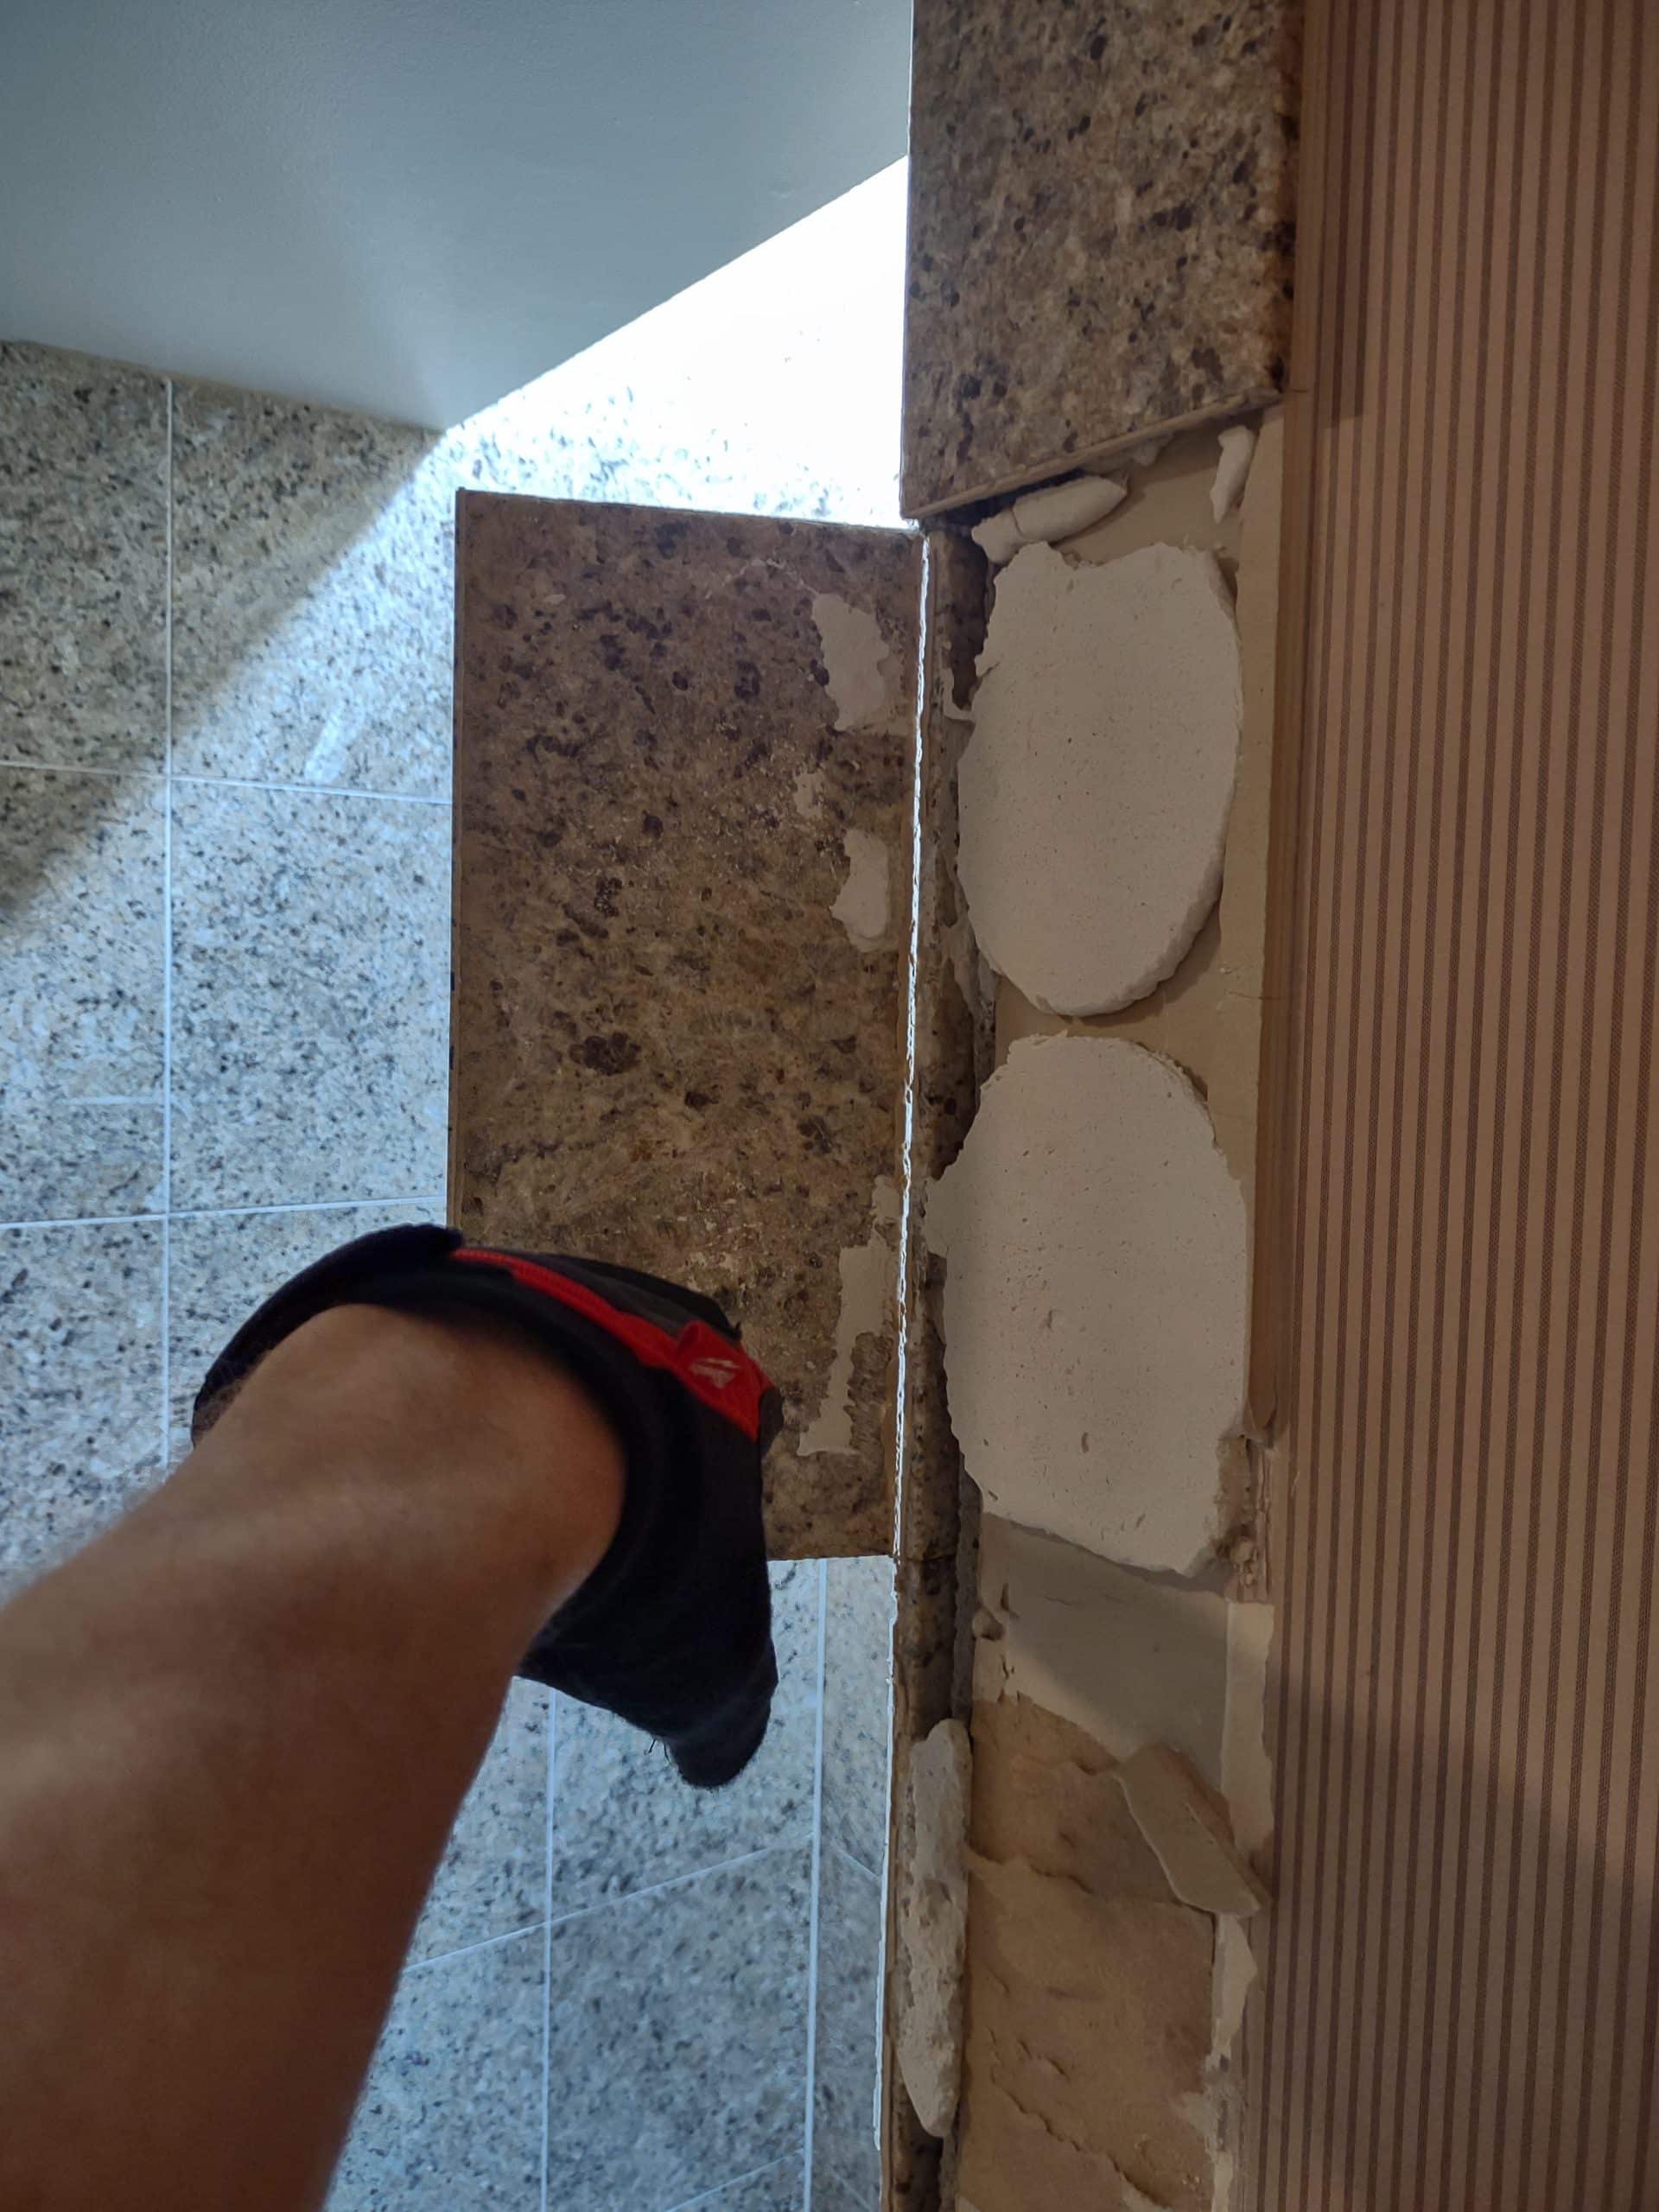
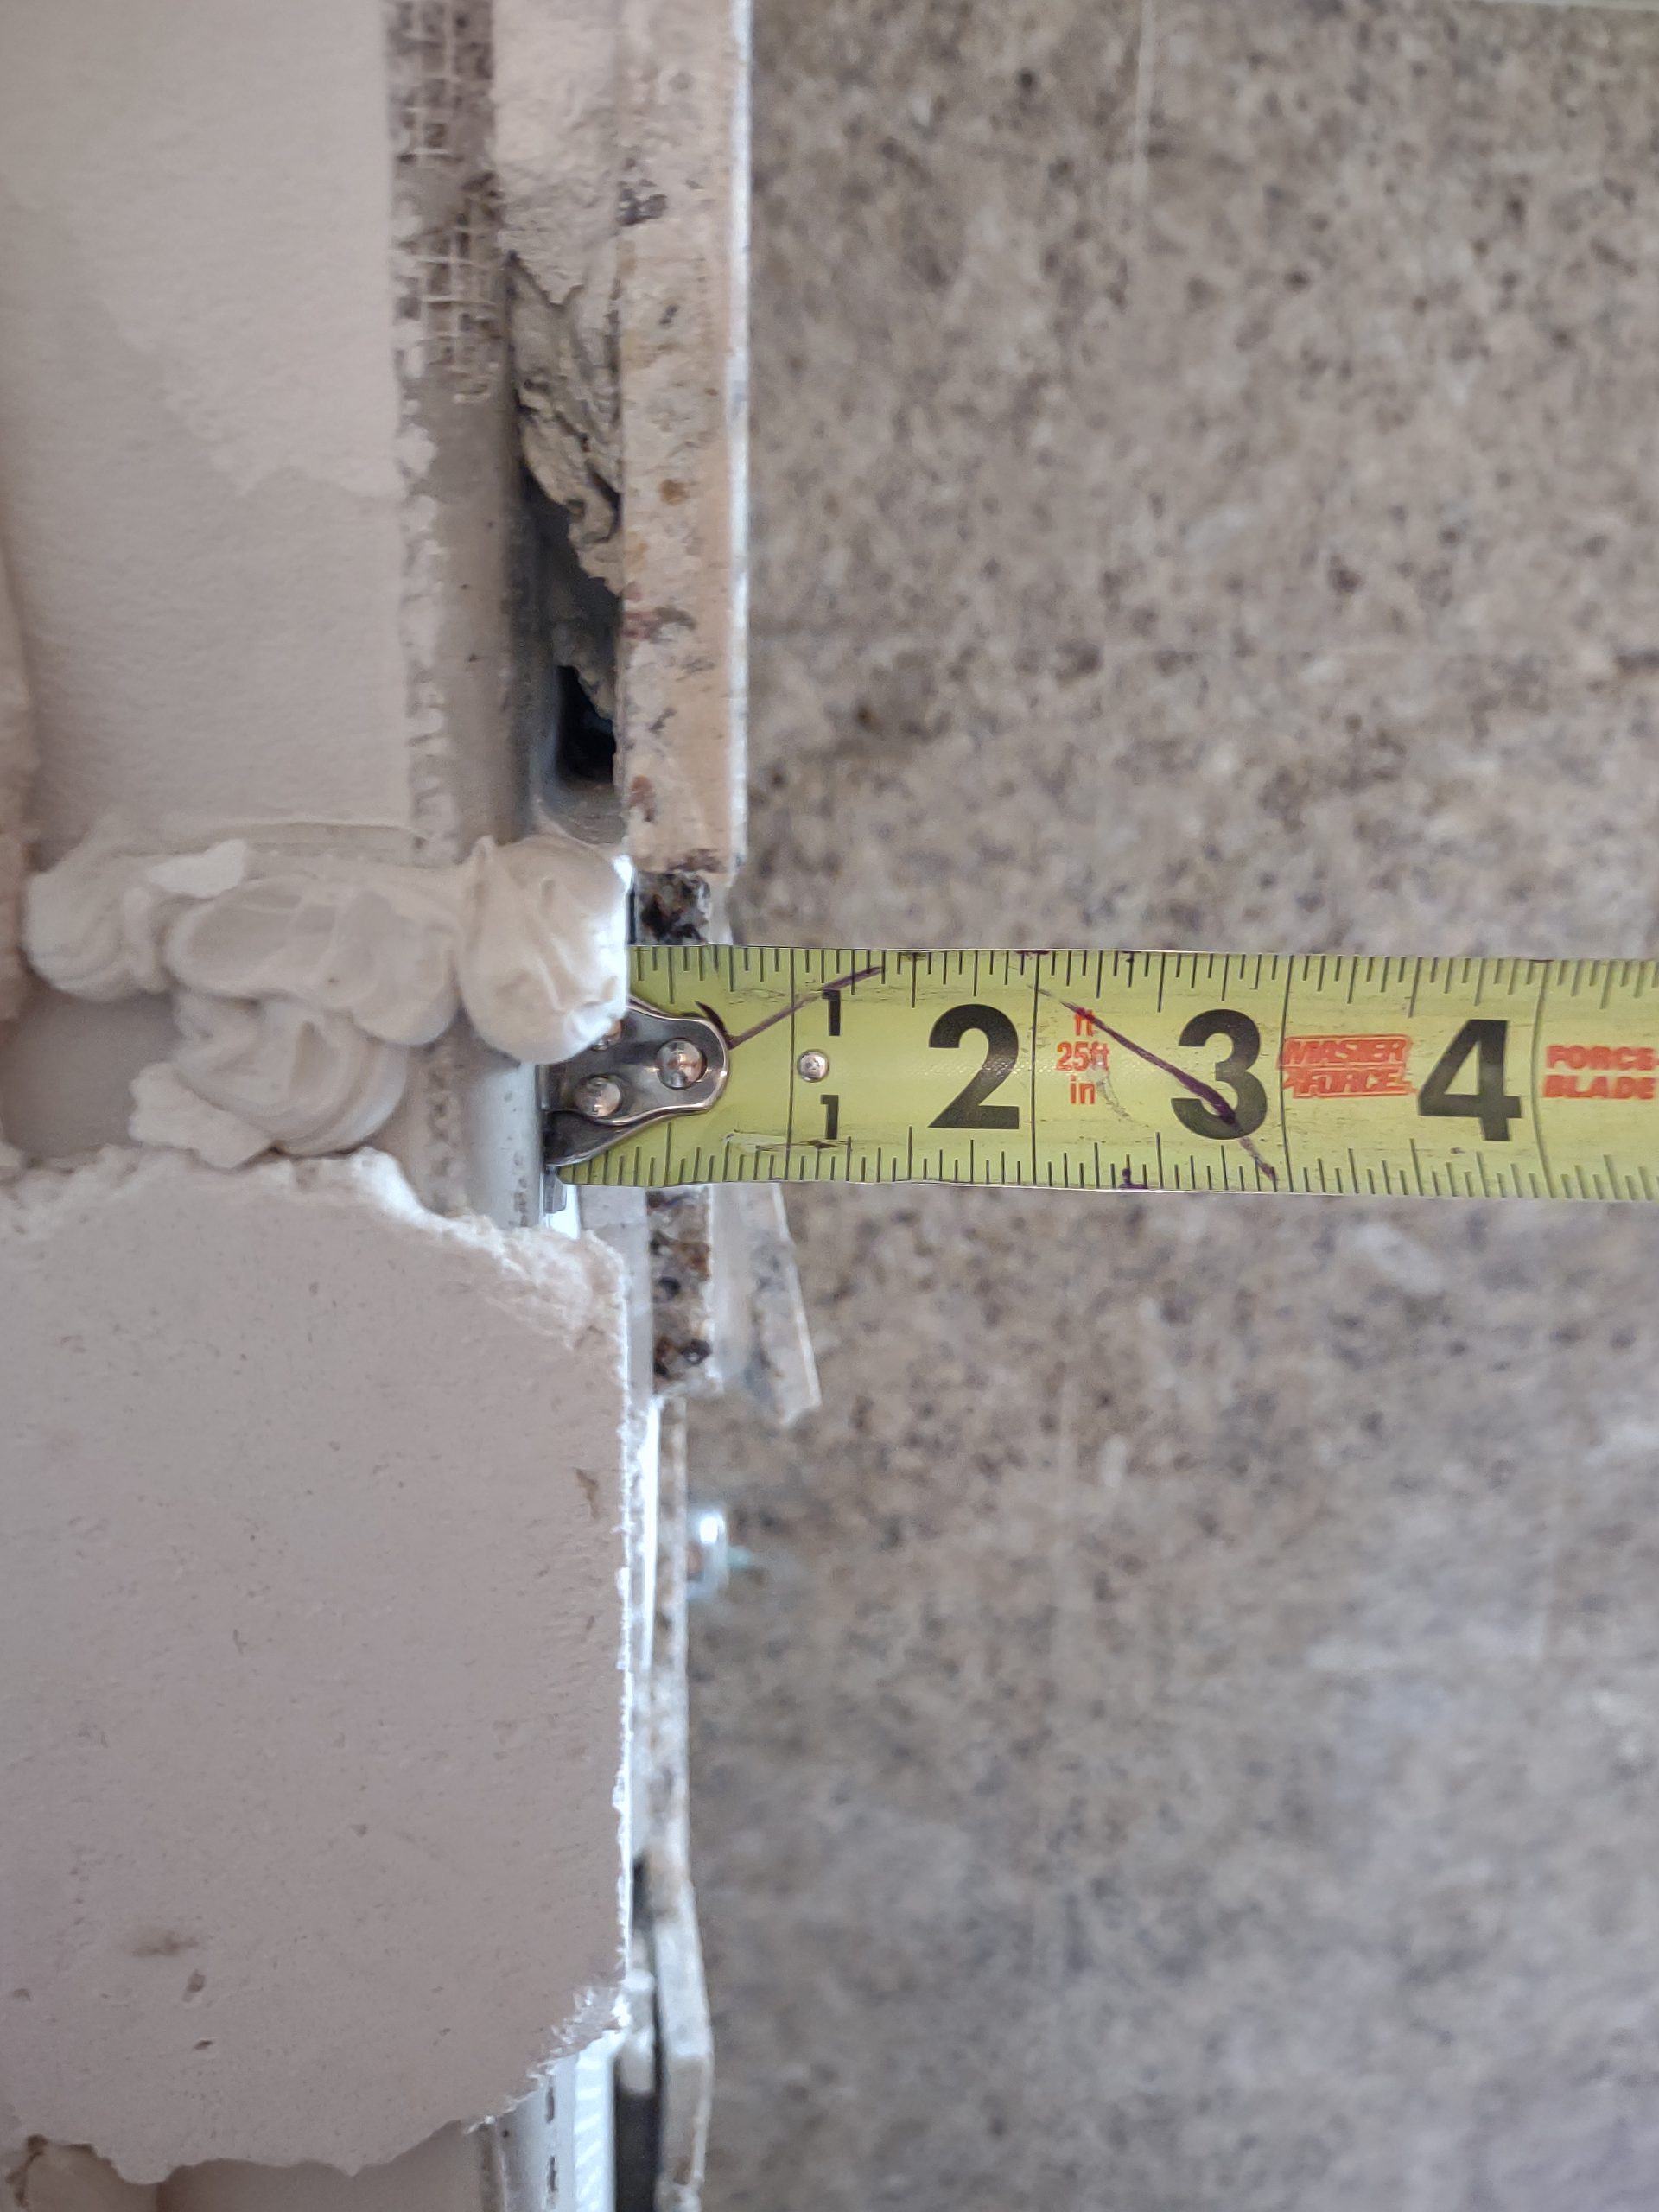
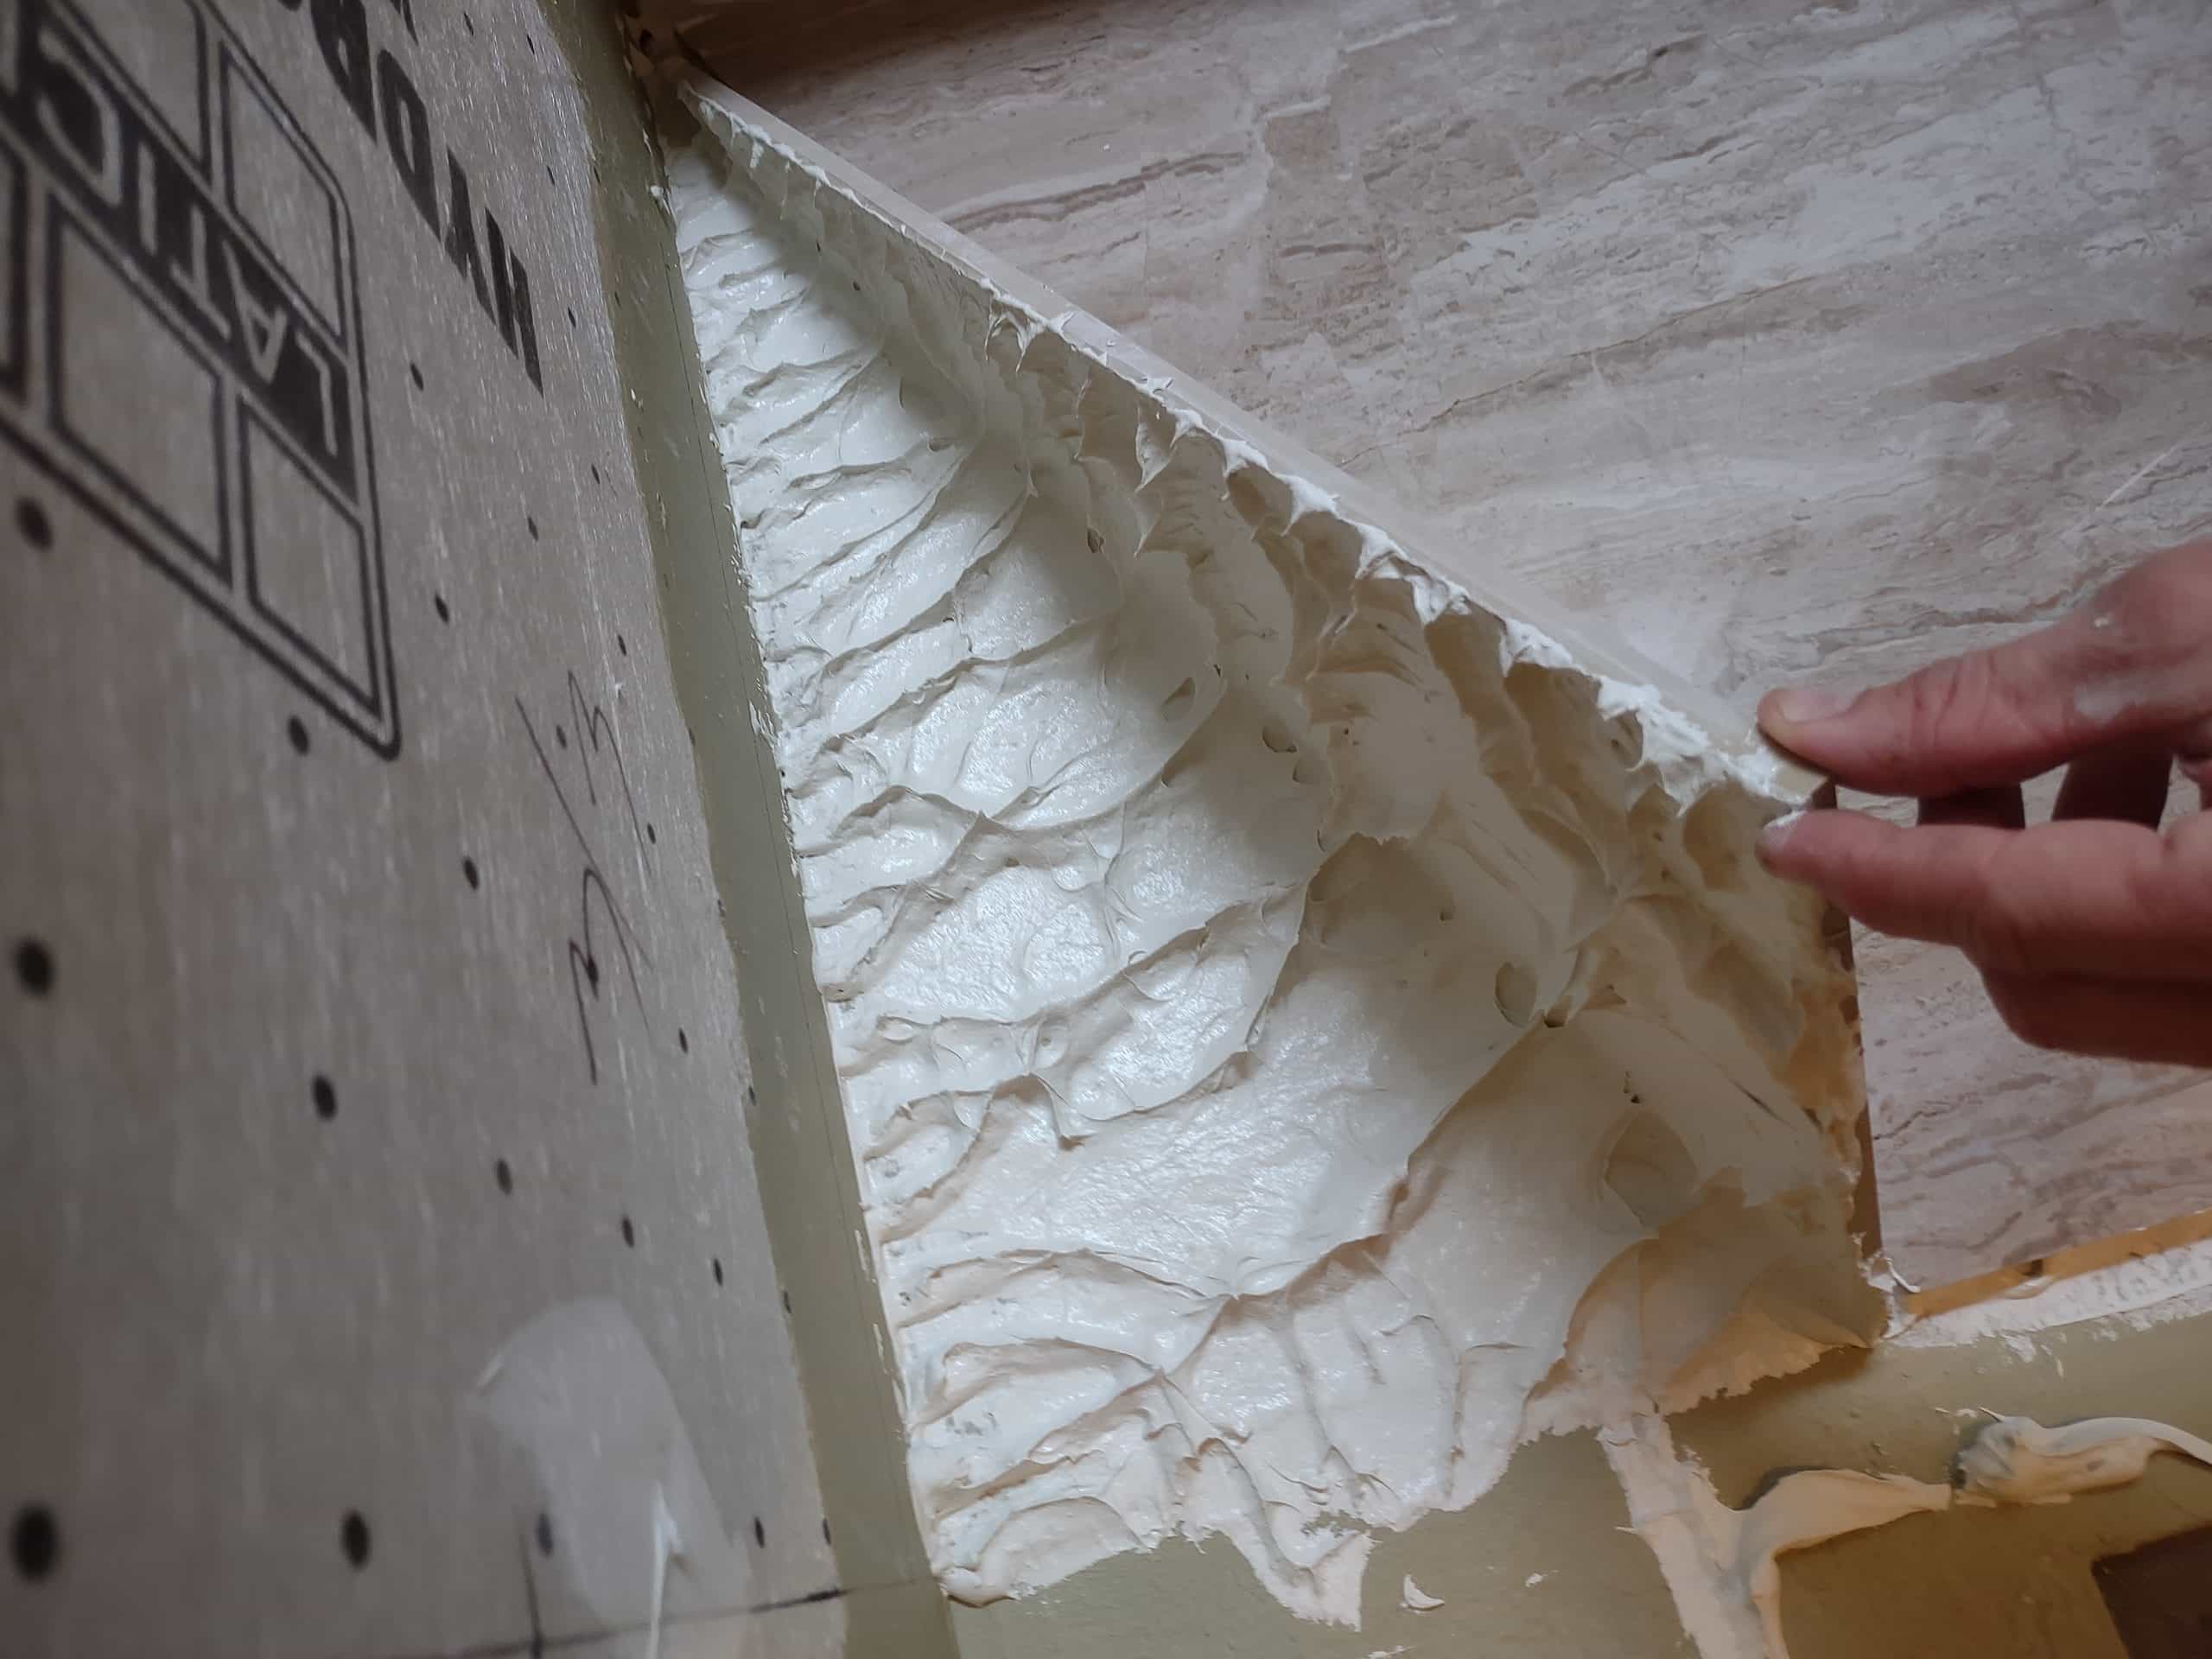
Here are a few issues with the overall installation. The framed walls and floor were not very flat, and rather than fixing the problem before the tile, a method called spot bonding was used. Spot bonding is not an appropriate method of tile installation, as it results in very weak support behind the tile. While it does make leveling the tile easier, the risks are tile breakage, water ingress behind tile, or even tiles falling off the wall. On this job, spots were as thick as 3/4″ in places.
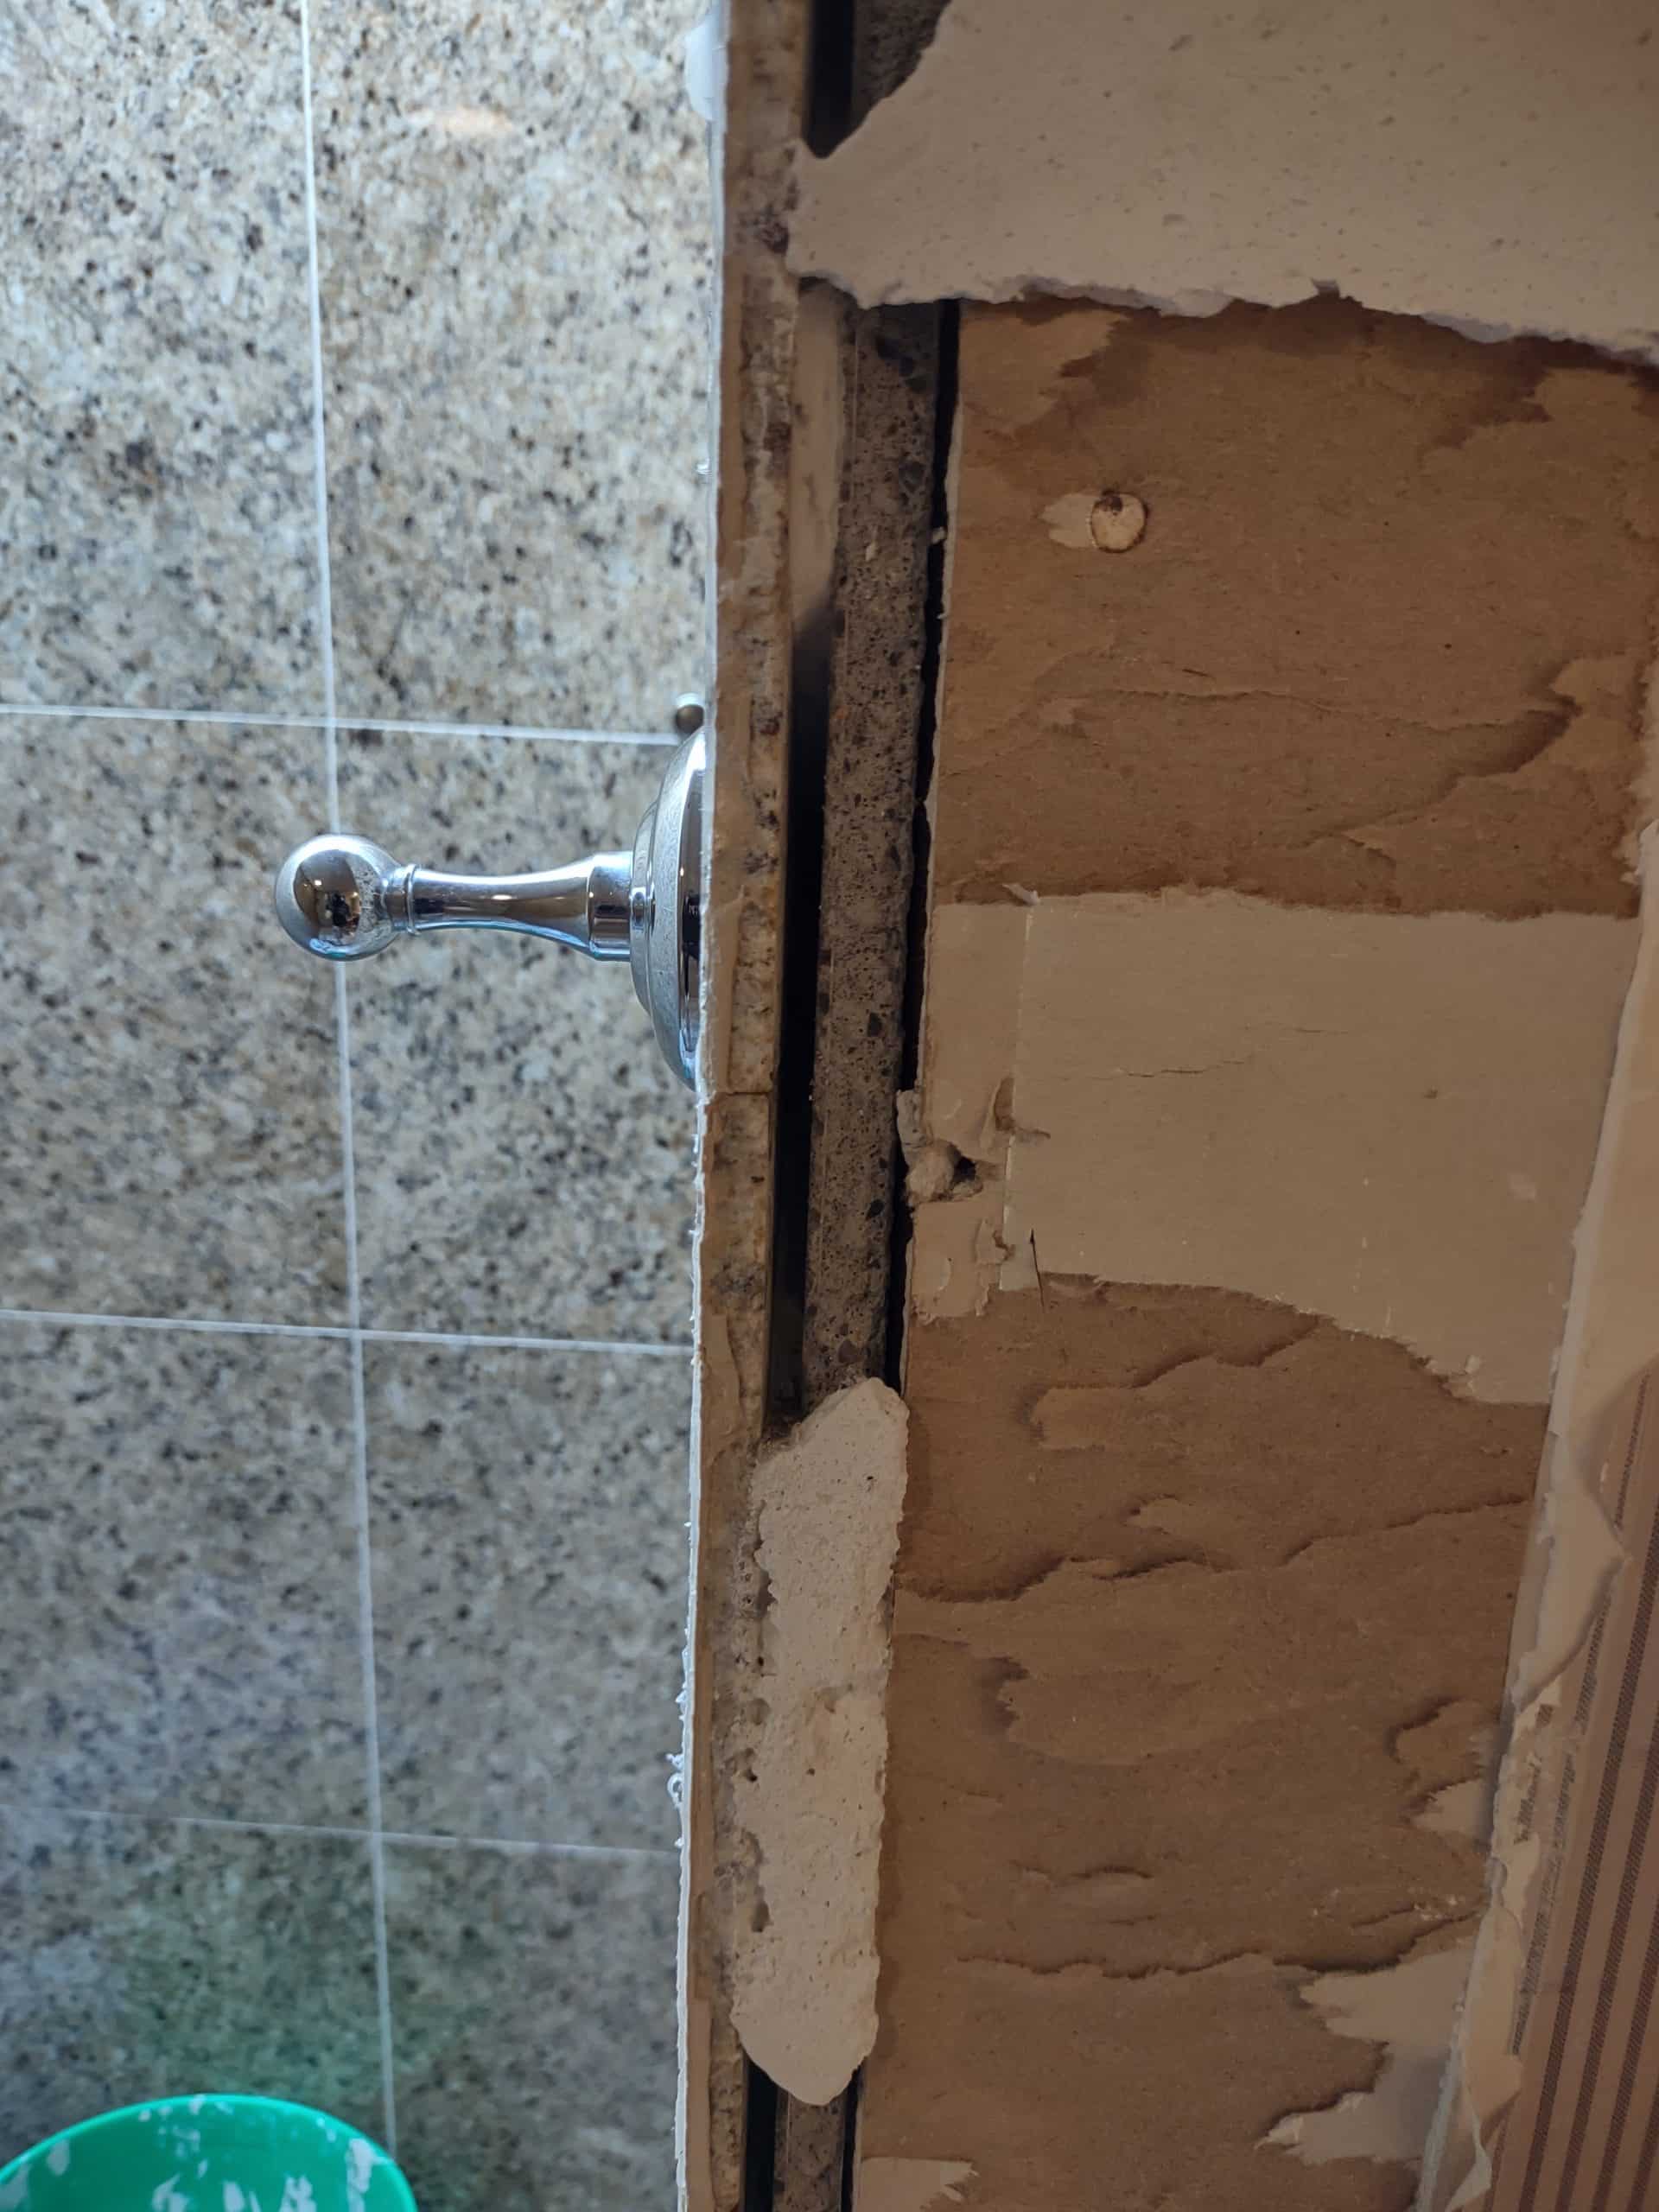
That said, the directions for the cement board had been followed: the seams were mesh taped with thinset mortar to create monolithic surfaces on walls. Topical waterproofing was not commonplace when this shower was built, though it should have been installed with a plastic vapor barrier behind the cement board to keep any water intrusion away from the structure.
The shower pan generally had some more common mistakes: the liner was installed flat against the subfloor, and concrete was poured. Then, in order to achieve the slope needed for water to go down the drain, the tile was shimmed with other tiles and mortar, to build up the space beneath. These errors betray common misunderstandings about how a 3-piece clamping drain system works.
Structural Repairs and Rough Plumbing
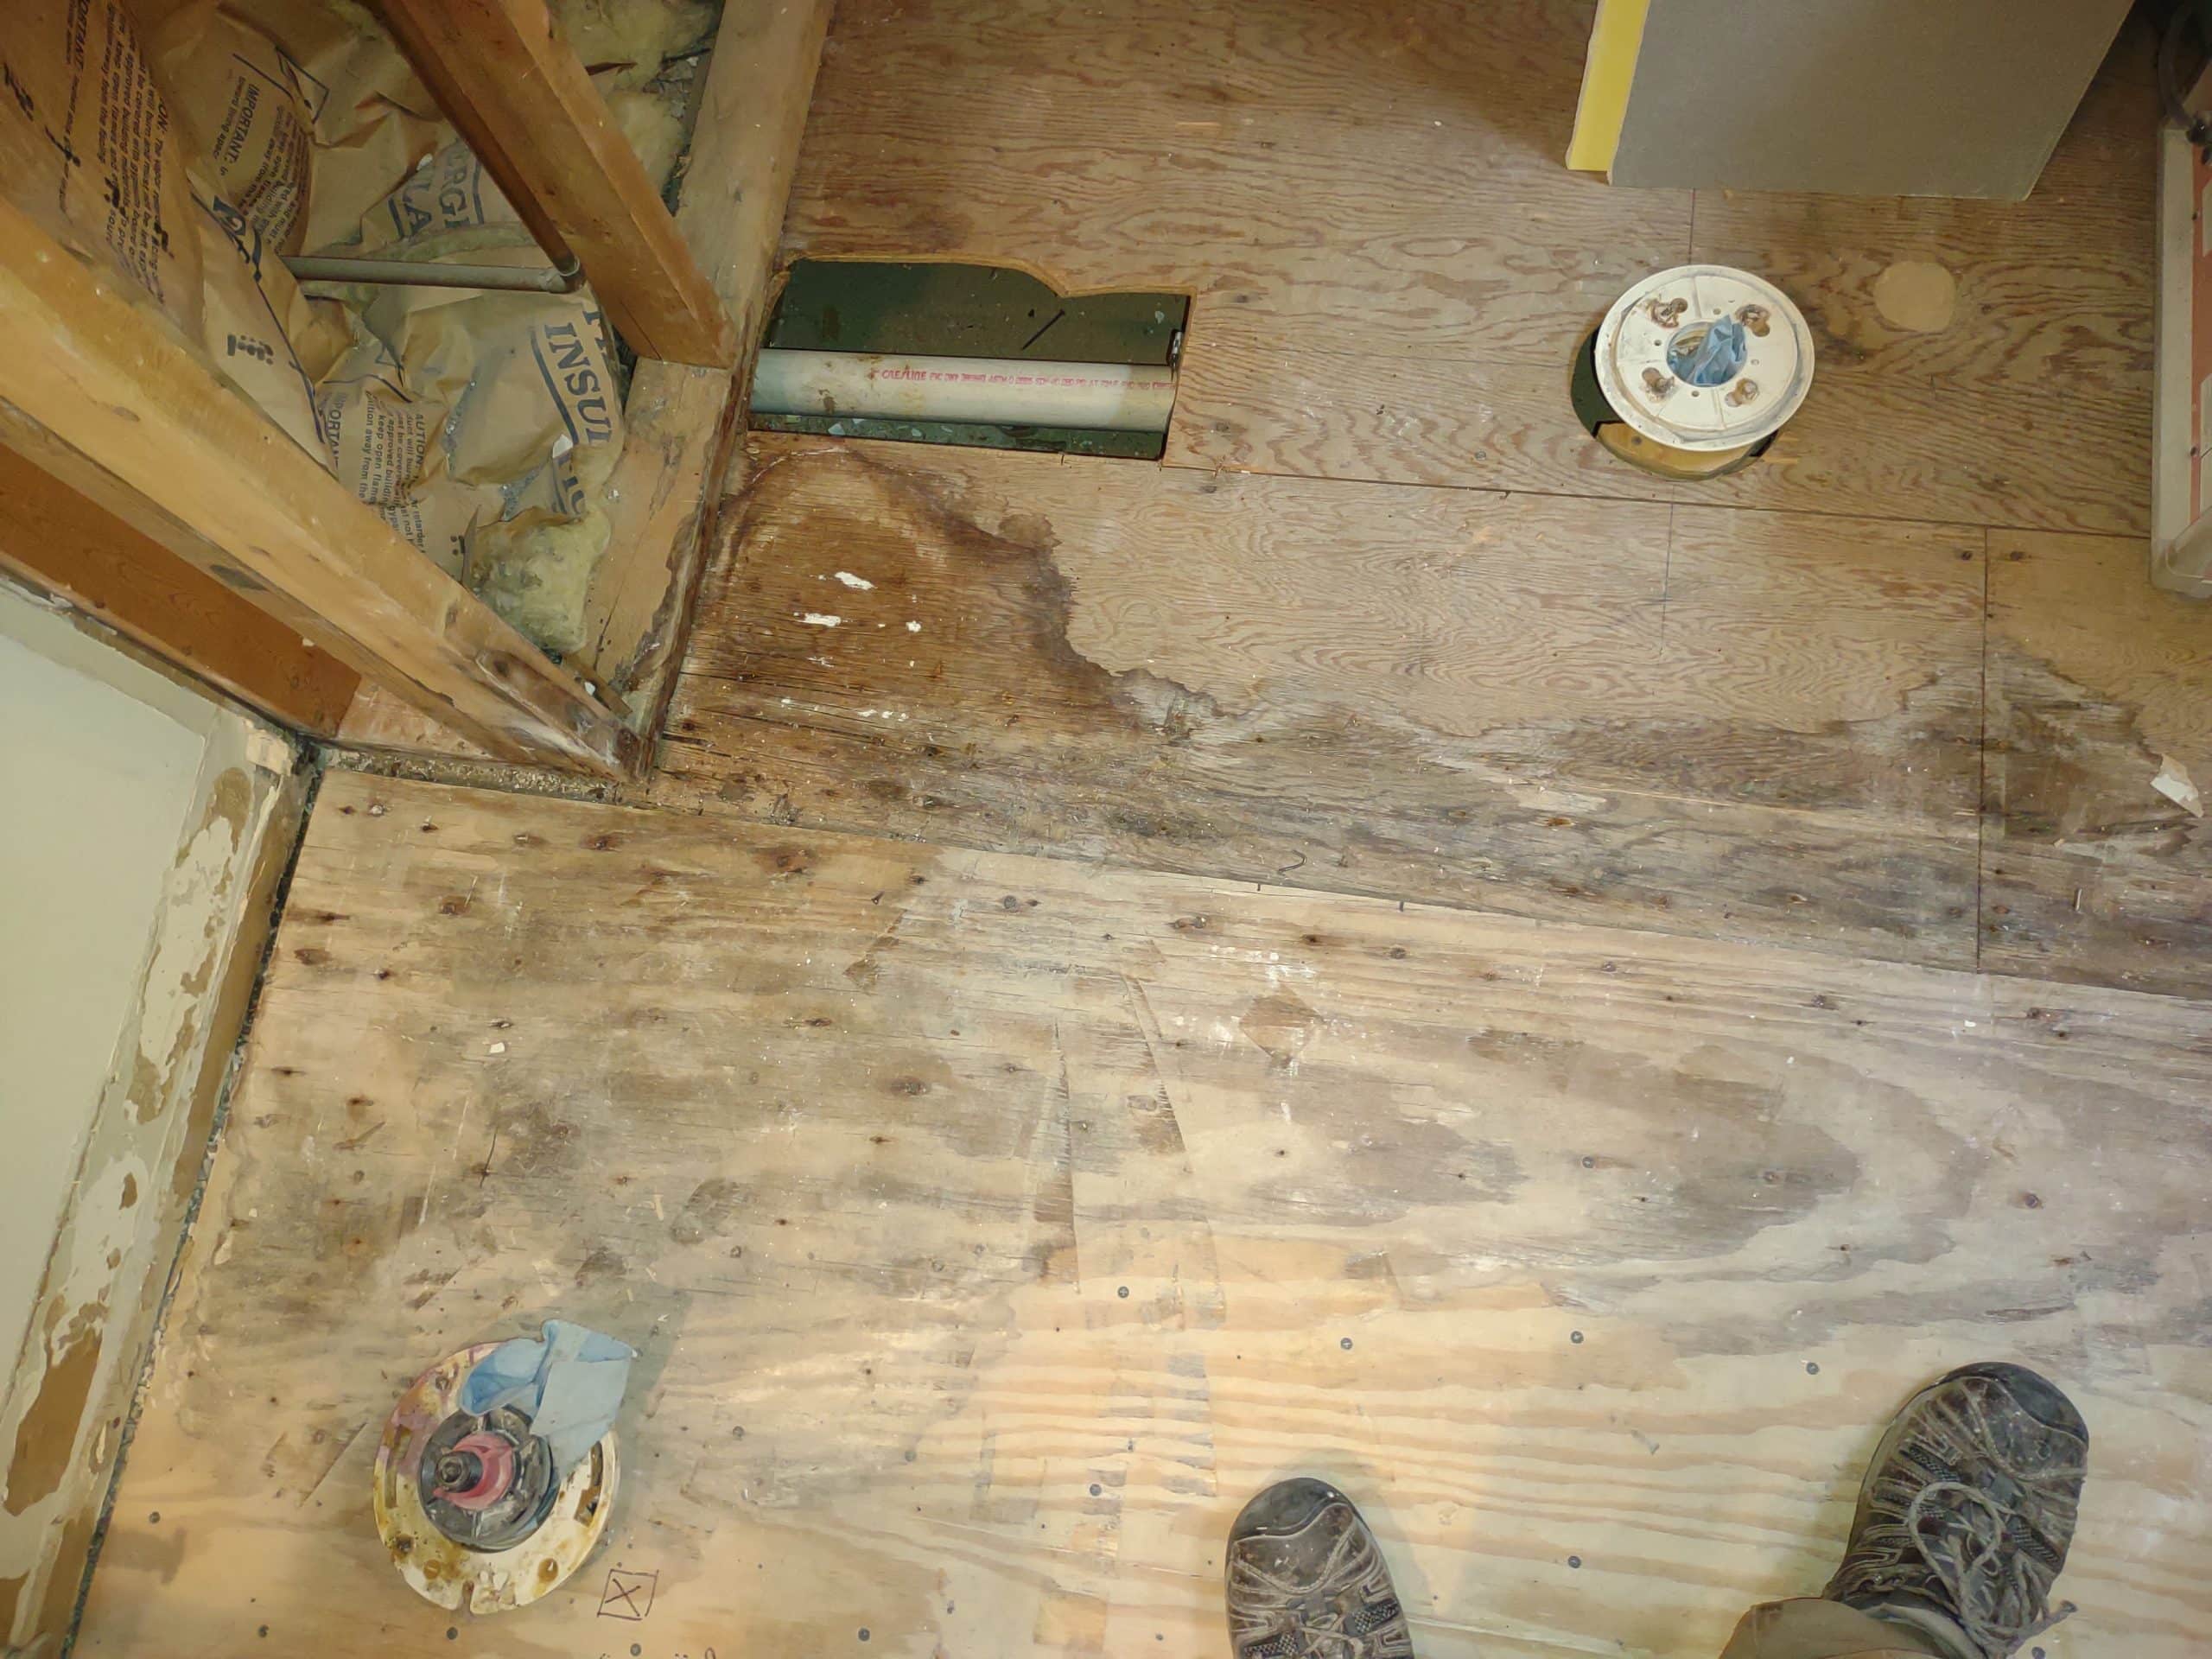
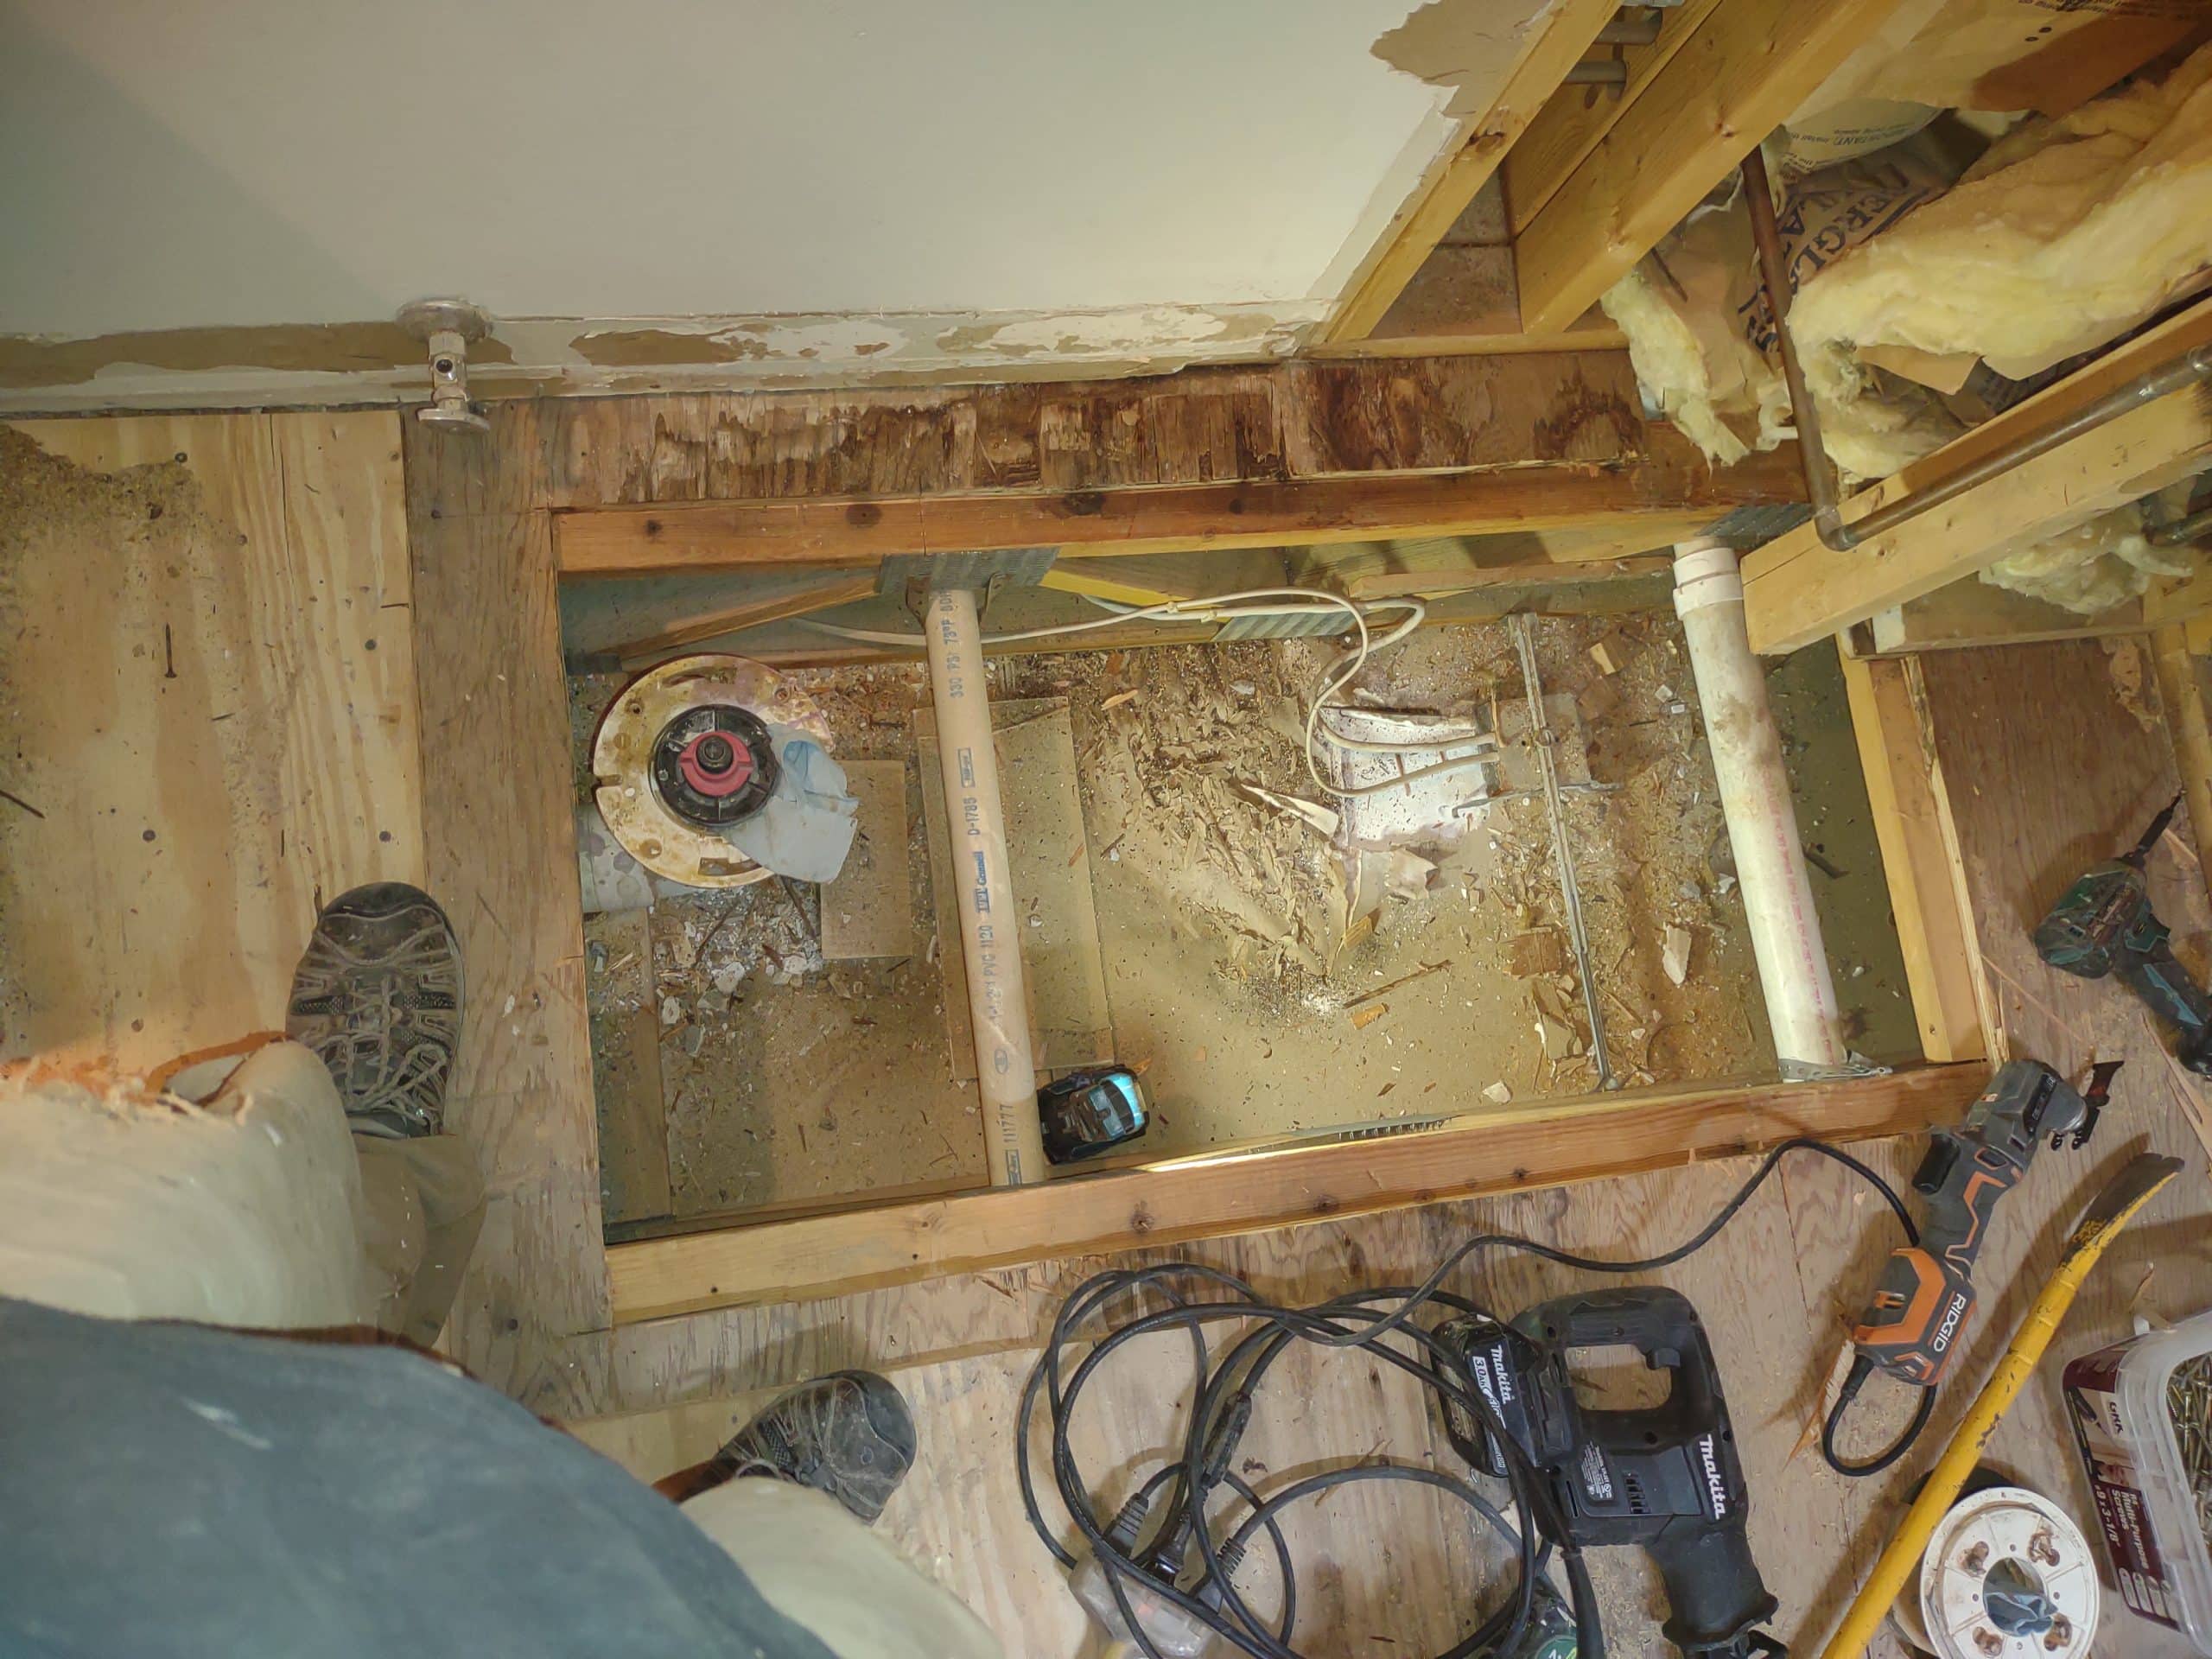
Once everything was removed, the water damage to the subfloor was revealed. In the photo, you can see that water found it’s way out all along the curb, then traveled downhill to the left where it eventually soaked through and dripped to the ceiling below. While the subfloor was intact, there was some plumbing access needed, so we opted to replace the damaged areas and framing.
After plumbing was finished, we blocked and patched the subfloor, then rebuilding commenced.
Replacement Shower Tile Prep
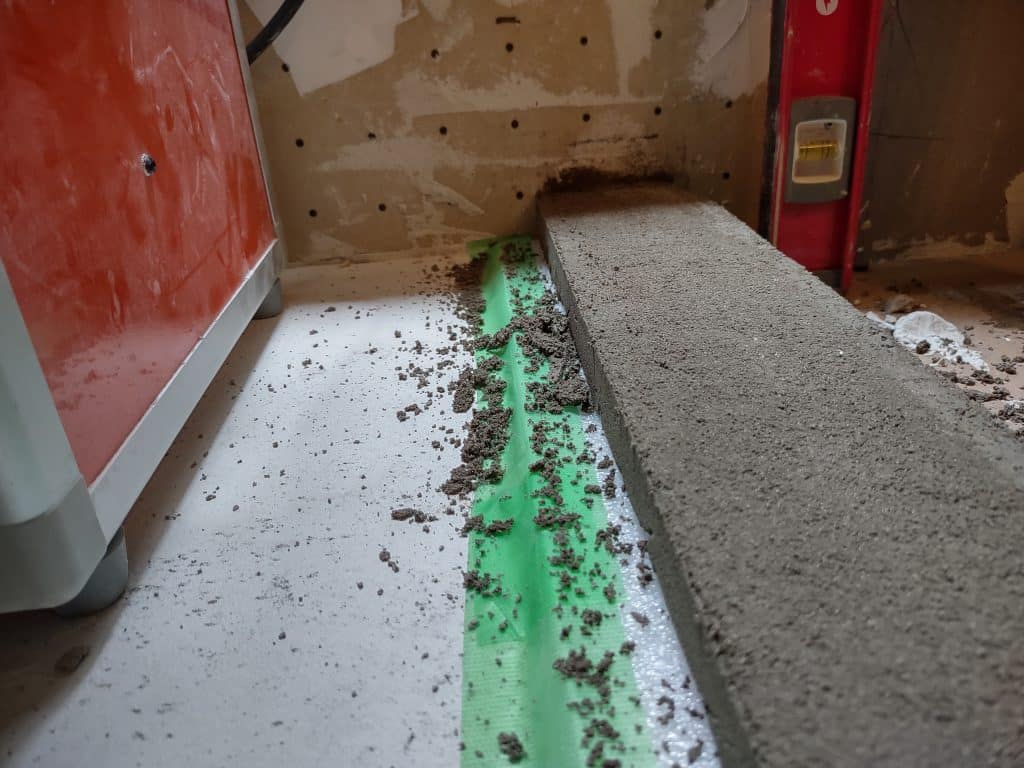
First, we shimmed and trimmed all the framing in the walls to bring them into plane. TCNA standards require that tile substrates are flat – so flat that a 10ft straightedge has less than an 1/8″ of variance below it. The walls in this home took some time to bring them to be within that standard. Once the walls were flat, we added our backer board and a shower pan. In contrast to the previous pan, this one is made of dry-pack mortar rather than concrete. Dry-pack mortar has a few advantages over concrete. It can be easily sloped and shaped (especially useful for sloping shower pans) and it also doesn’t have the same high potential for cracking. Any cracks in concrete below a tile installation will transfer to the tile above, which nobody wants.
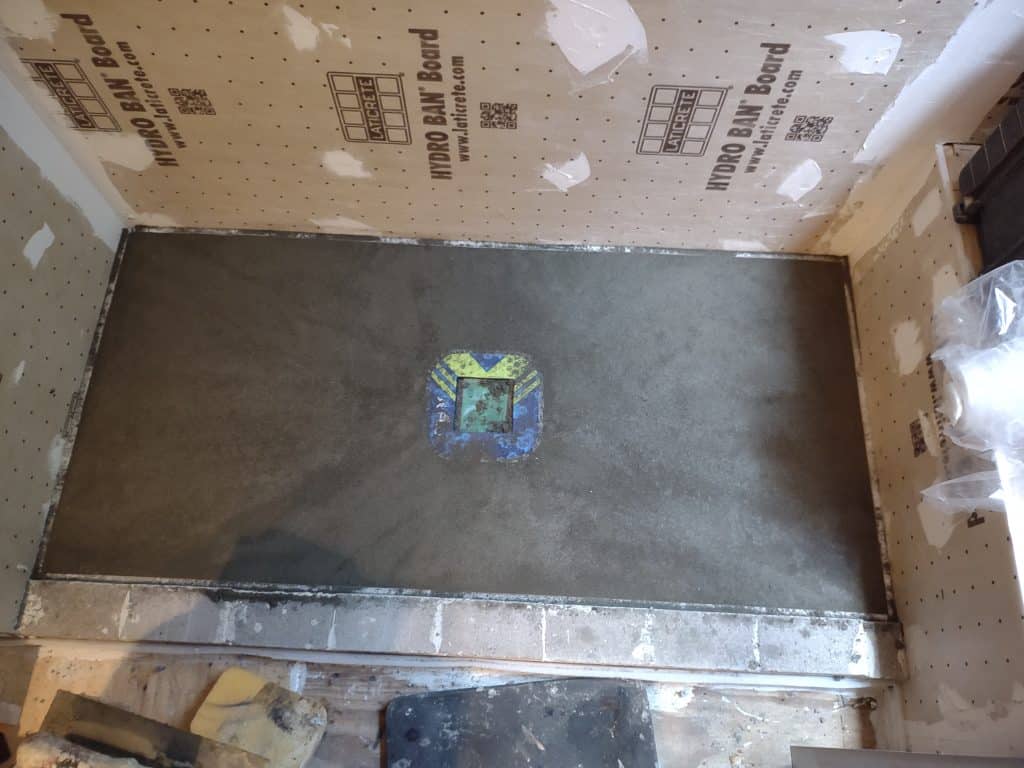
We built the curb from common brick, mortaring each together to create a single unit. At this point, we weren’t sure exactly what dimensions the curb should have, so we deliberately left it fairly short for later adjustment. You’ll note it’s barely higher than the shower pan in the photo.
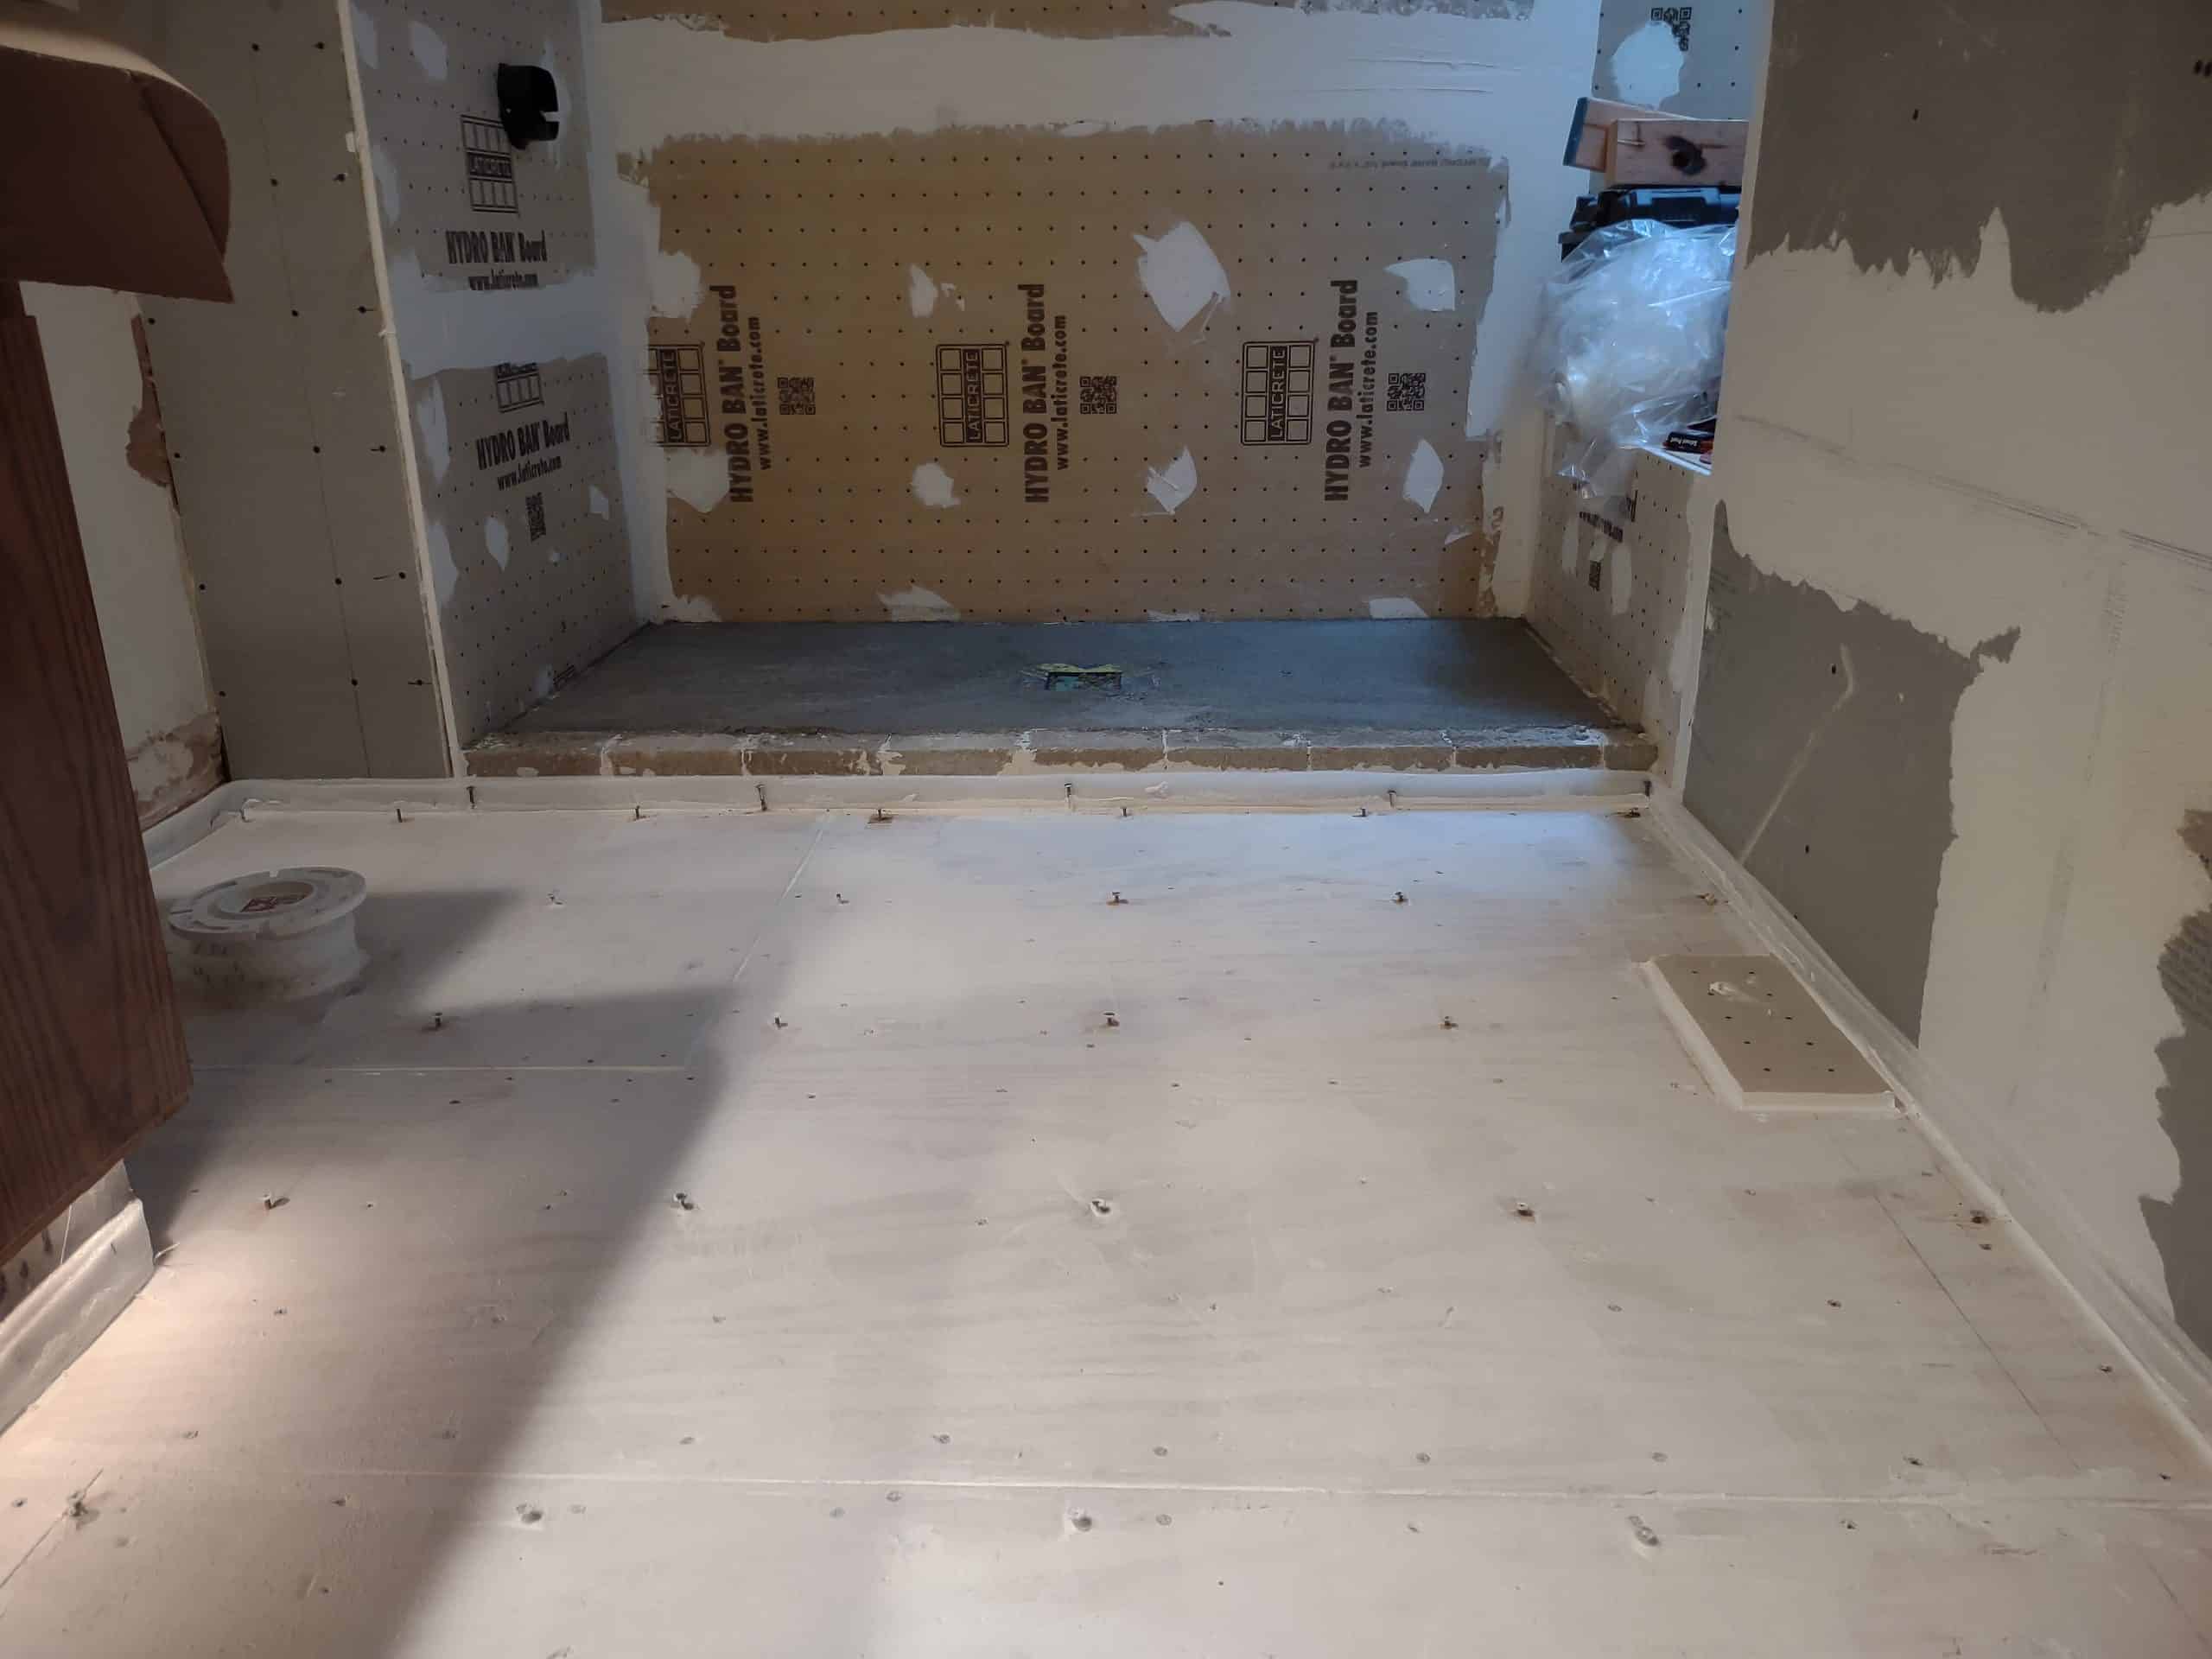
Bathroom Floor Tile Prep
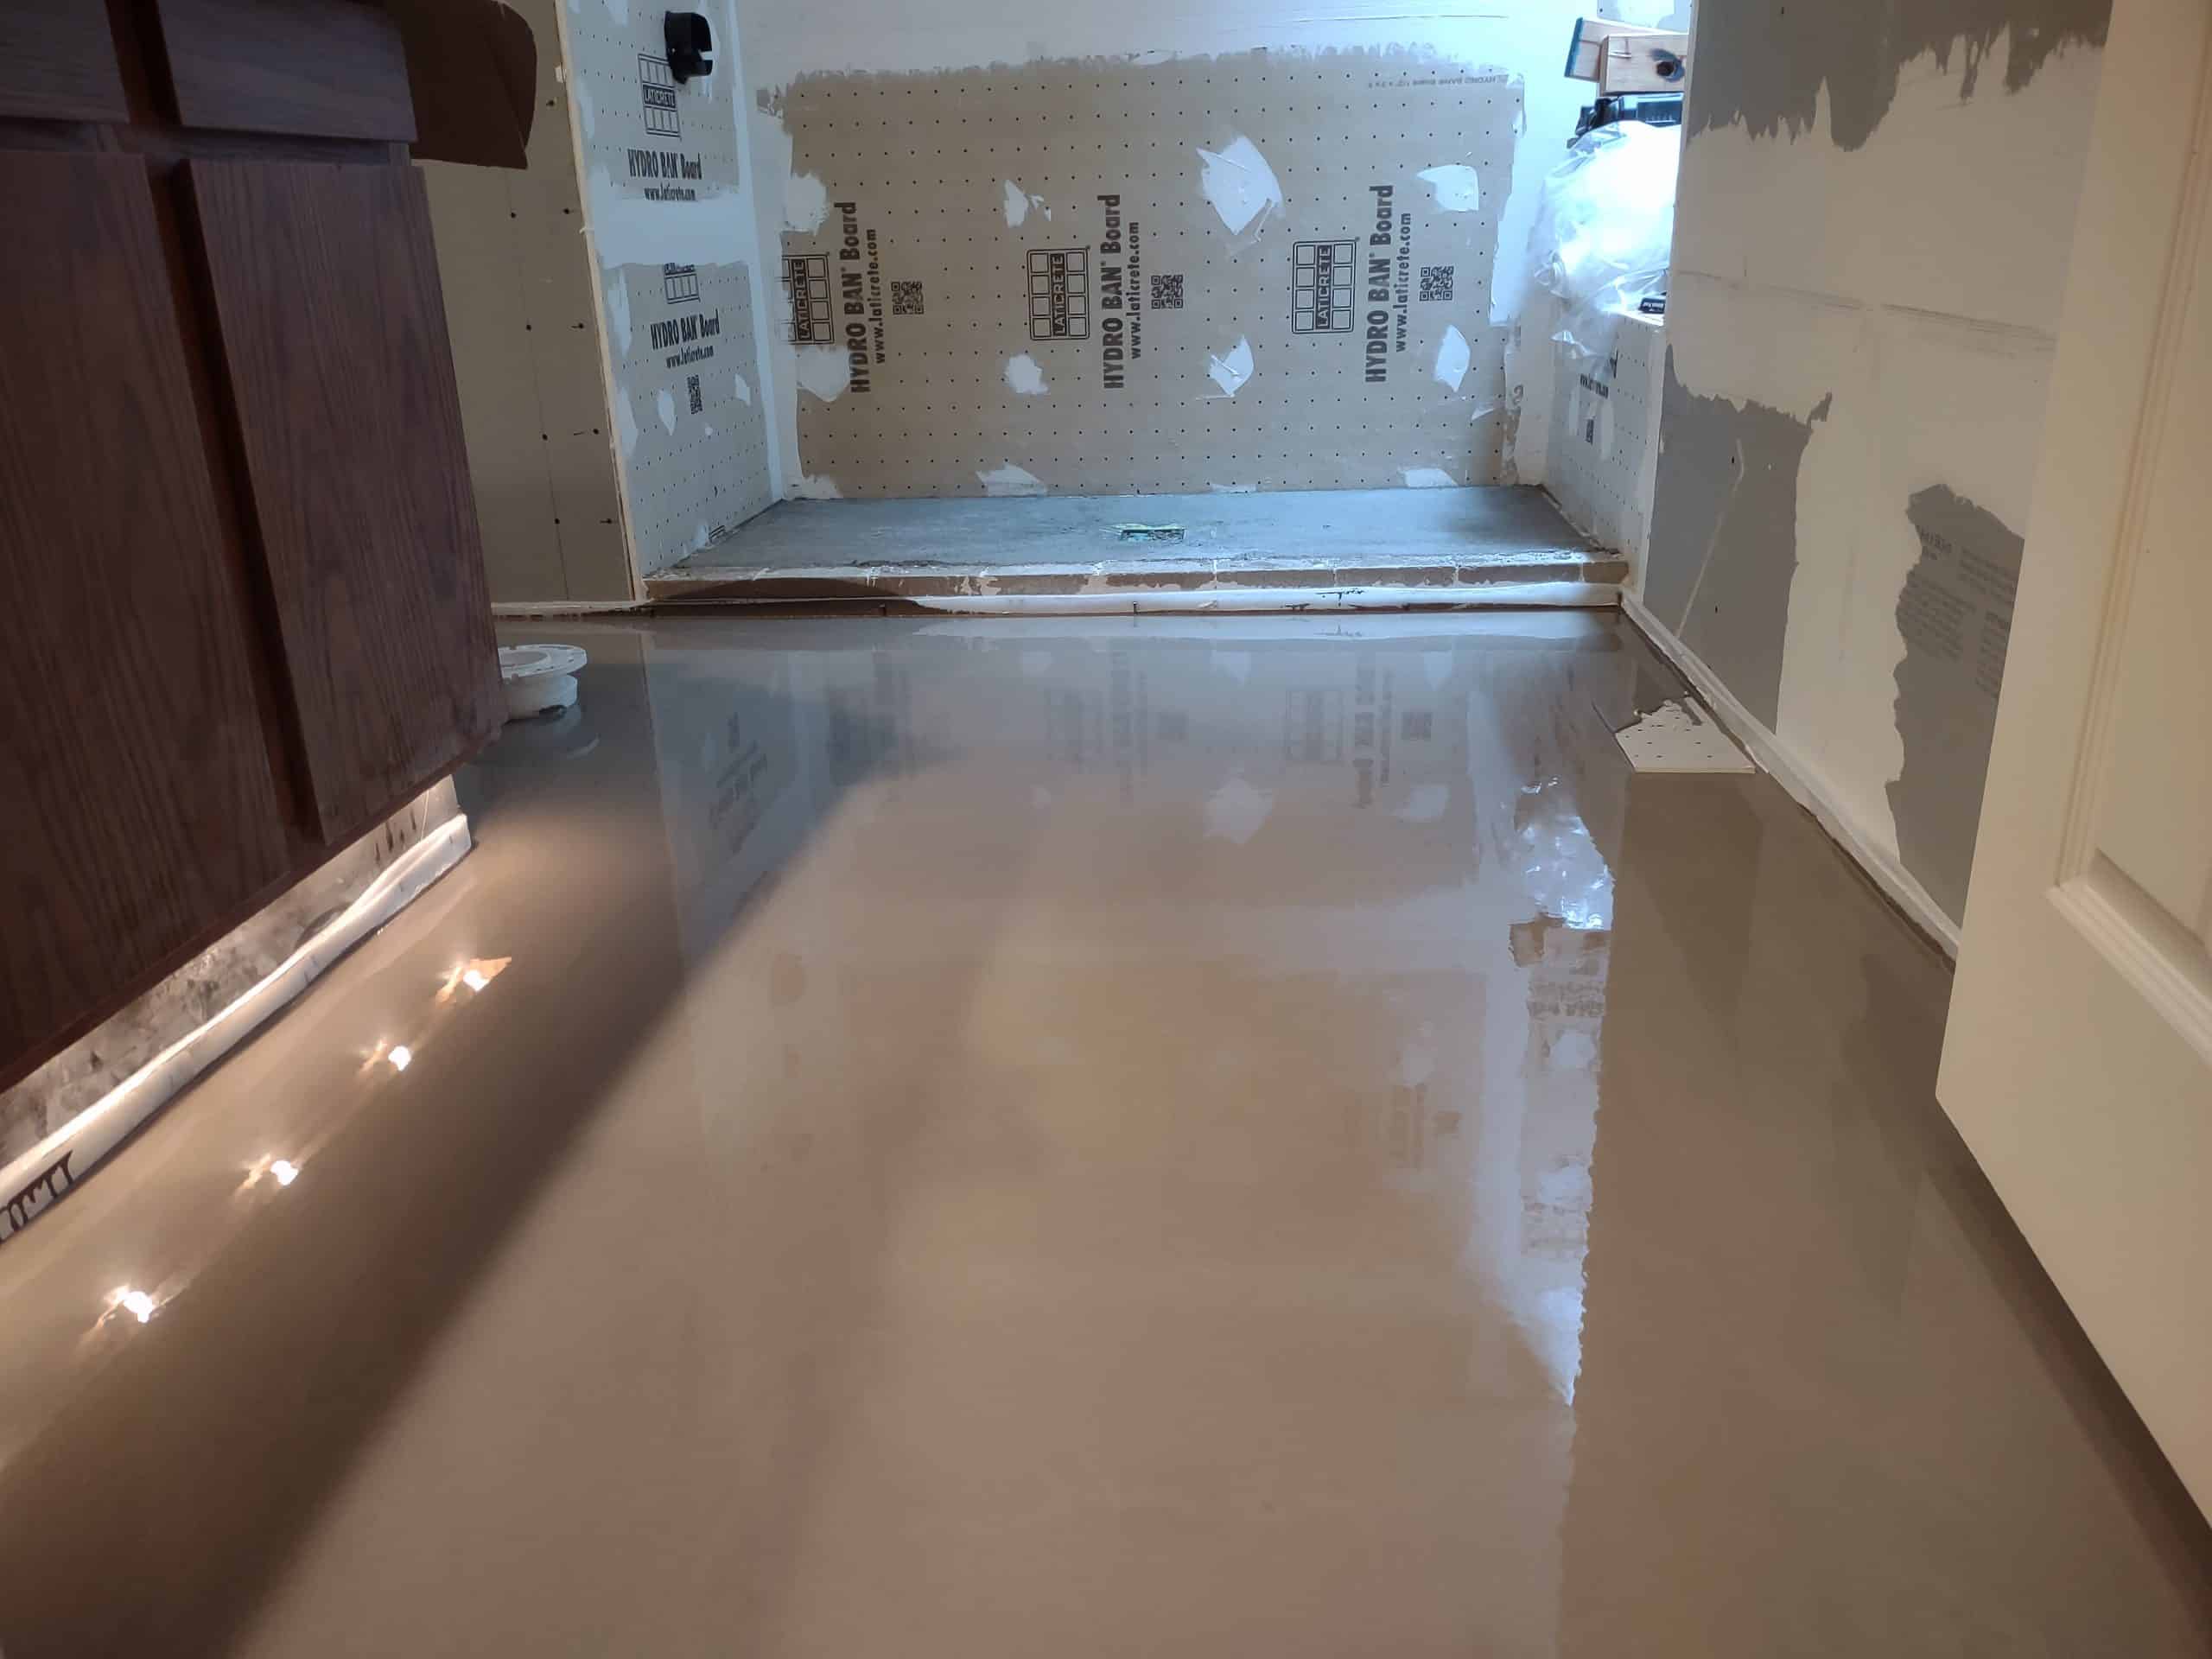
We next turned our attention to the bathroom floor. The floor was reasonably flat already – we could have almost set an underlayment and tiled. However, the seamless layout we wanted to achieve had a problem: the floor was significantly out of level. In order for our floor tile pattern to continue into the shower without problems, we needed the floor to be at 90 degrees from the walls. The best solution in our situation was to pour a self-leveling underlayment first. We then laid an uncoupling membrane before setting tile.
Setting Floor Tile
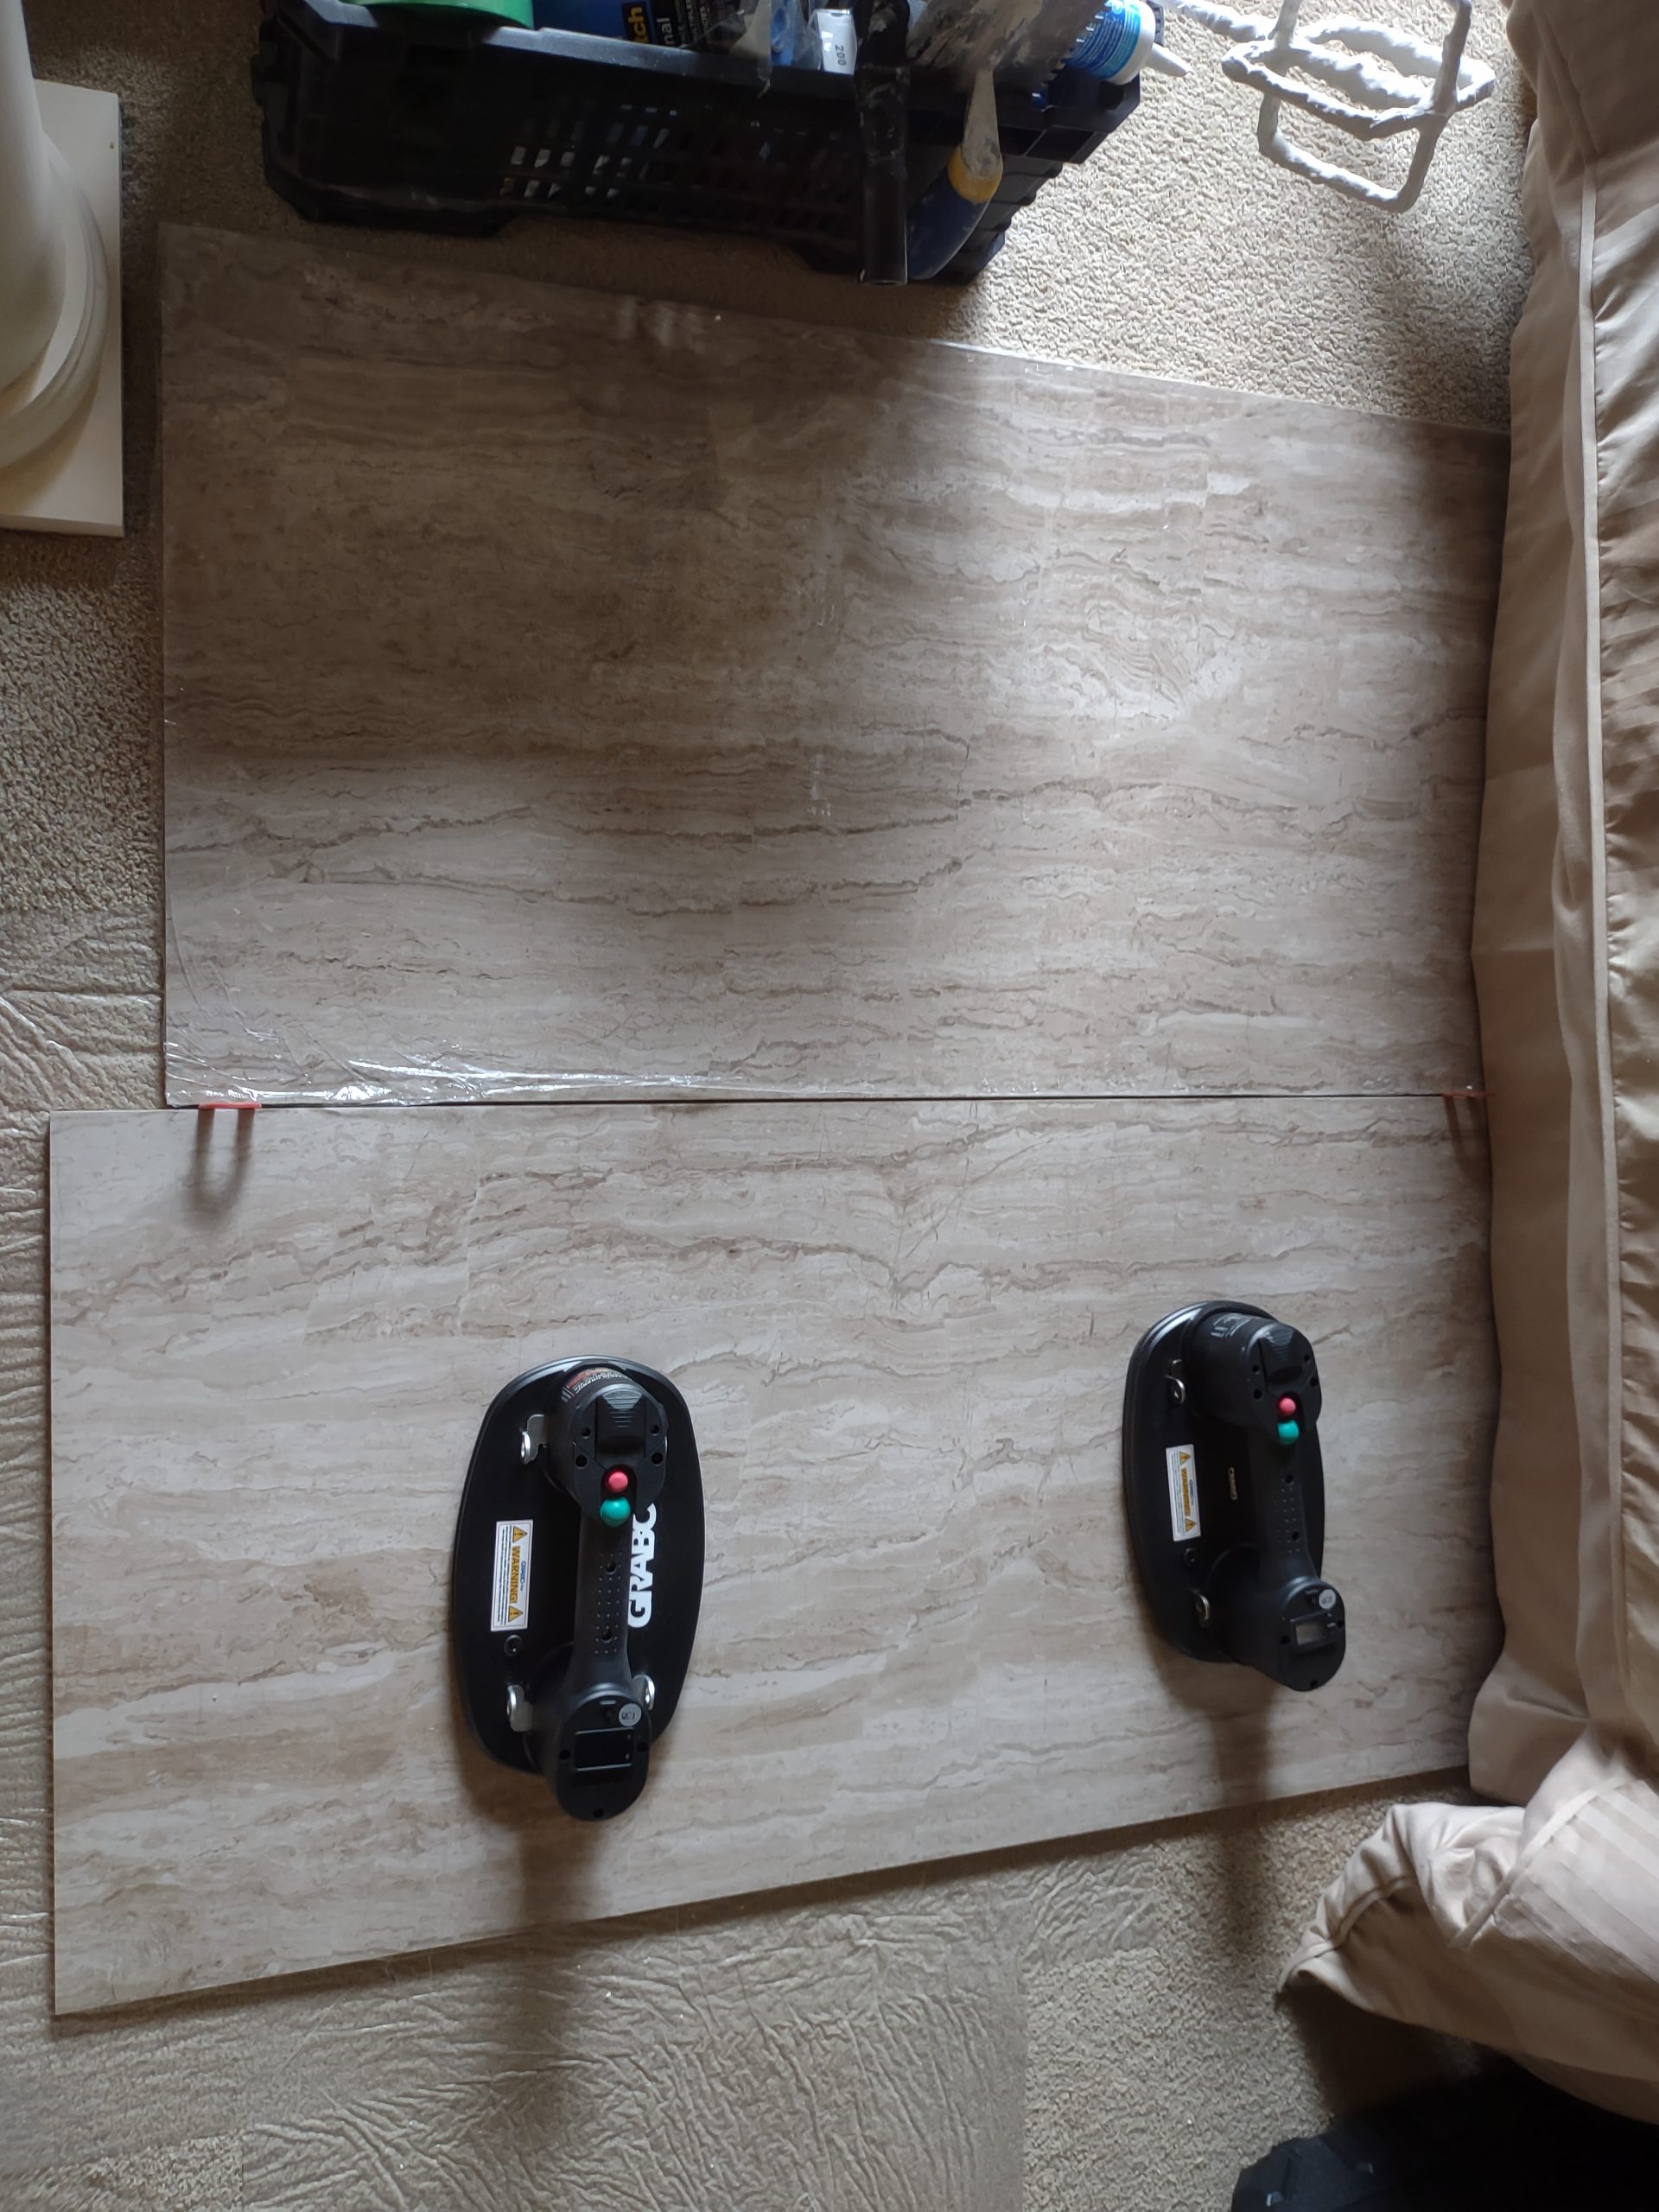
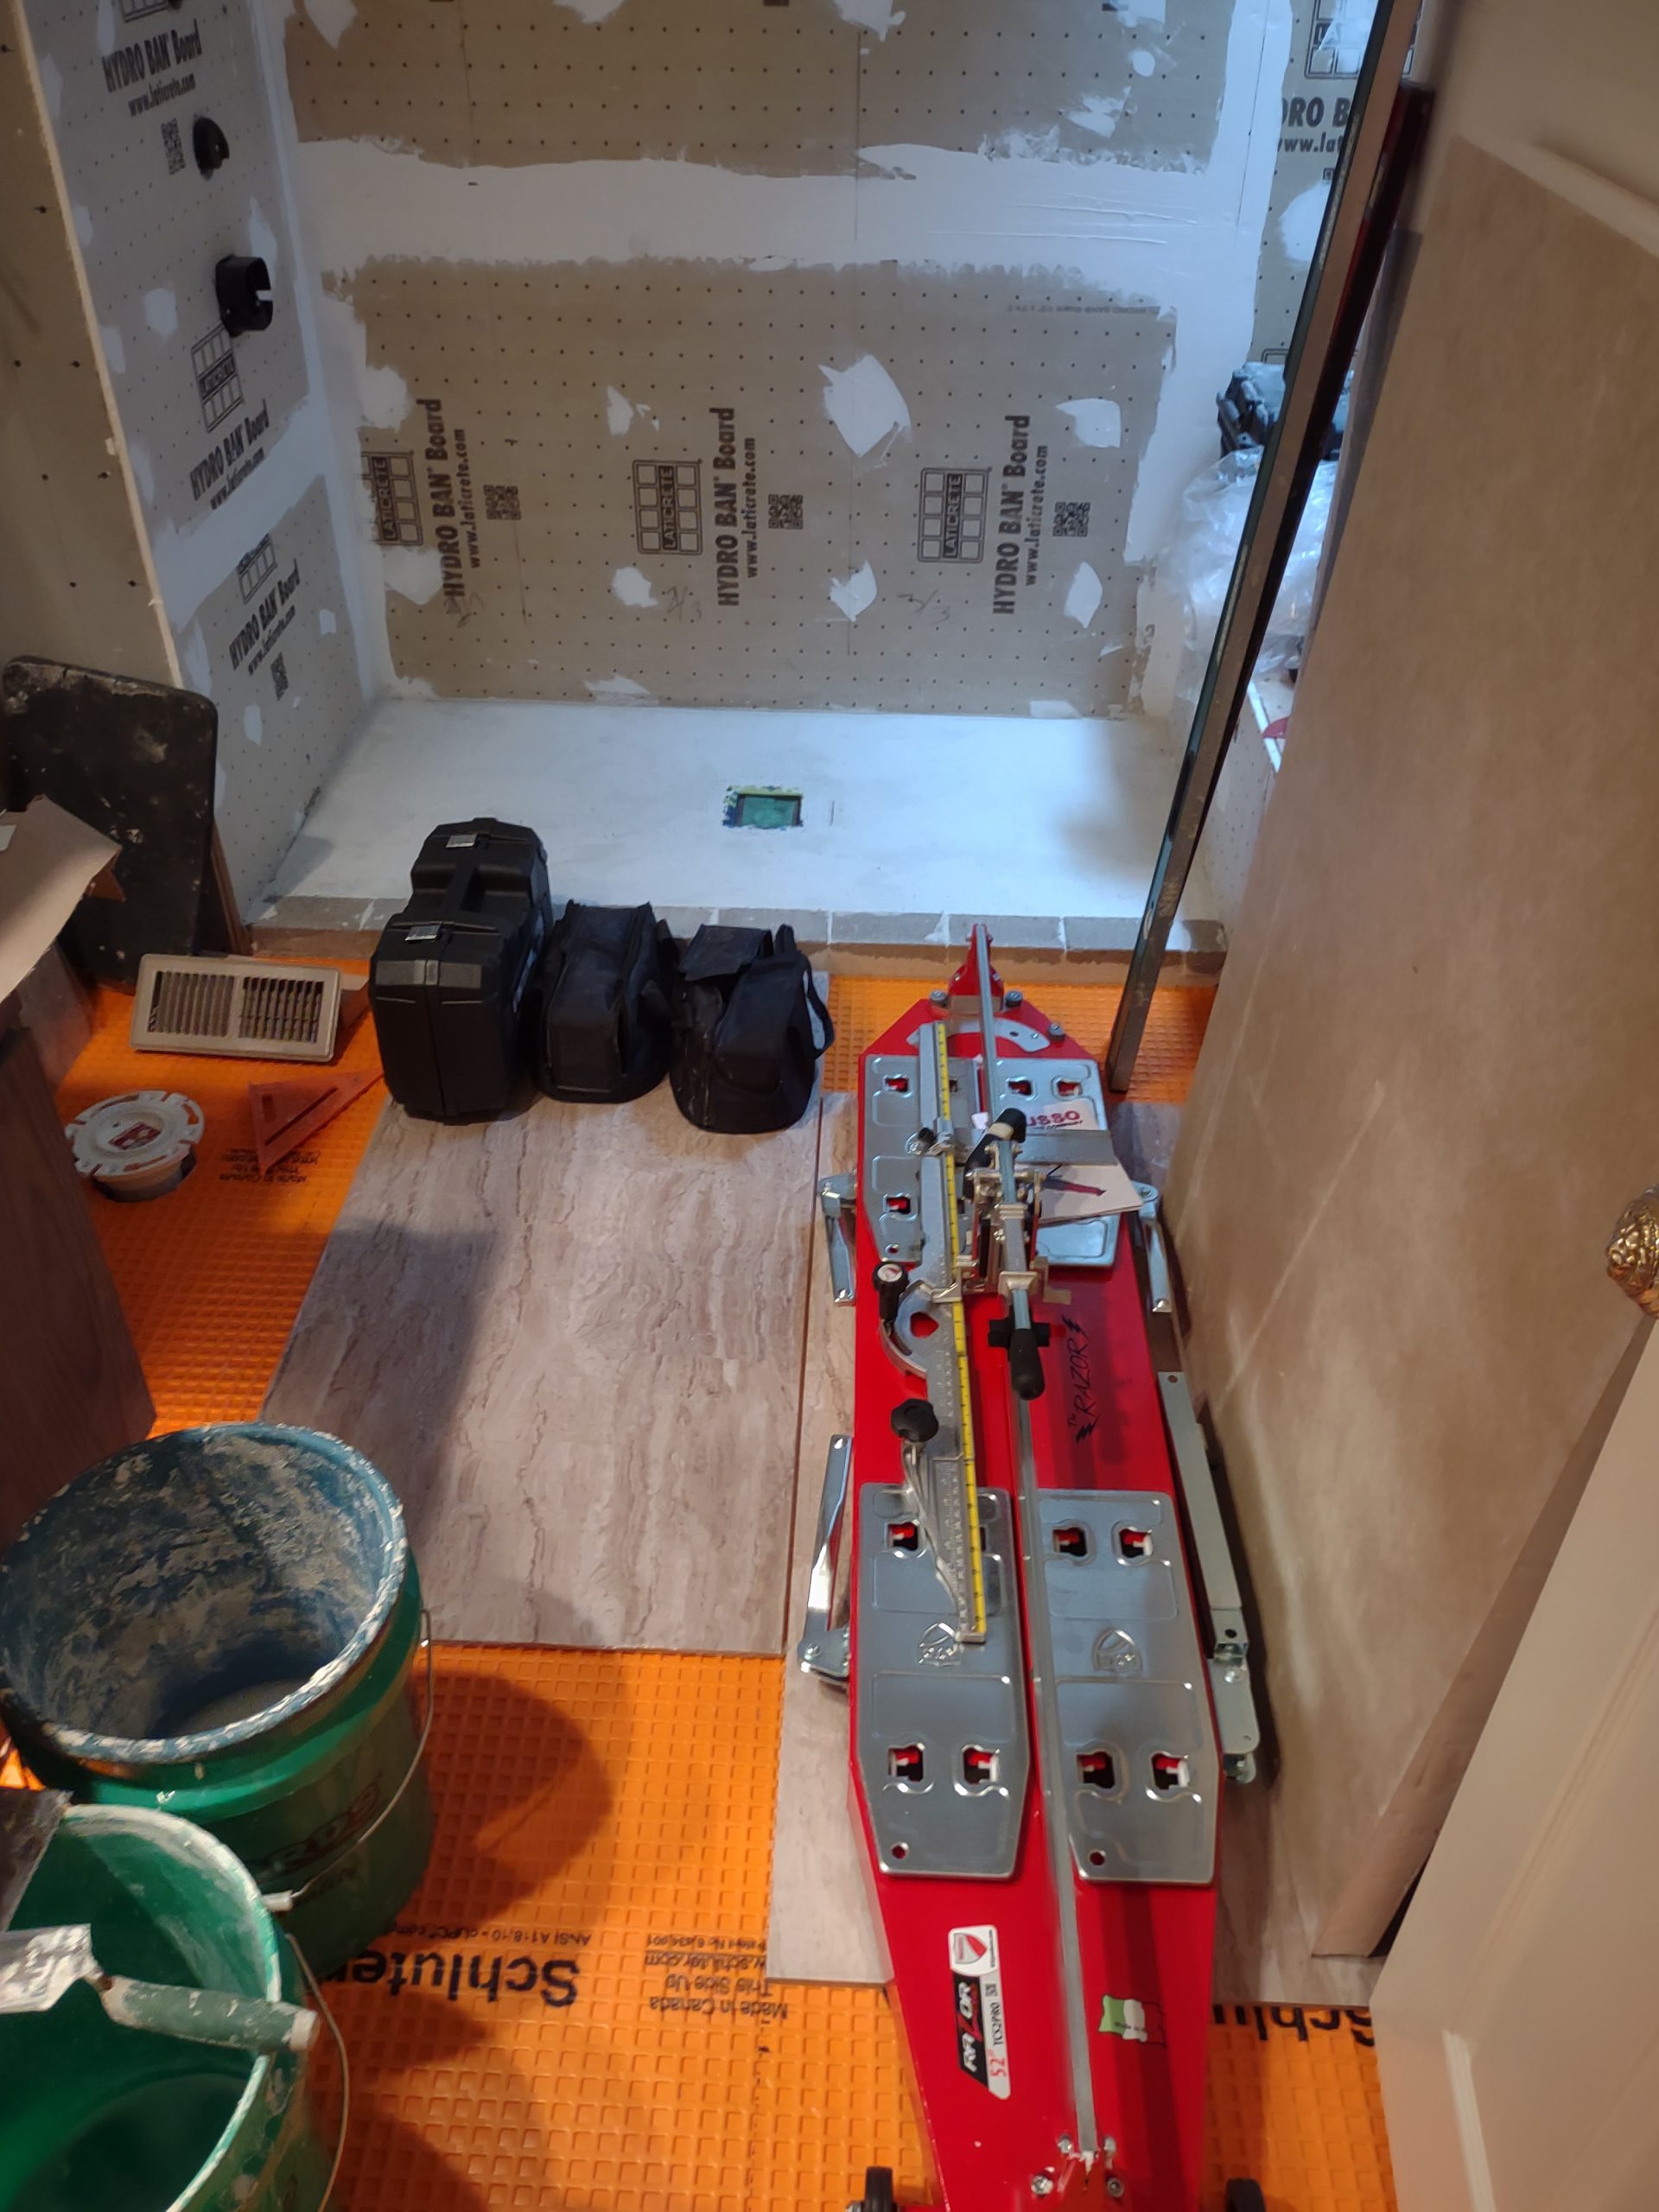
The first thing to do when laying tile is figuring out the best layout. This process takes some time, especially when there are multiple surfaces that share the same tile, as there were on this project. Our aim is to have a centered and balanced layout. In many cases that’s easier said than done. We spend a good deal of time deciding what areas are the most/least visible and where we need to put the best-looking areas, and where we can hide the less ideal areas.
Final Shower Pan Adjustments and Waterproofing
After tiling the floor and covering it up with protective cardboard, we switched our attention back to the shower. We floated our curb with mortar to exactly achieve the dimensions we needed to match our existing layout. Not only was our tile layout a factor, but the glass to be installed had already been cut, so we needed to hit a certain elevation so it would fit perfectly between the tiled curb and ceiling.
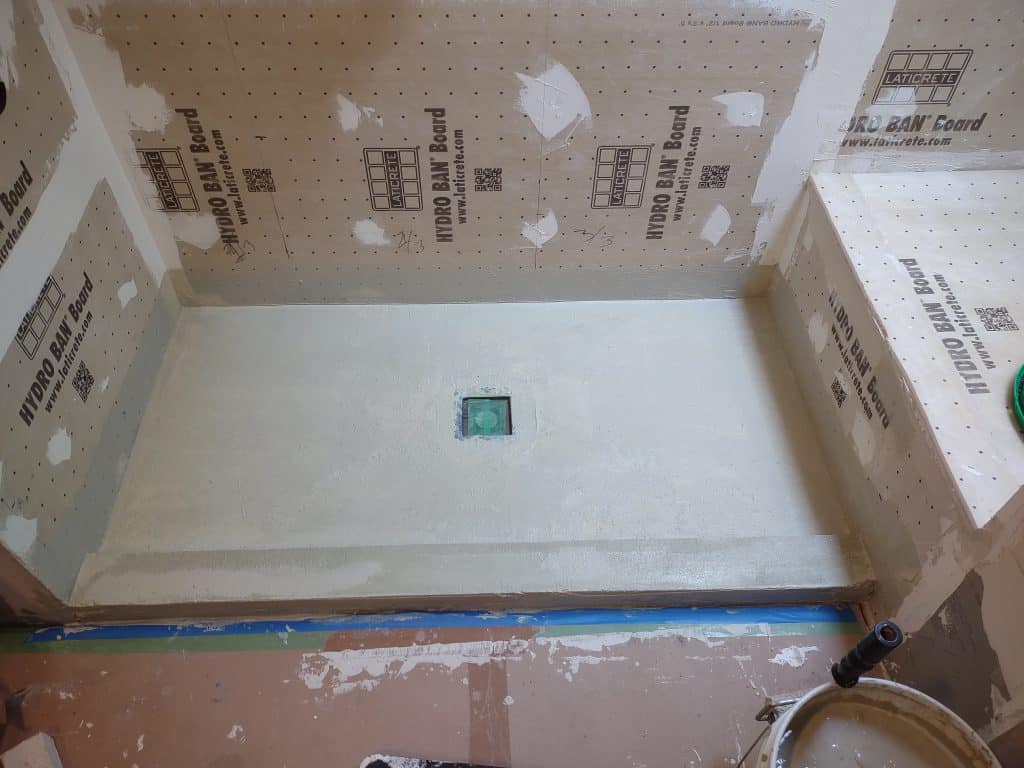
After the curb had dried, we applied two coats of a liquid topical membrane to the entirety of the shower pan, bonding flange drain and curb. Note that this method is only compatible with this style of drain, not the standard 3-piece clamping drain.
After waiting for the membrane to dry, we flood tested the pan. This involves plugging the drain and filling the shower pan with water. After waiting 24hrs, we confirm that the water level has stayed the same. This is a test as to the “waterproofness” of our new shower pan.
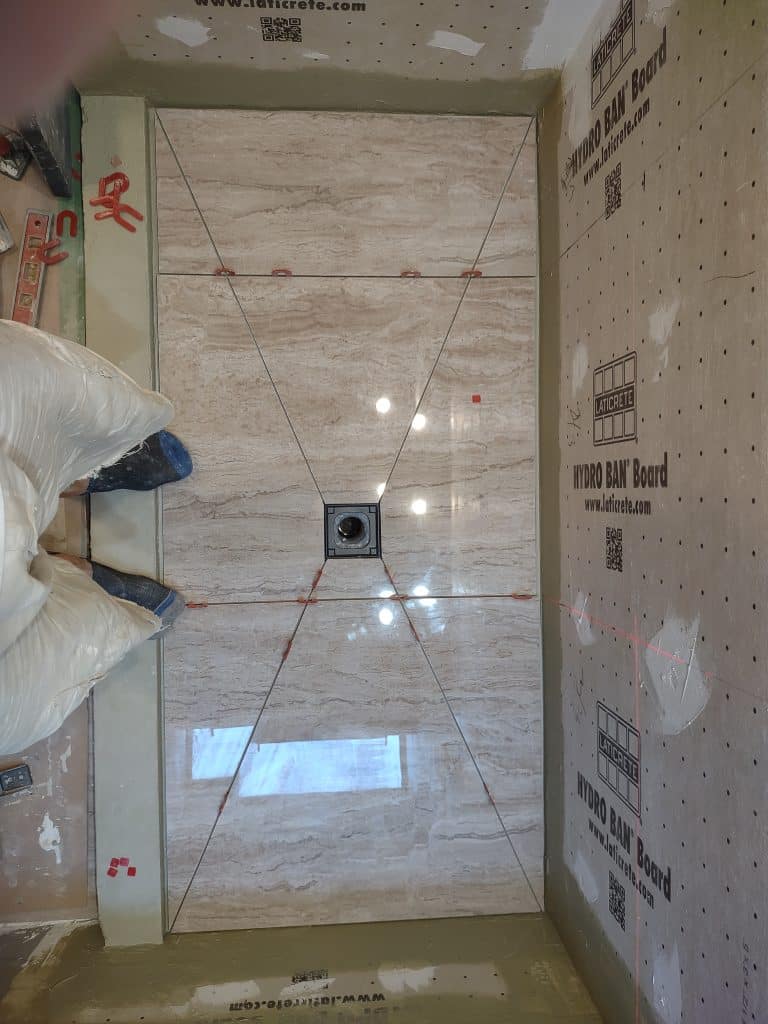
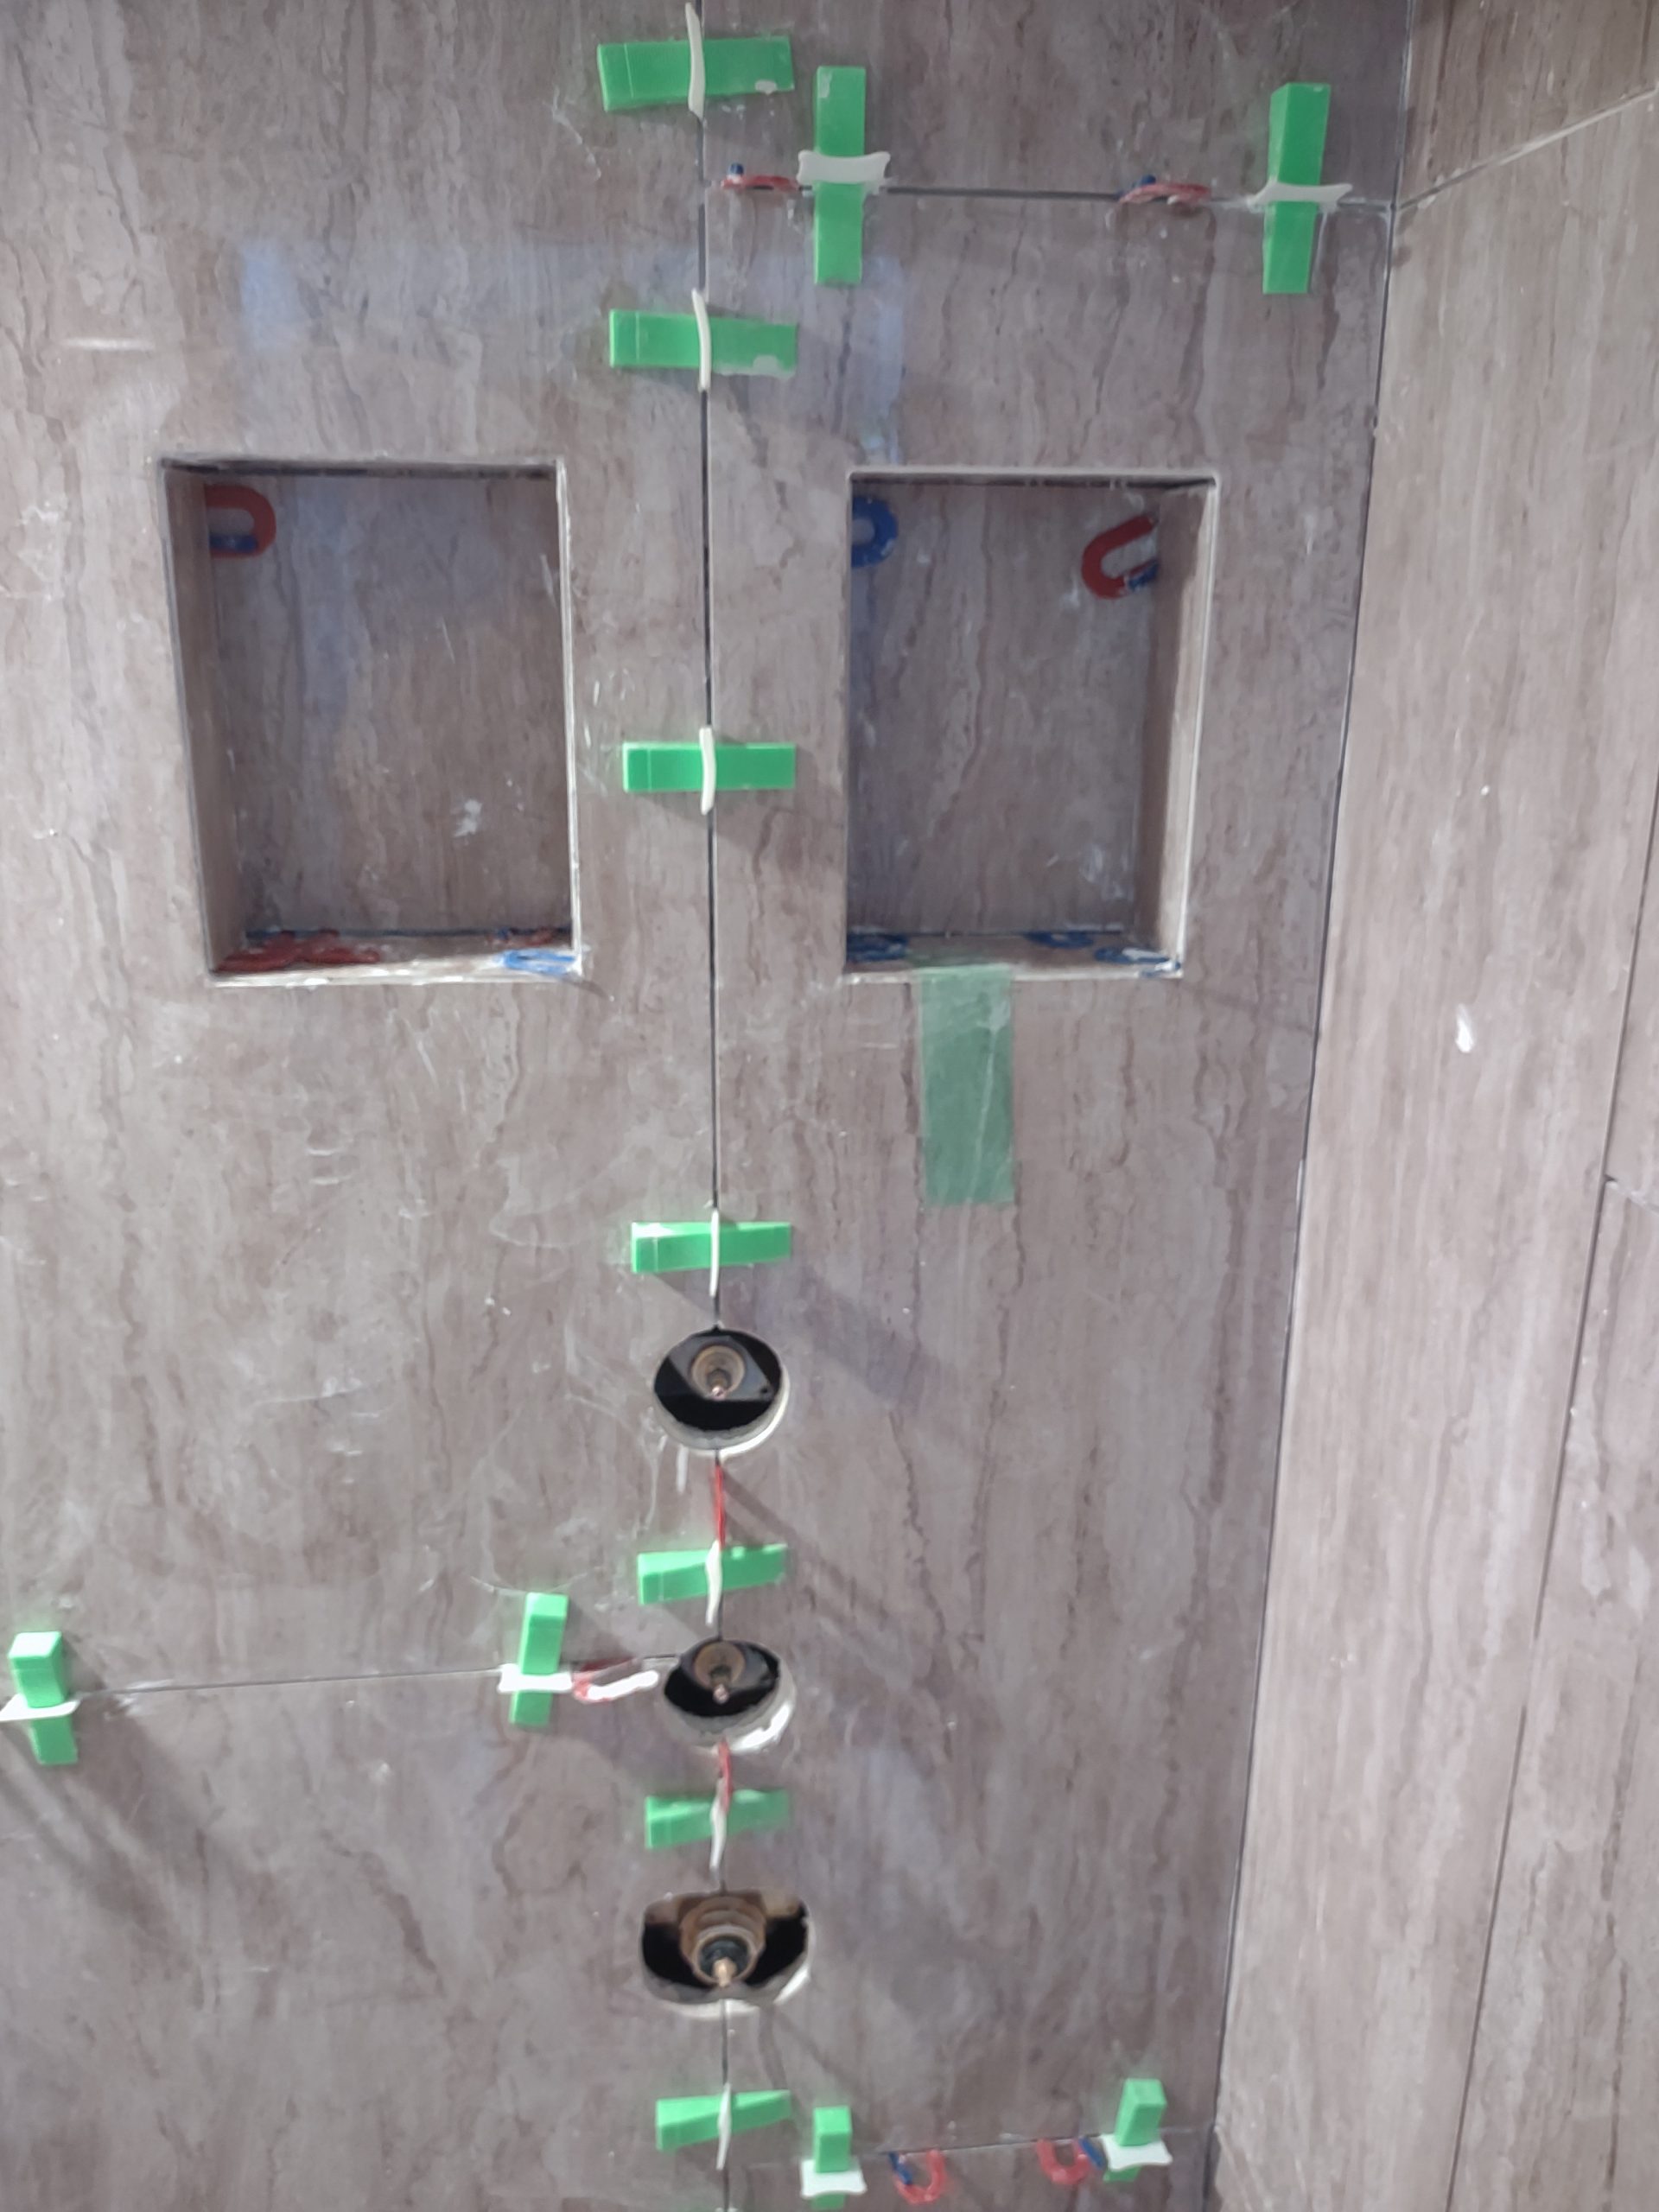
Replacement Shower Tile
Then, we’re ready to continue laying tile! We start with the shower floor, then move to the bench and the walls.

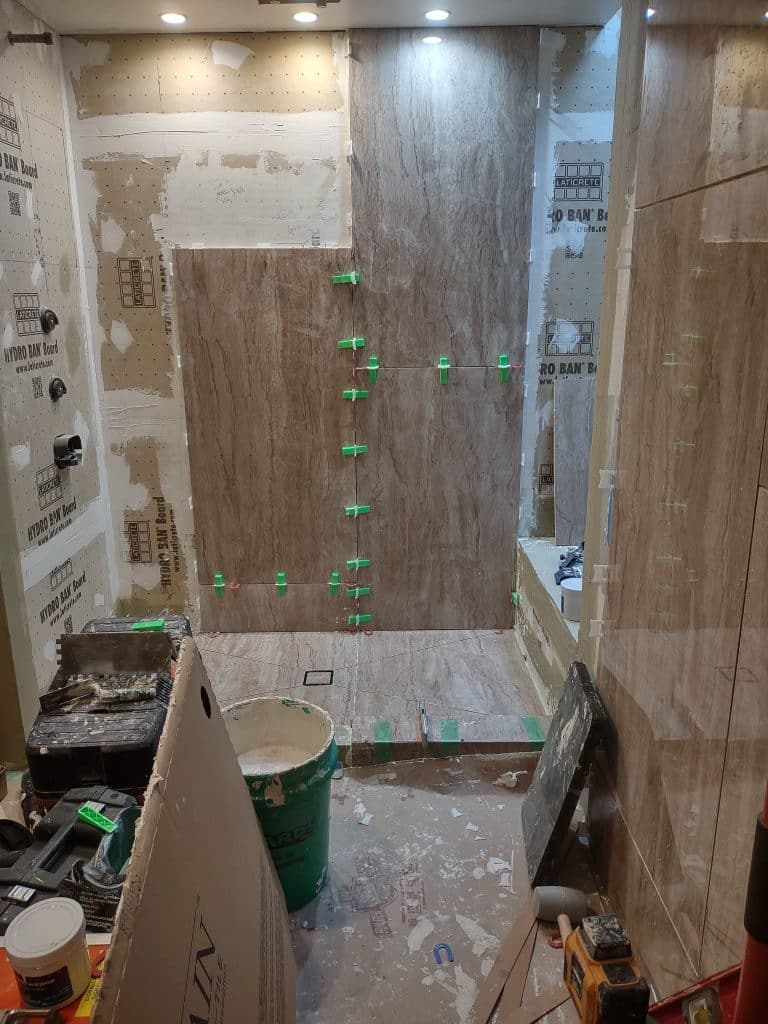
Things are getting pretty messy, but in the photo above, you can see where we start to tie the tile pattern of the bathroom floor in via the curb.
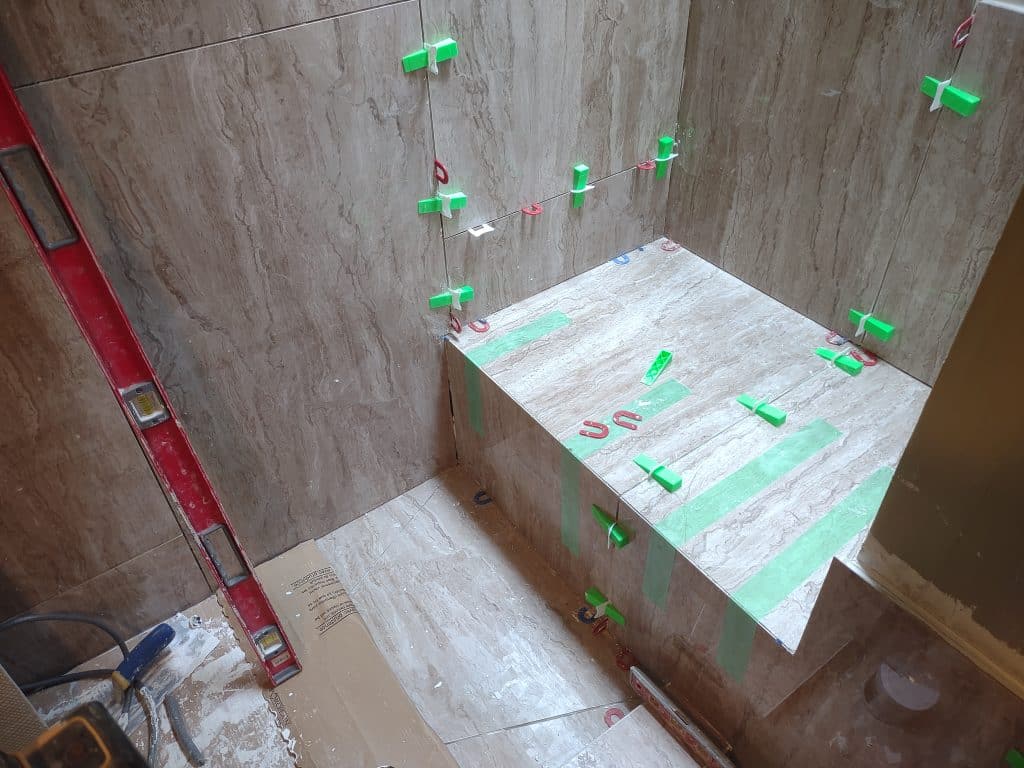
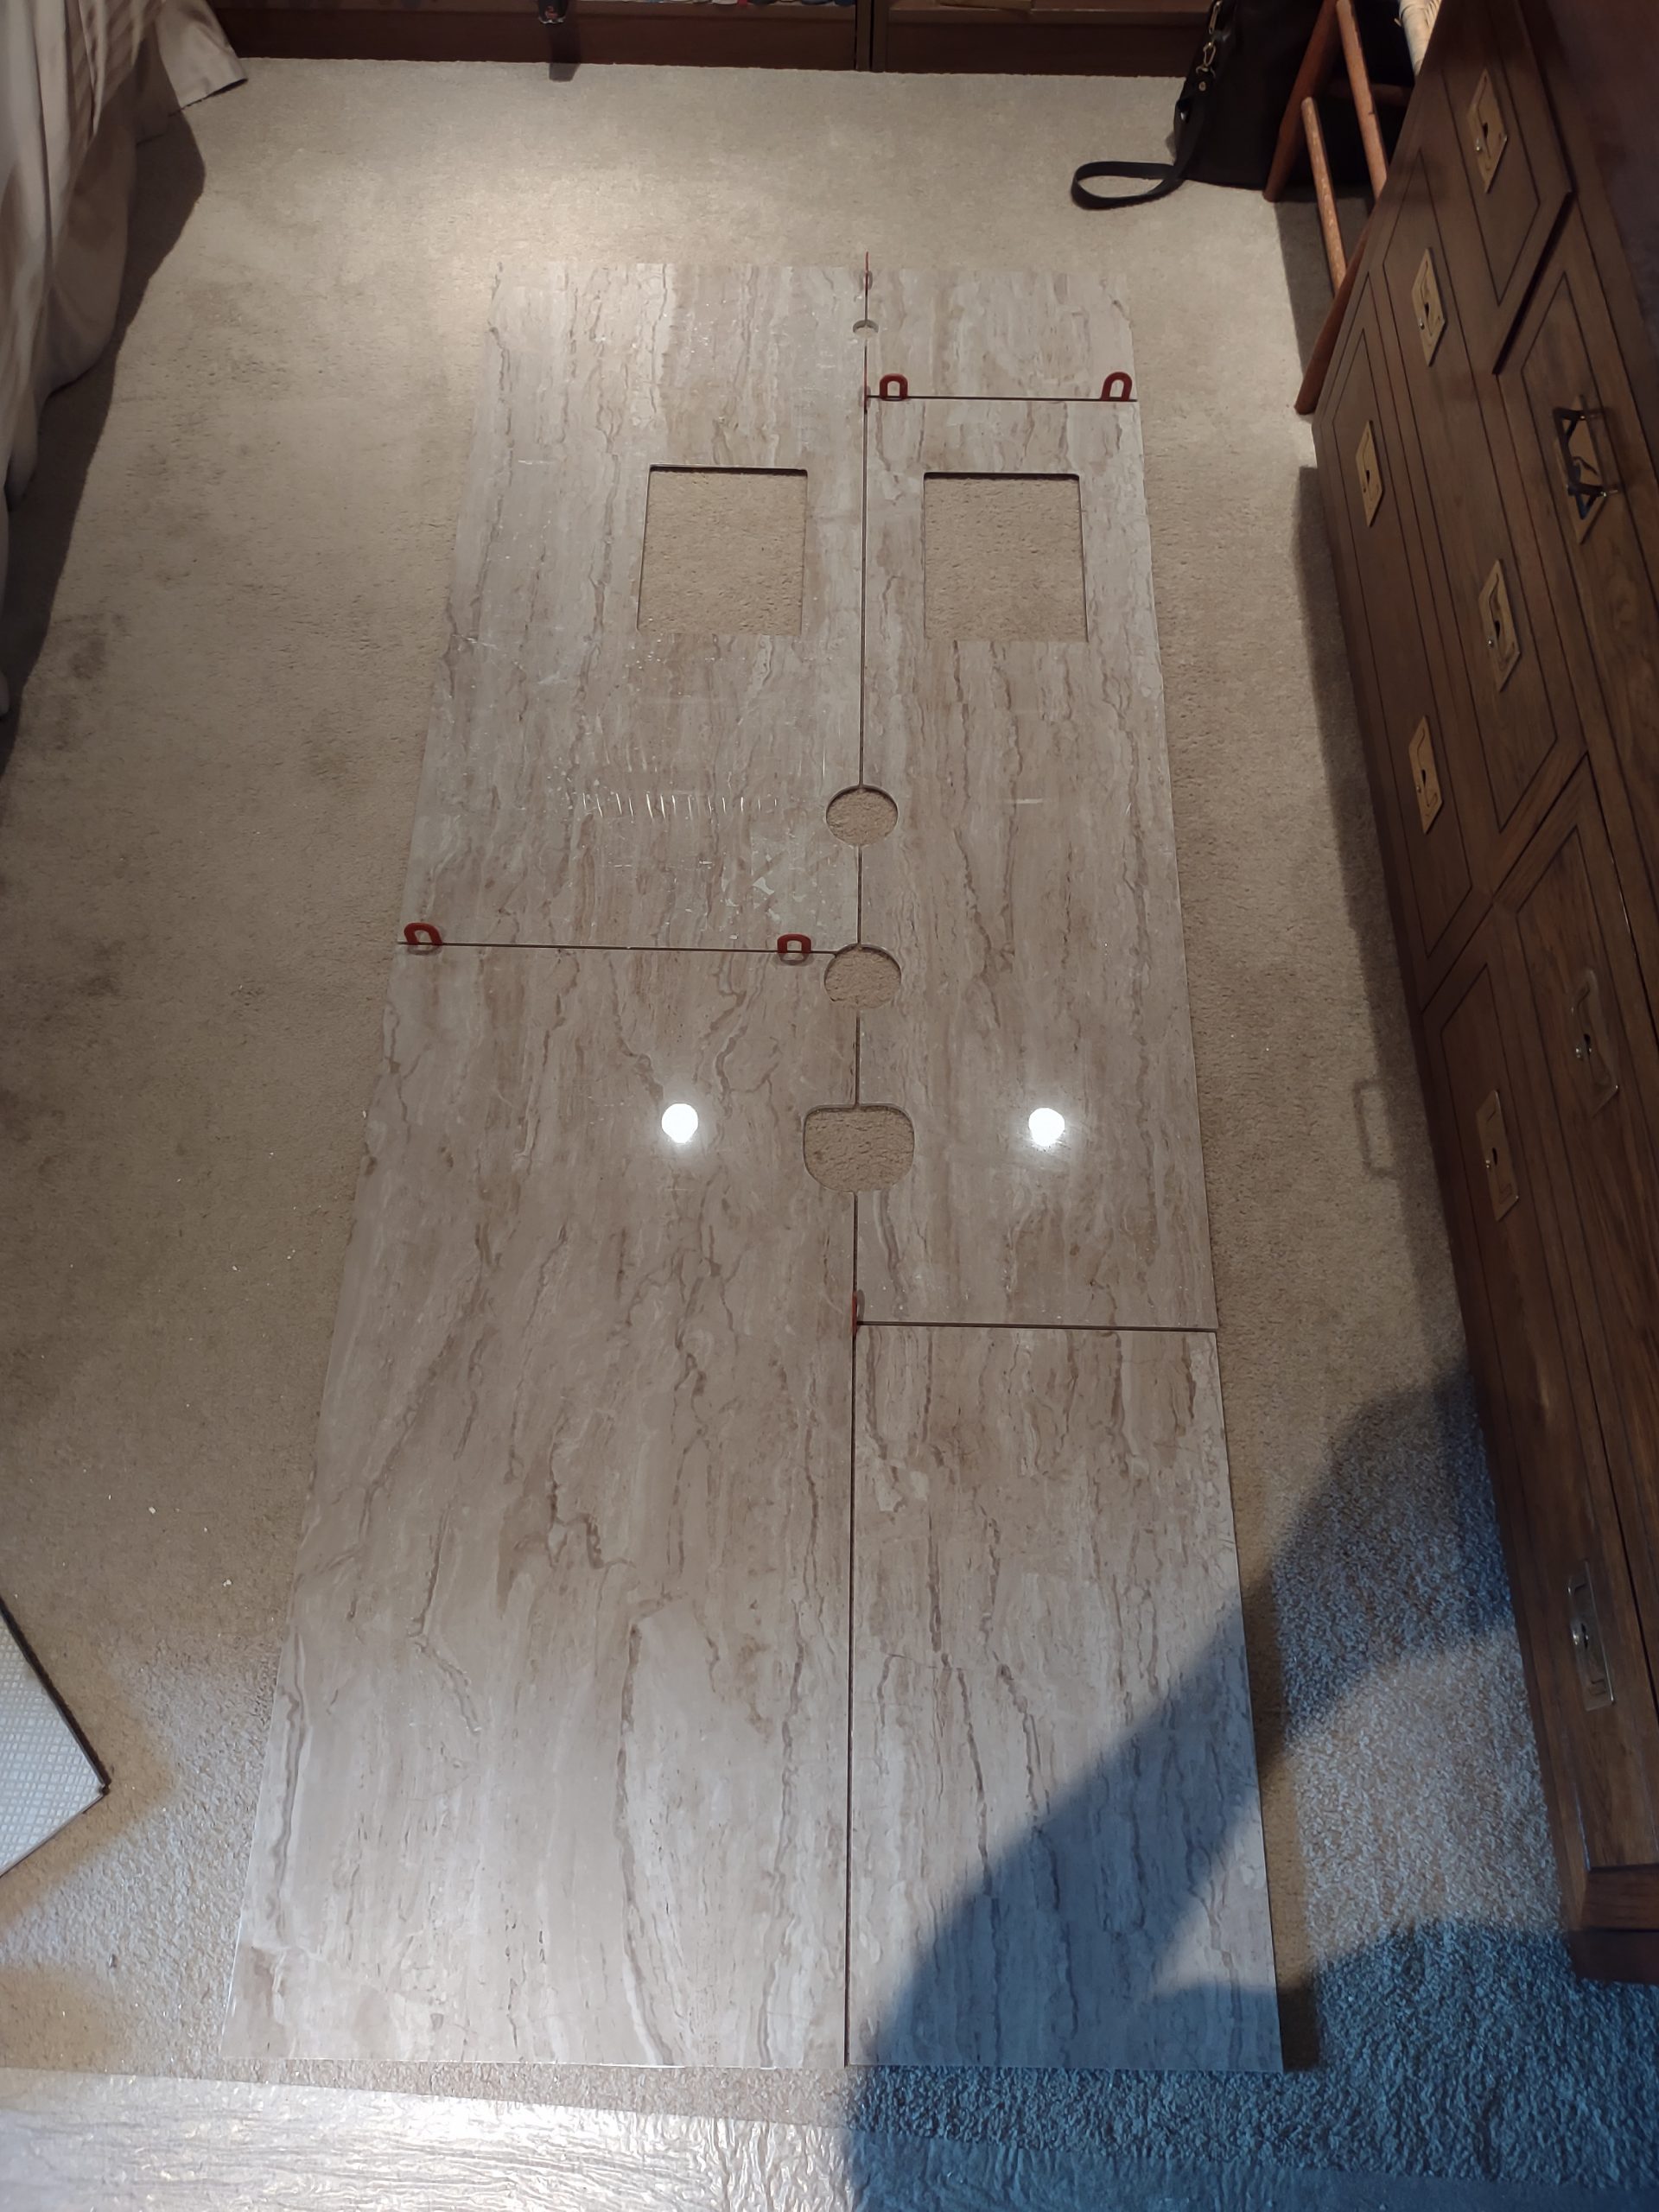
With larger porcelain tiles, trim pieces are rarely manufactured. Often, we will use a metal profile along outside edges to give the edges a finished look. On this job, we opted for mitering/epoxy all outside edges. In the photo of the bench area, you can see there are miters along the front of the bench, both sides of the shower curb, and up the wall to the ceiling.
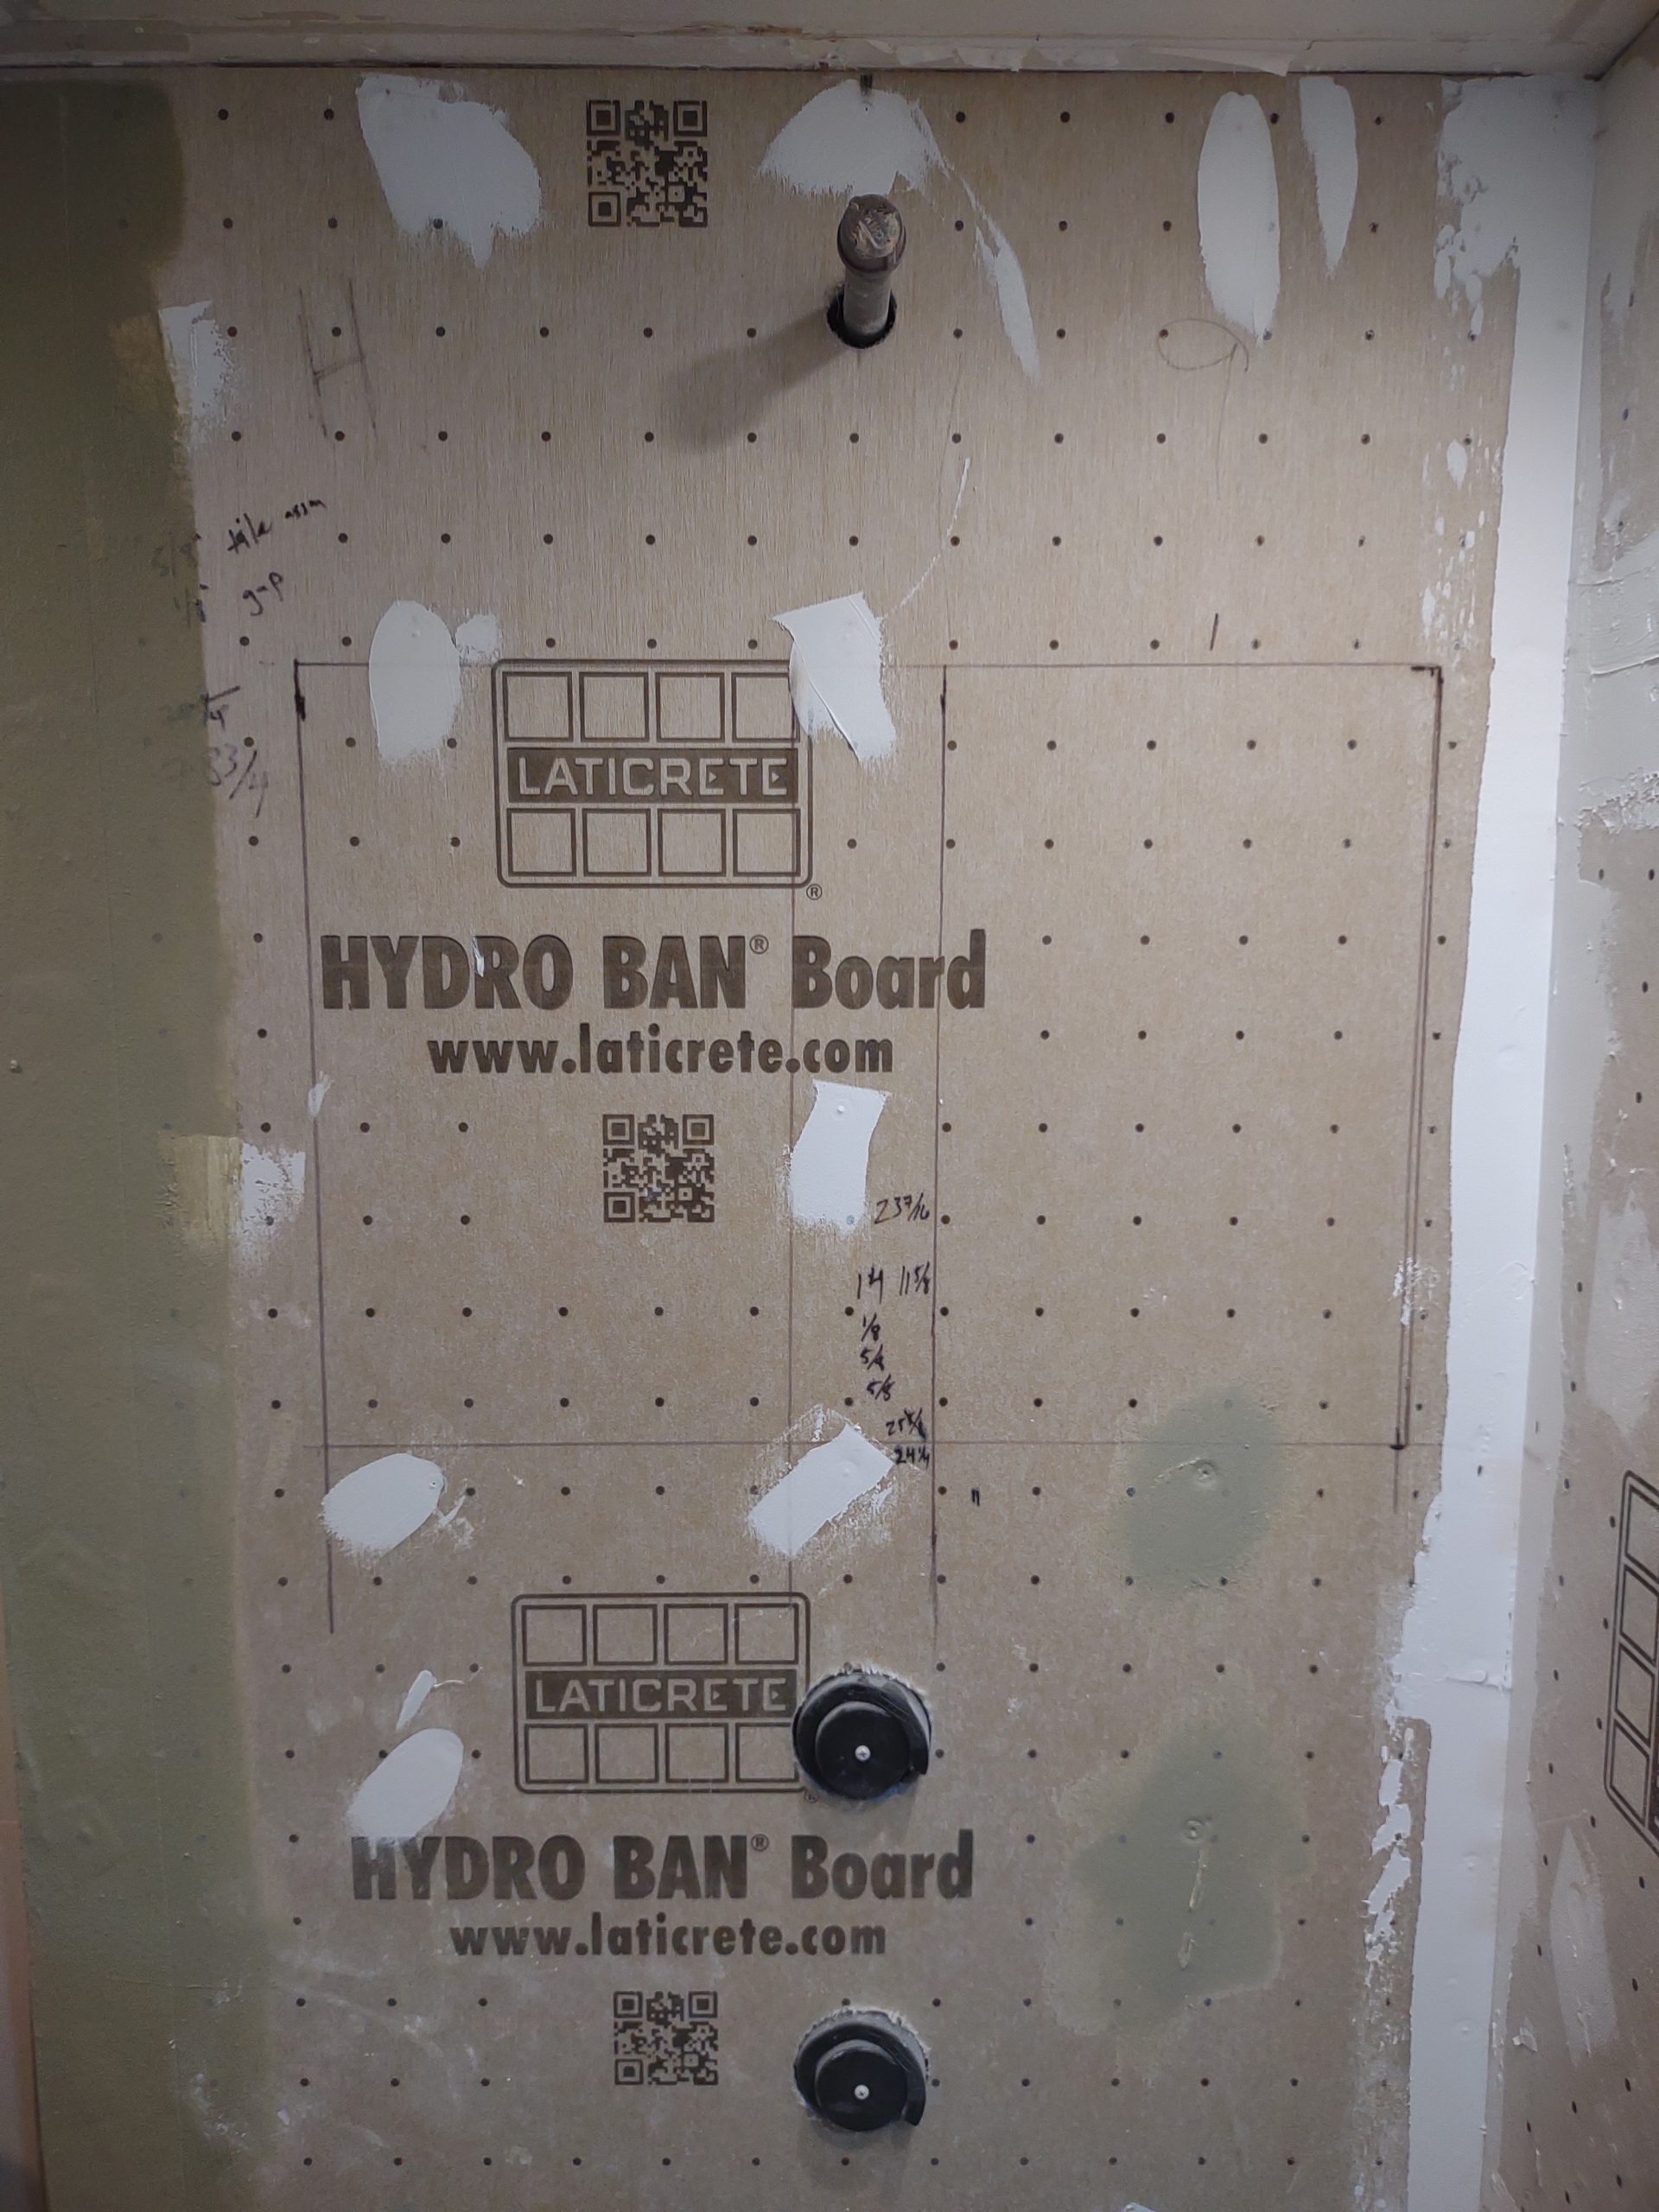
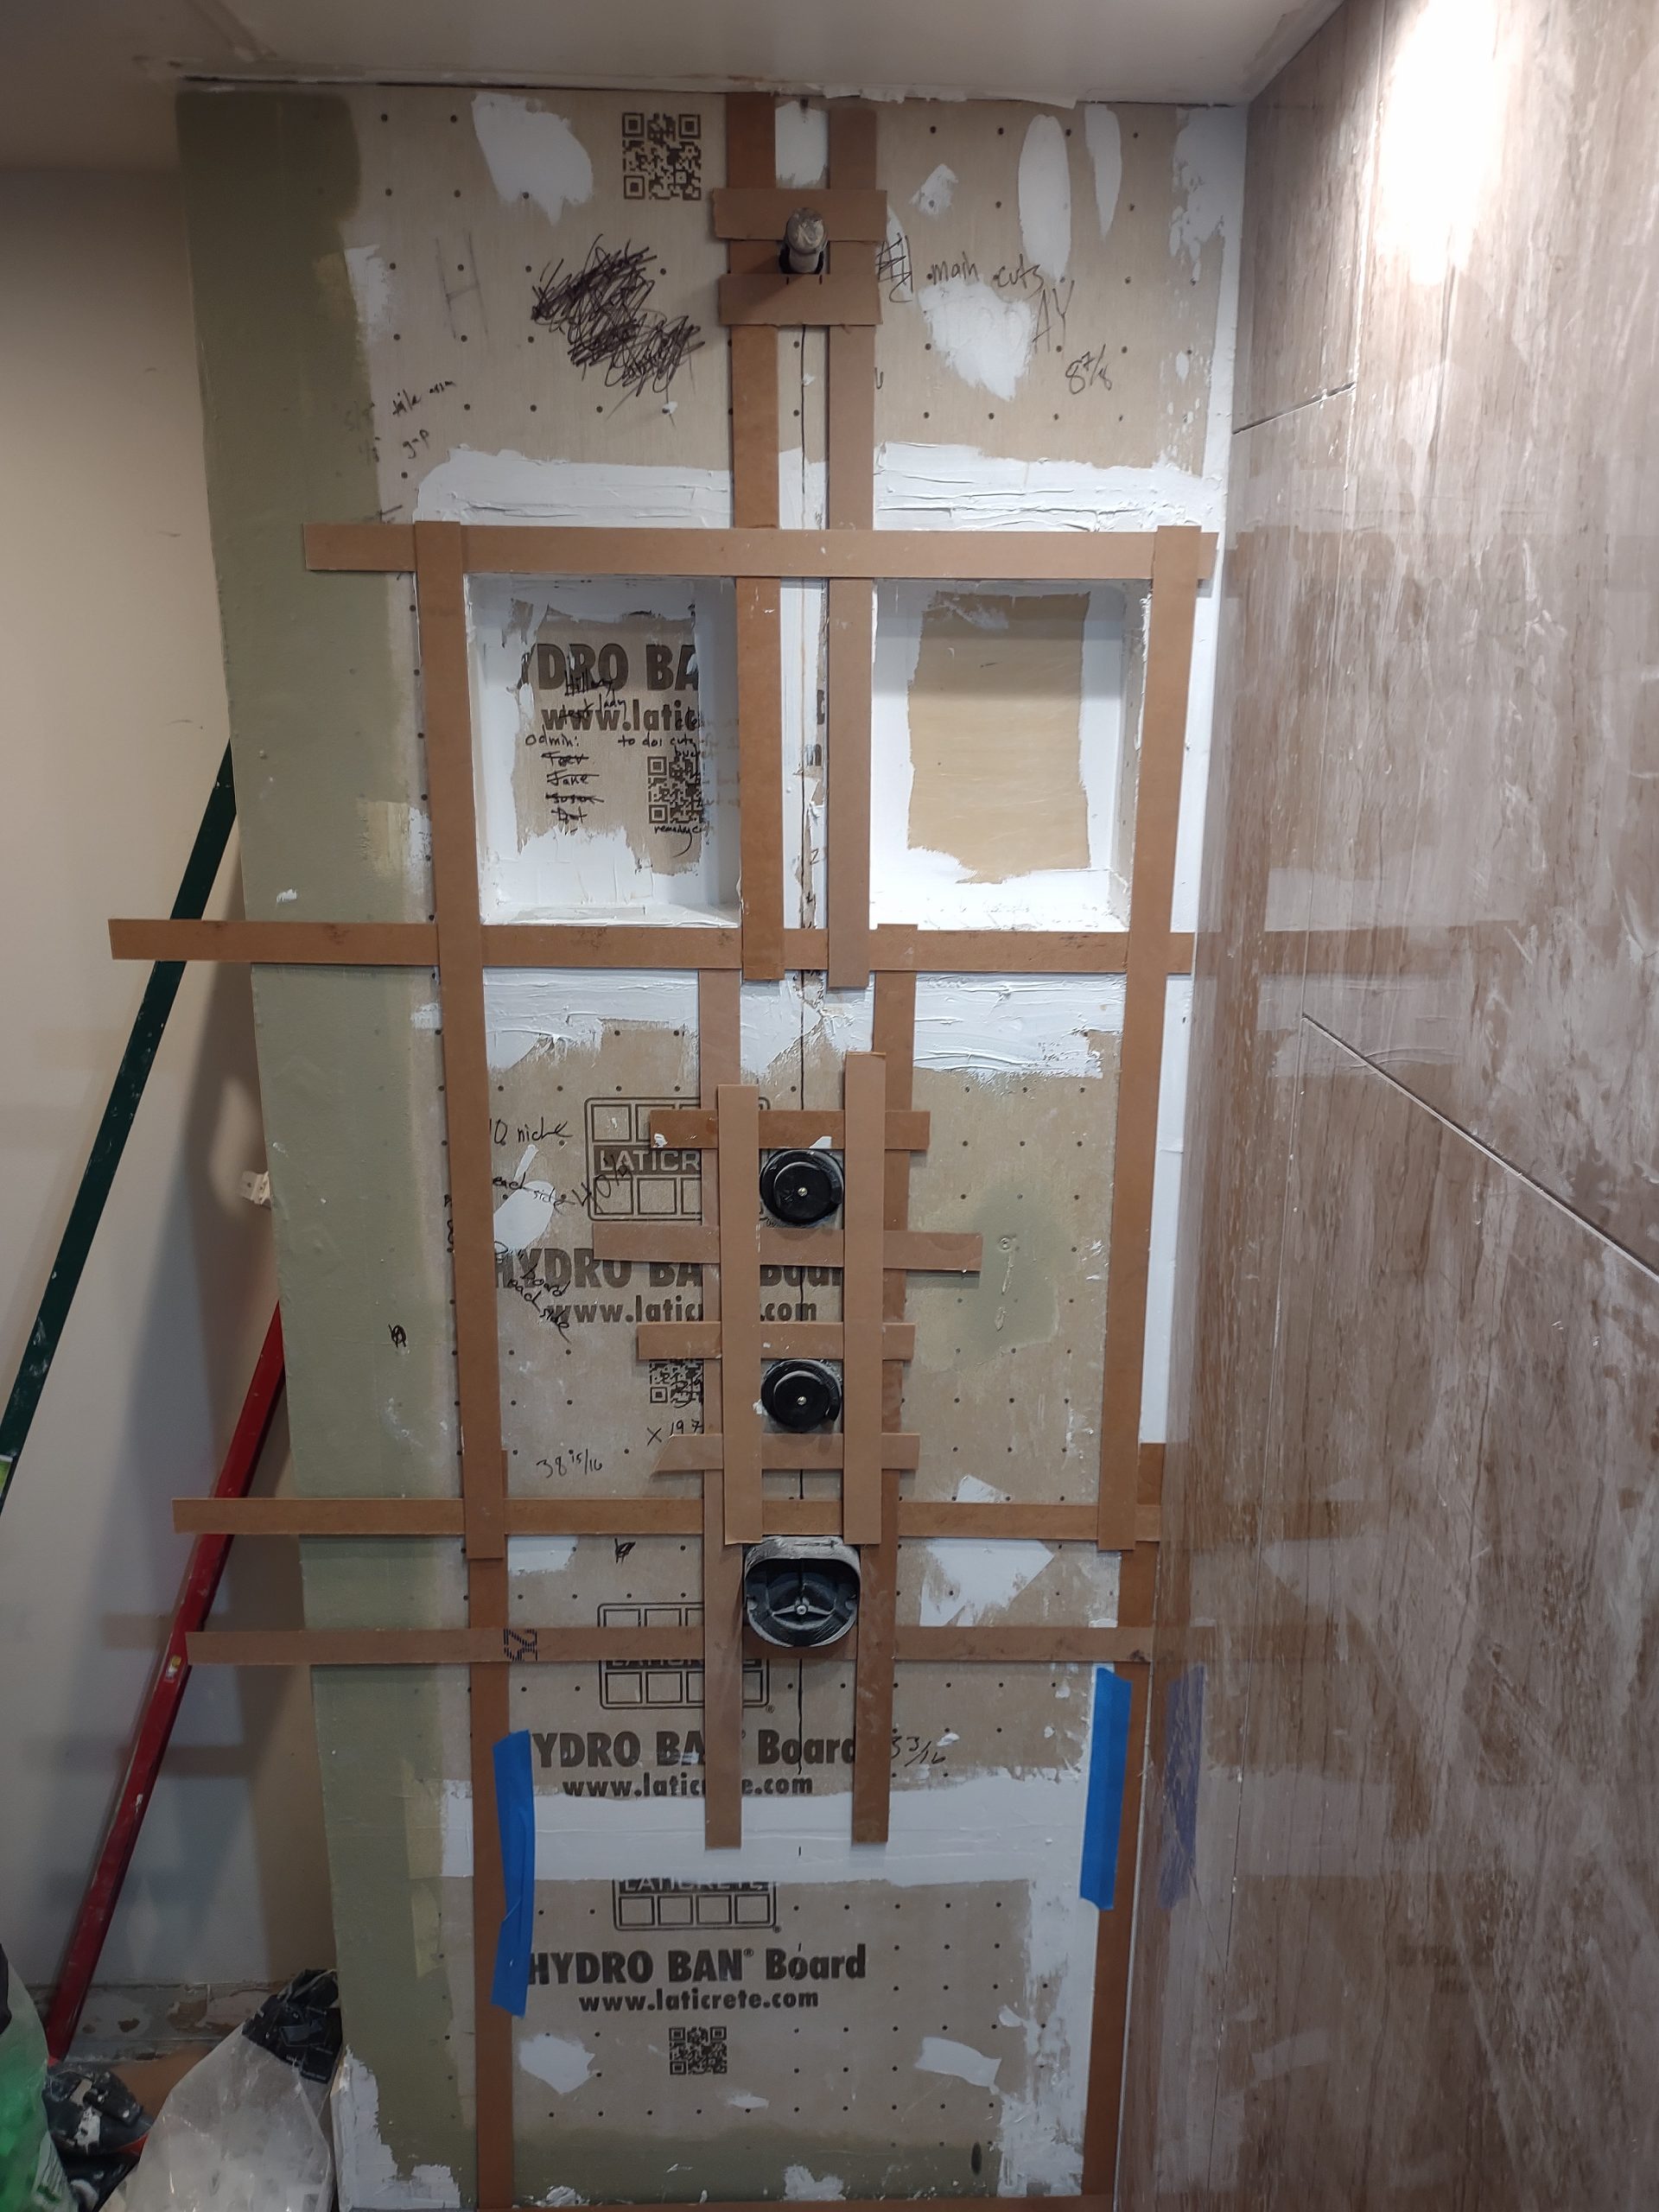
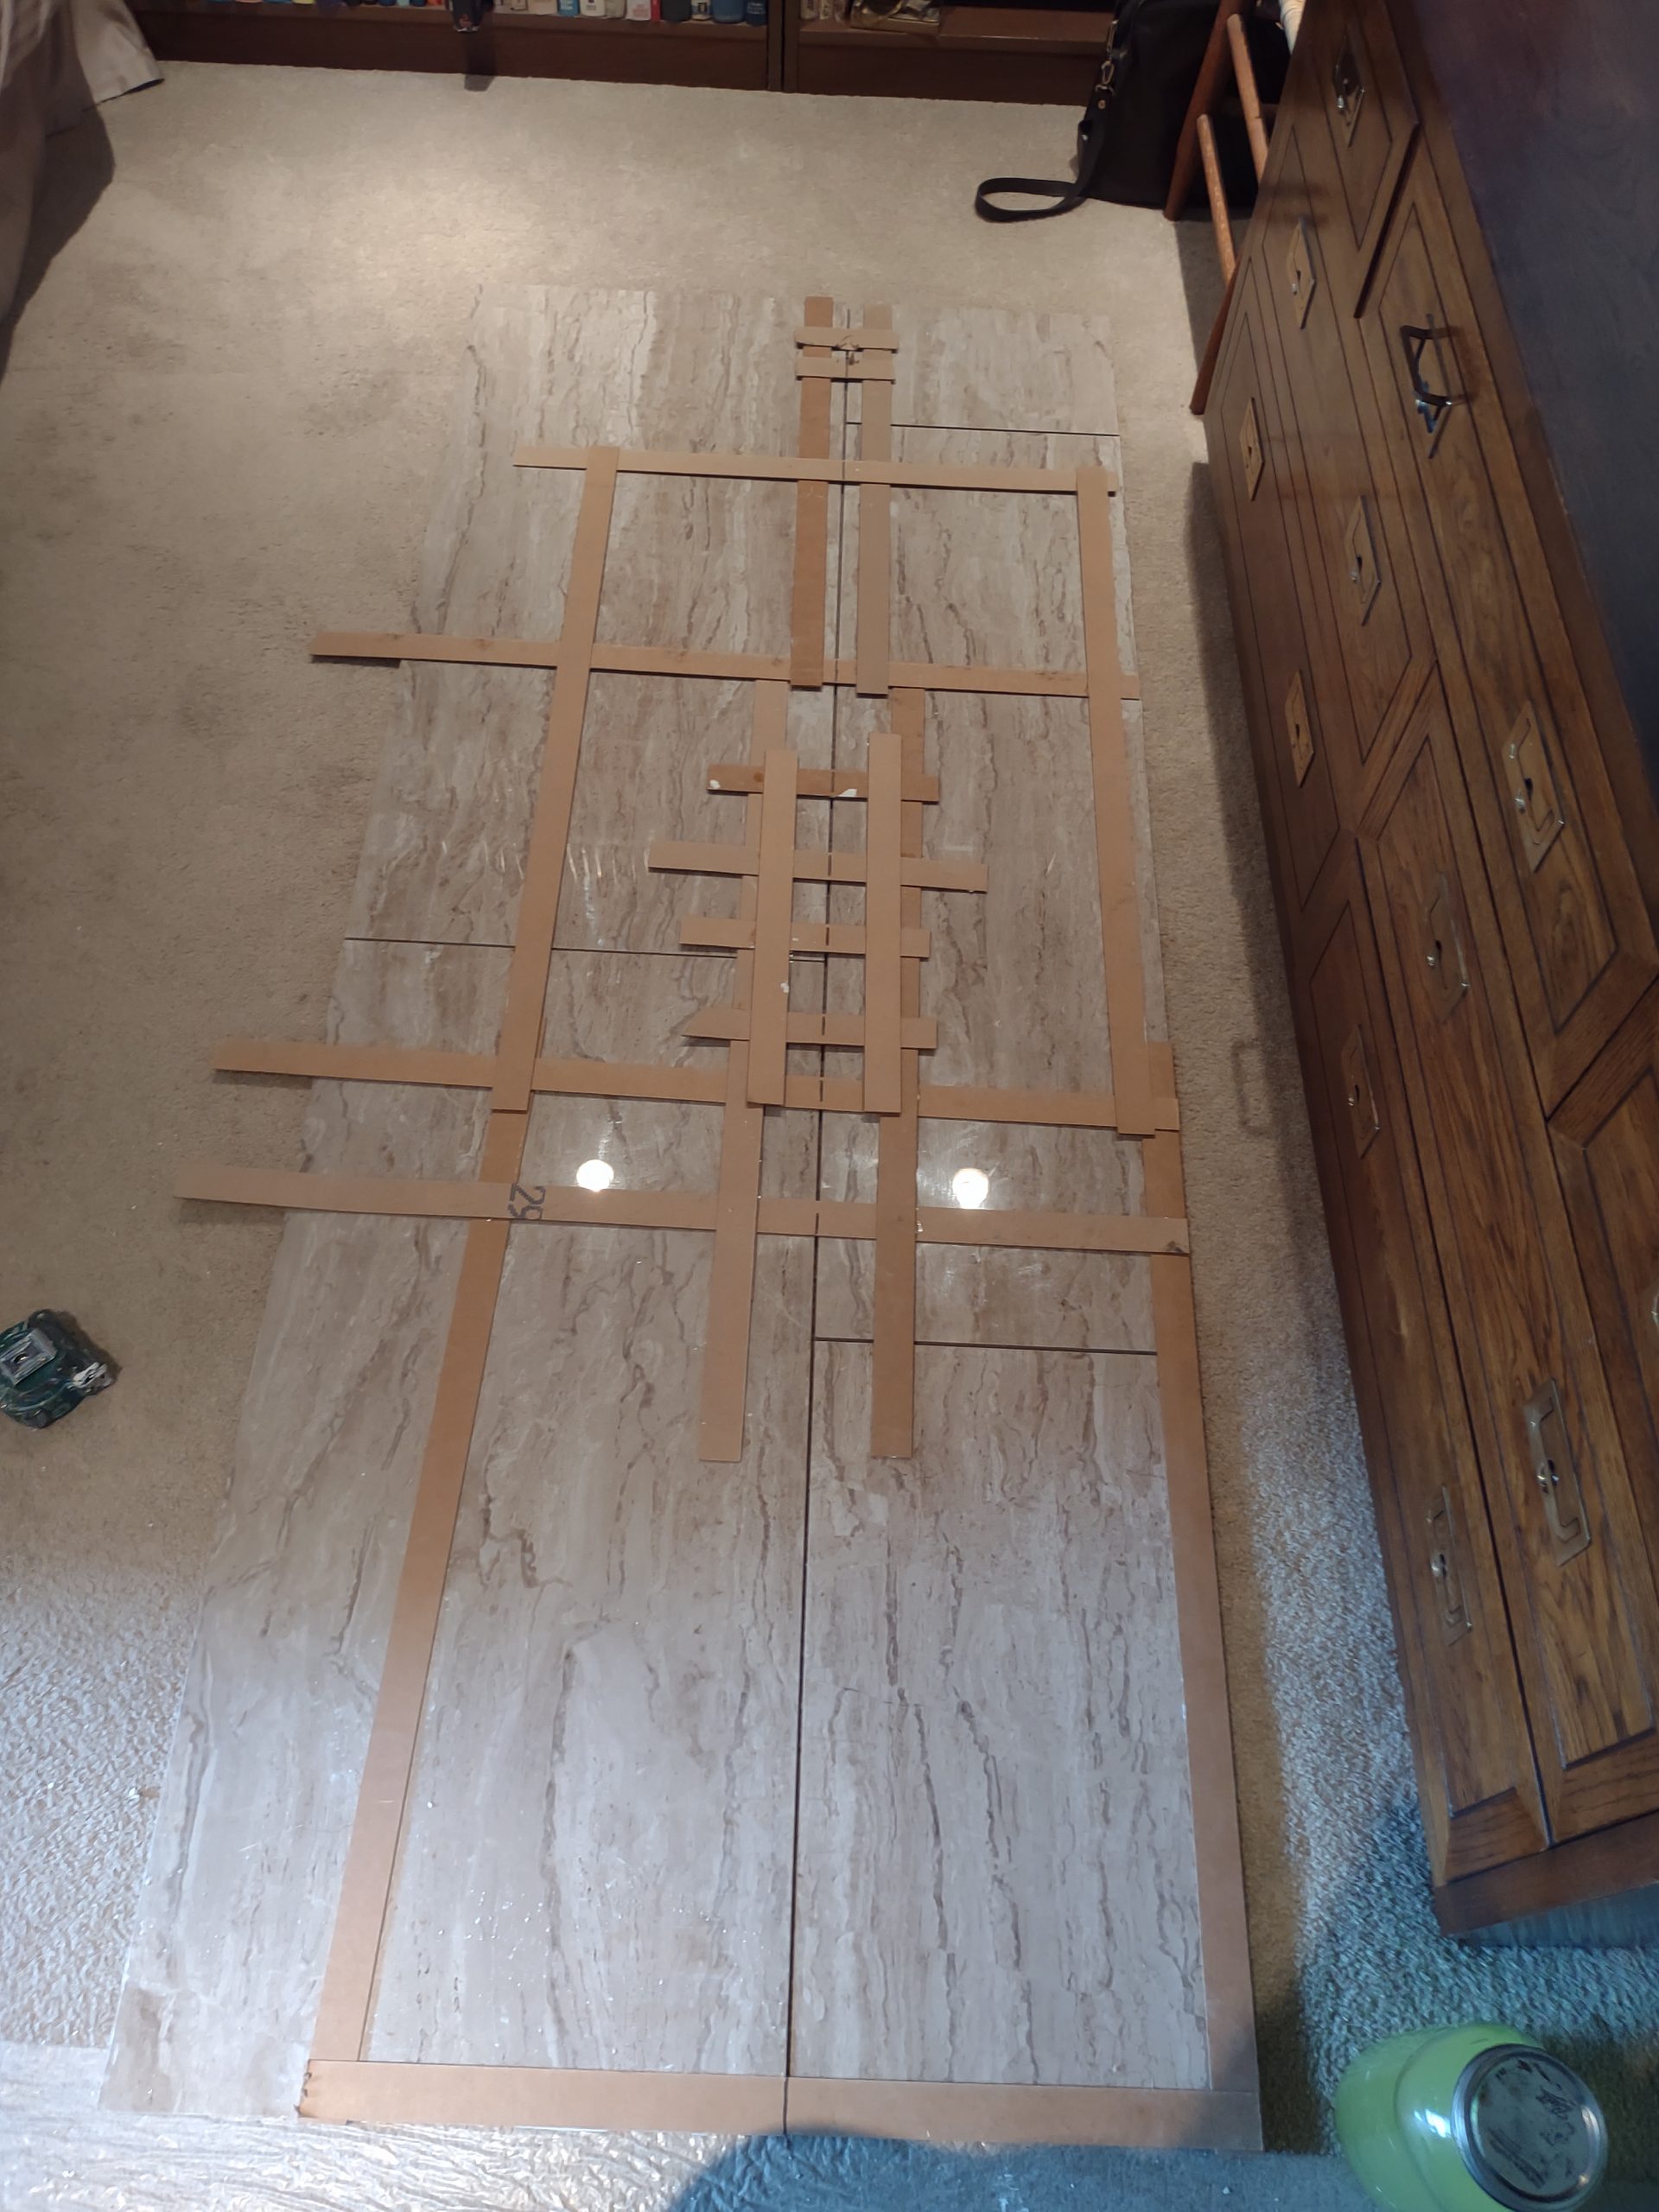
Because the wet wall was a complex set of cuts, we opted to build a template to transfer our marks.
After grout, plumbing trim, hardware, and glass were installed.
Products Specified on this Project
Replacement shower waterproofing system (mostly) by Laticrete:
- Hydro Ban board
- Hydro Ban liquid-applied waterproof membrane
- Multimax Lite mortar
- 3701 fortified mortar bed
- FloFX bonding flange drain with tile-in grate
Dry areas:
- Laticrete NXT-Level Plus self-leveling underlayment
- Schluter Ditra uncoupling membrane
- Georgia Pacific DensShield gypsum tile backer board
- TEC Ultimate 6+ mortar
Tile: Daltile Marble Attaché
Grout: Laticrete Spectralock 1